
Kindoo Software Releases
▼v 6.1.7 Latest
07-10-2025Introduction of the First-In Schedule
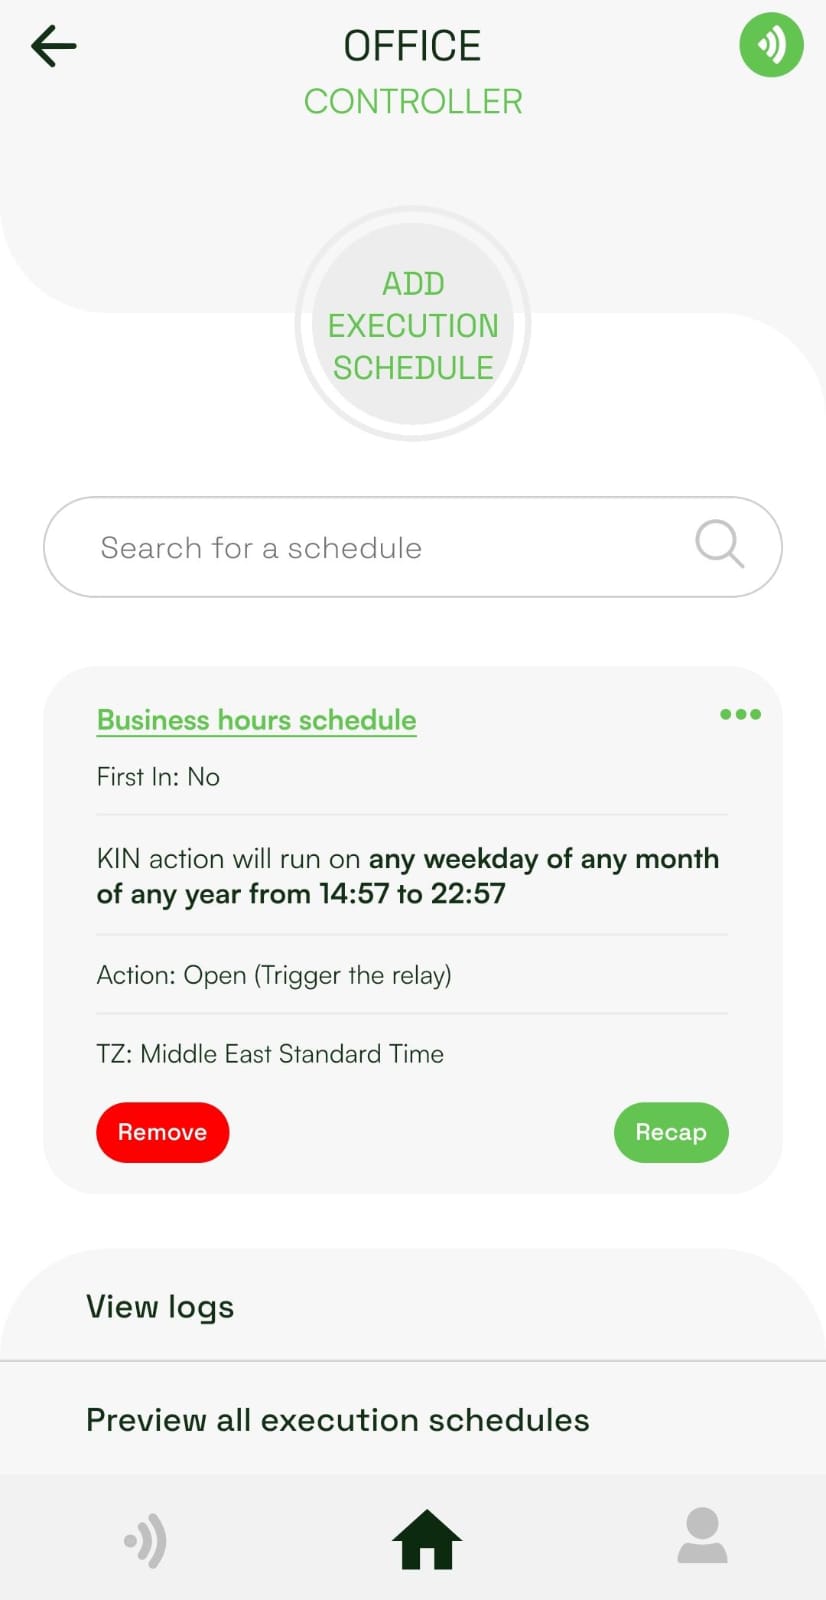
When creating a controller schedule, enabling the First-In feature prevents the schedule from automatically starting at its scheduled time. Instead, the schedule remains on hold until a user issues a manual command within the scheduled window.
How it works
- If no user issues a command during the scheduled window : The schedule will never run.
- If a user issues a command during the scheduled window : The schedule activates immediately upon that first command and stays active until the schedule end time.
Enabling the First-In Feature:
When adding a controller's execution schedule, select "The schedule activates an entry point during a certain period". The First-In radio button will automatically appear, allowing you to choose whether to enable or disable the feature.
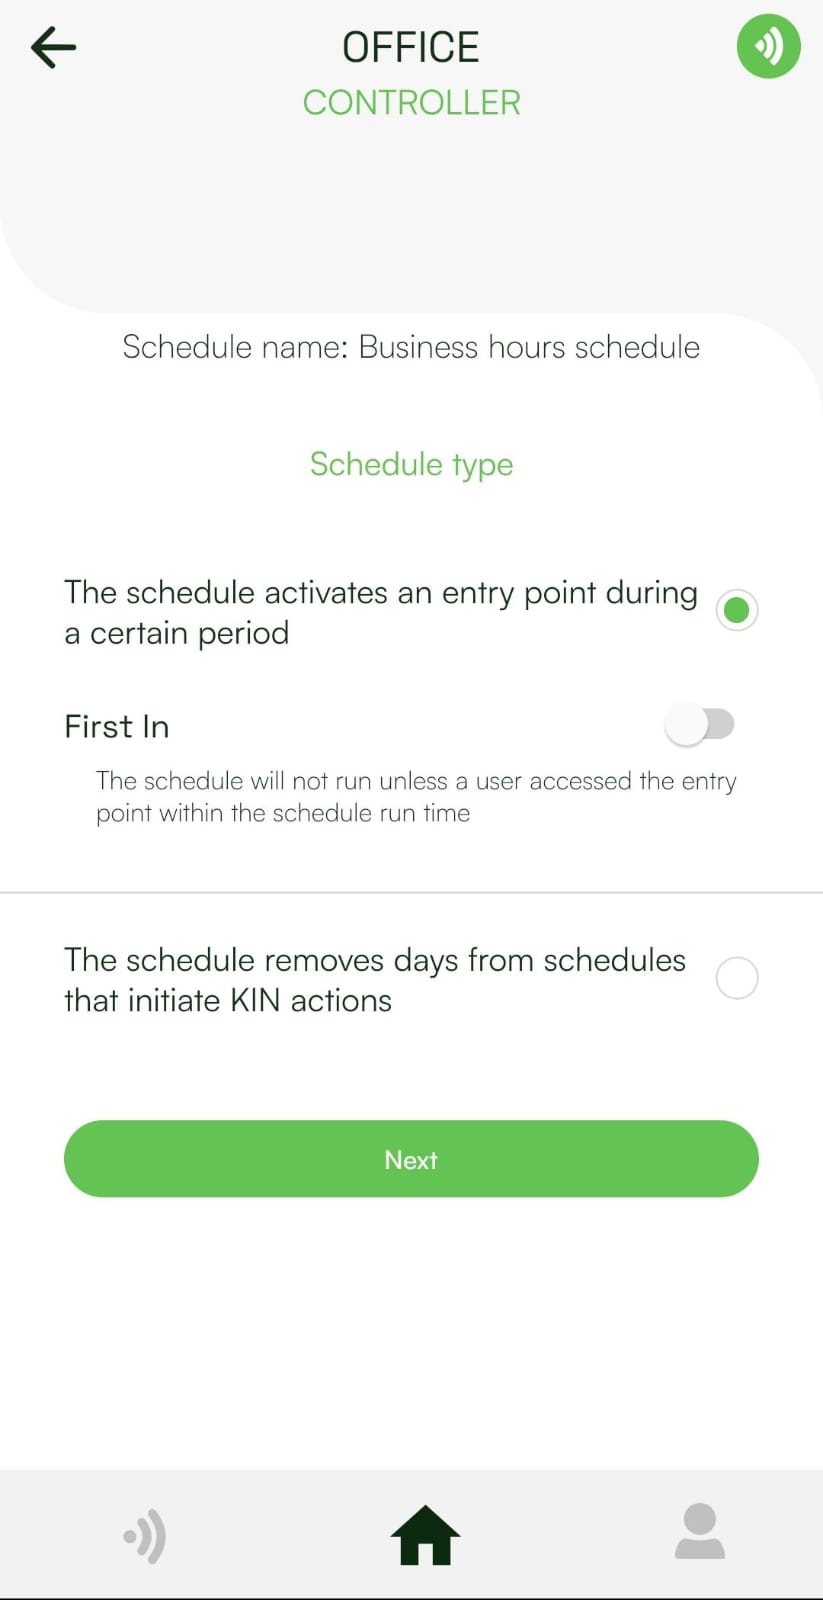
IMPORTANT NOTE: If you do not see the First in feature, kindly delete the controller and add it back to the site.
Preview All Execution Schedules
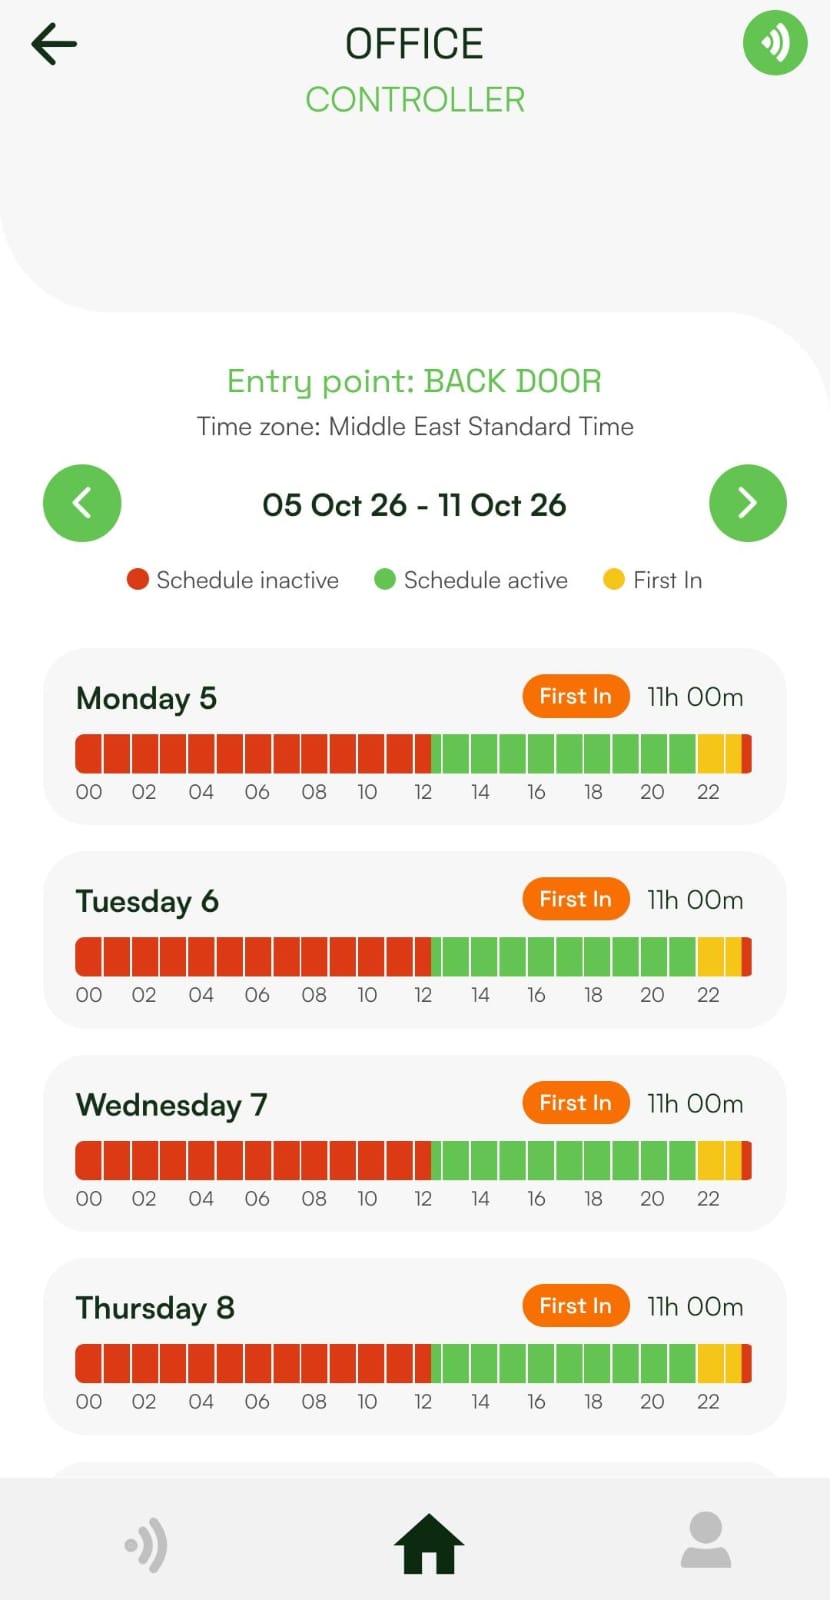
The Preview All Execution Schedules feature gives you a clear, weekly visual timeline of a controller's execution schedule for a specific entry point. It uses color-coded bars to show you exactly what is happening hour-by-hour every day of the week.
How to Access:
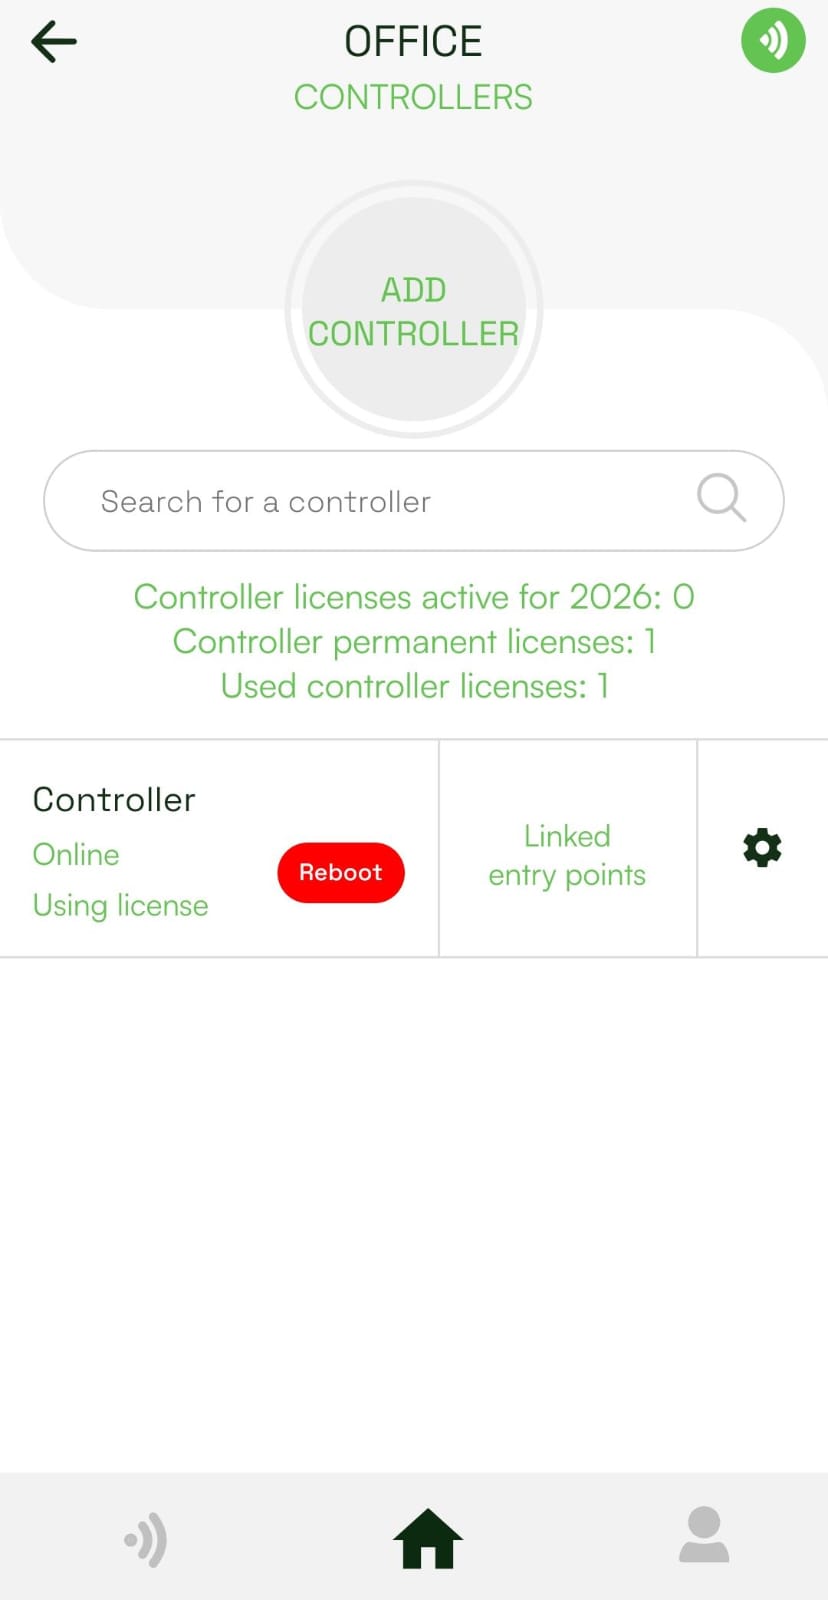
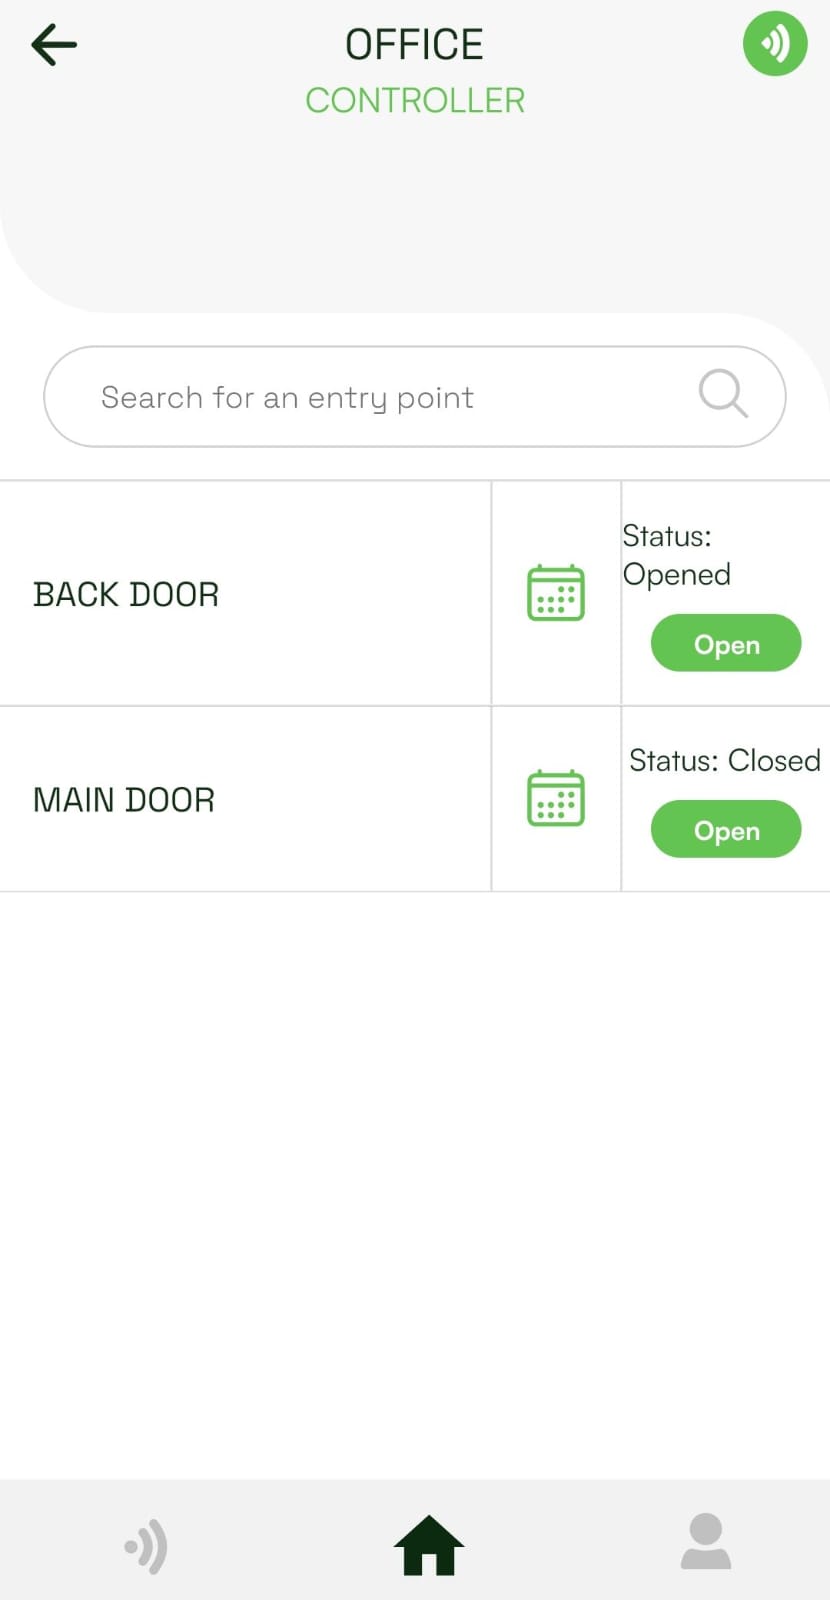
To view the preview page, navigate to the Controllers page, select Linked Entry Points, press the Schedule icon next to your desired entry point, and tap Preview all execution schedules at the bottom.
▼v 6.1.0
27-04-2026View logs screen update
What are the changes?
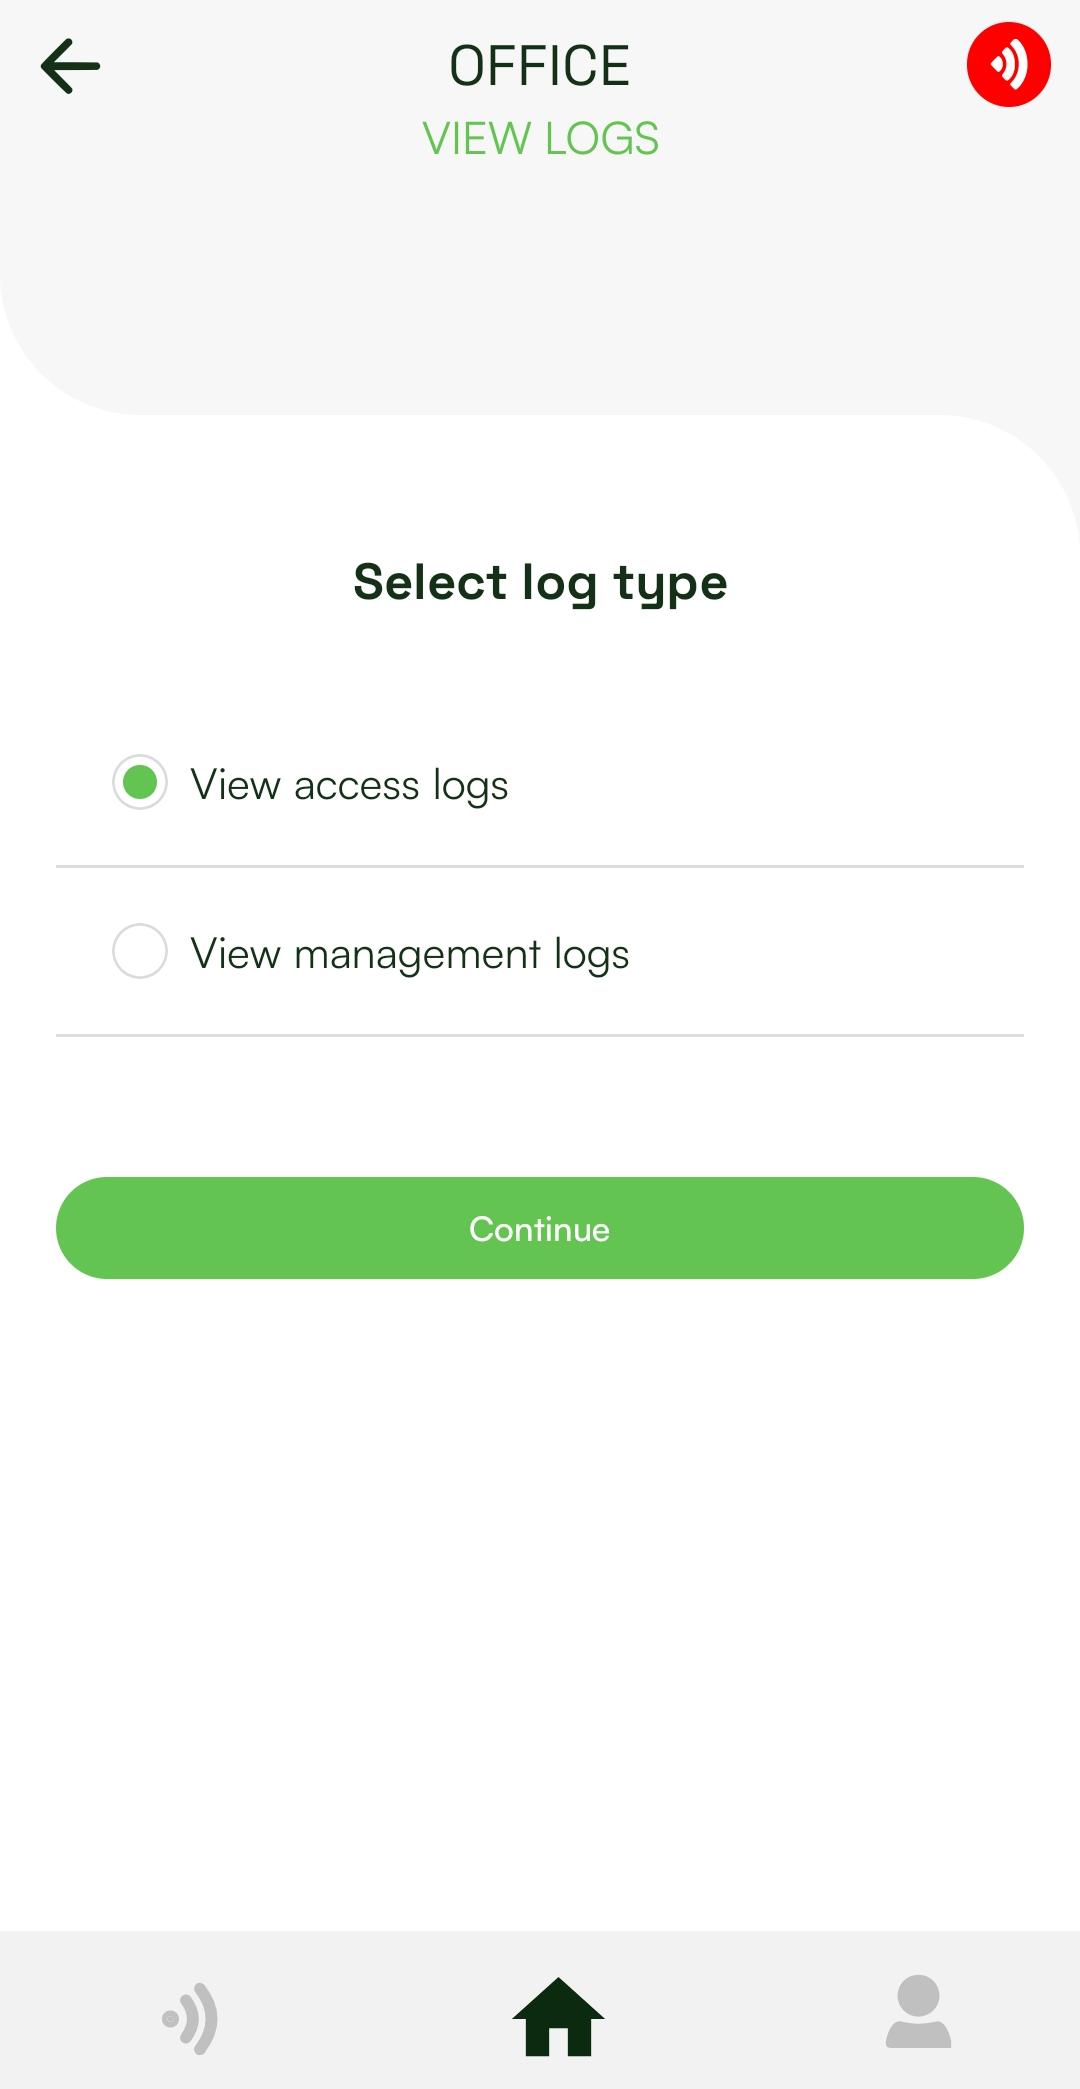
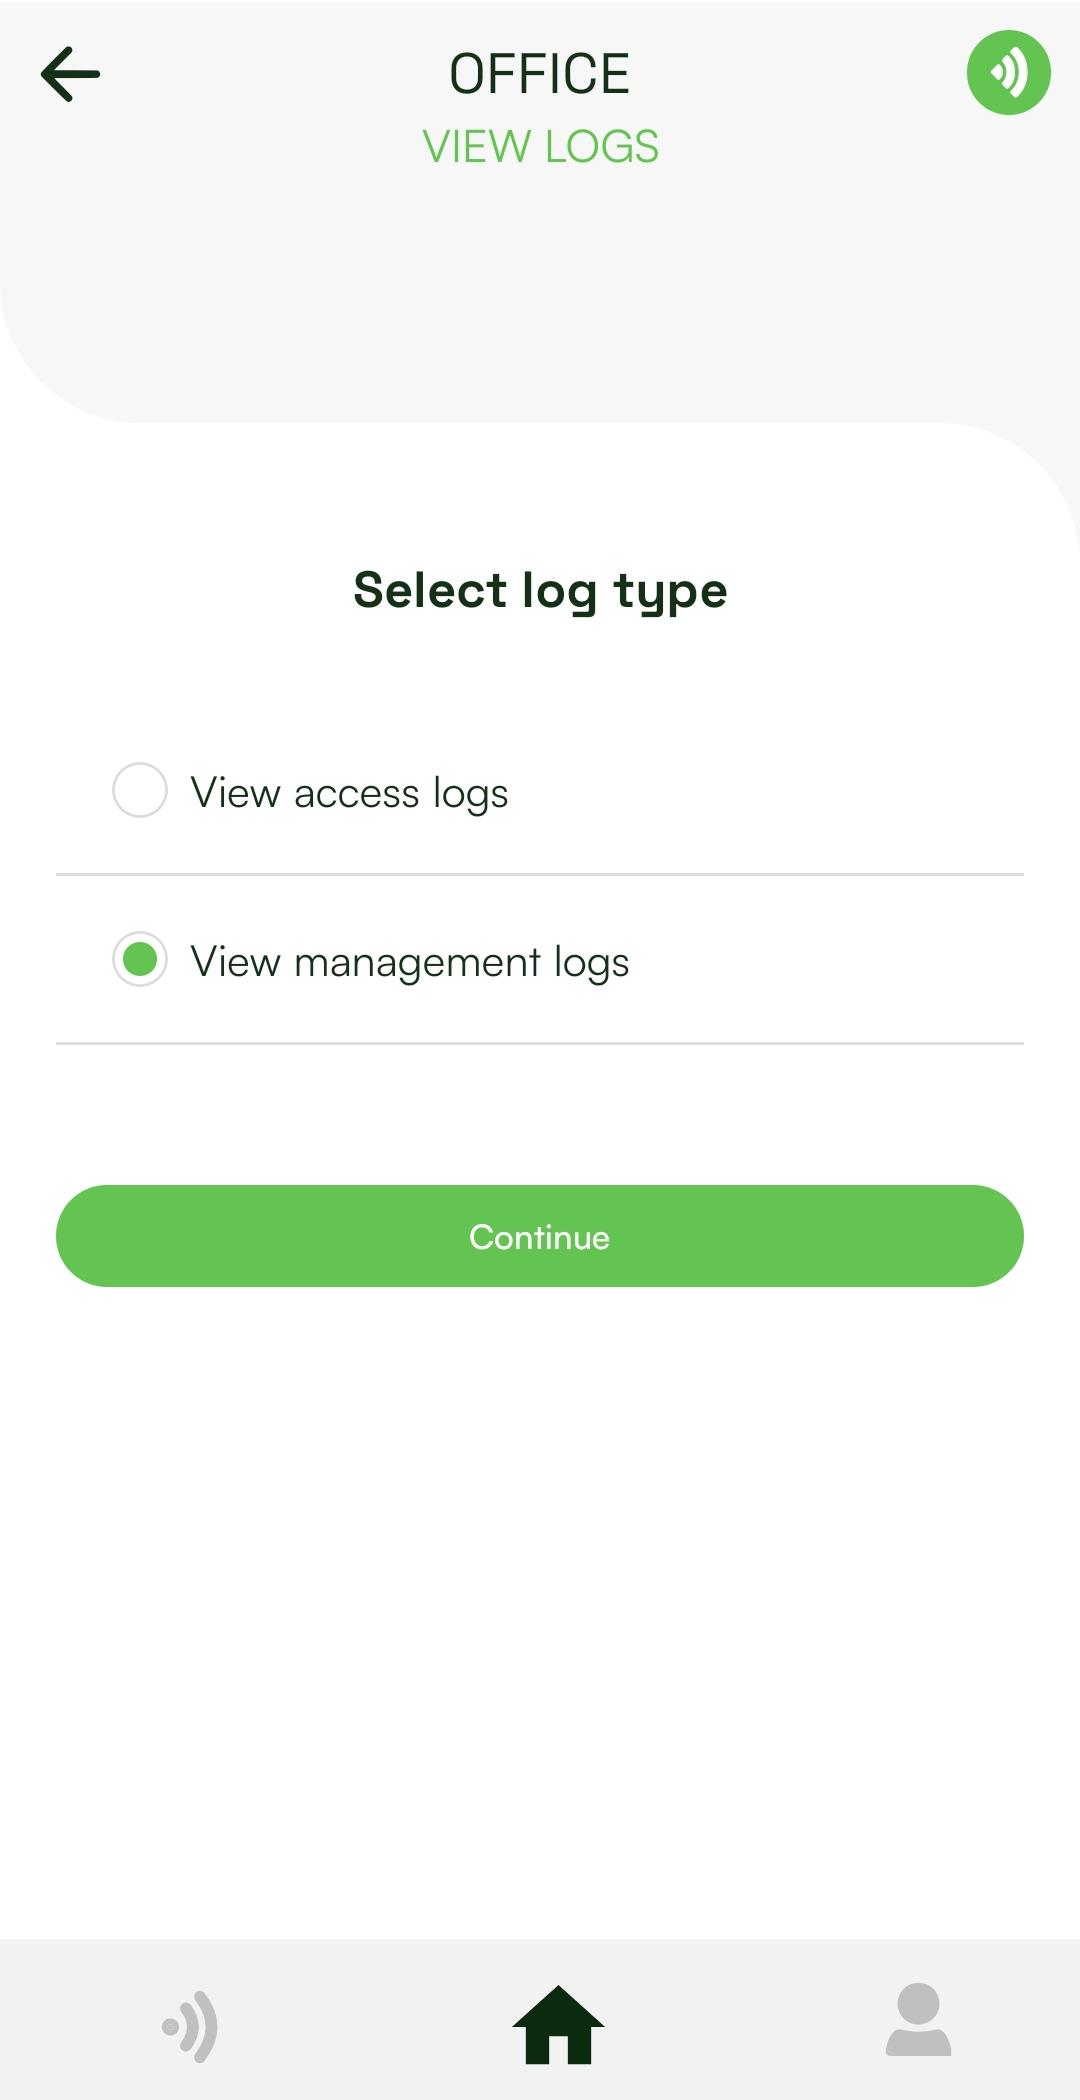
The initial View Logs screen no longer displays access logs immediately. Users are now presented with two distinct options:
- View Access Logs
- View Management Logs
View access logs screen update
What is this screen?
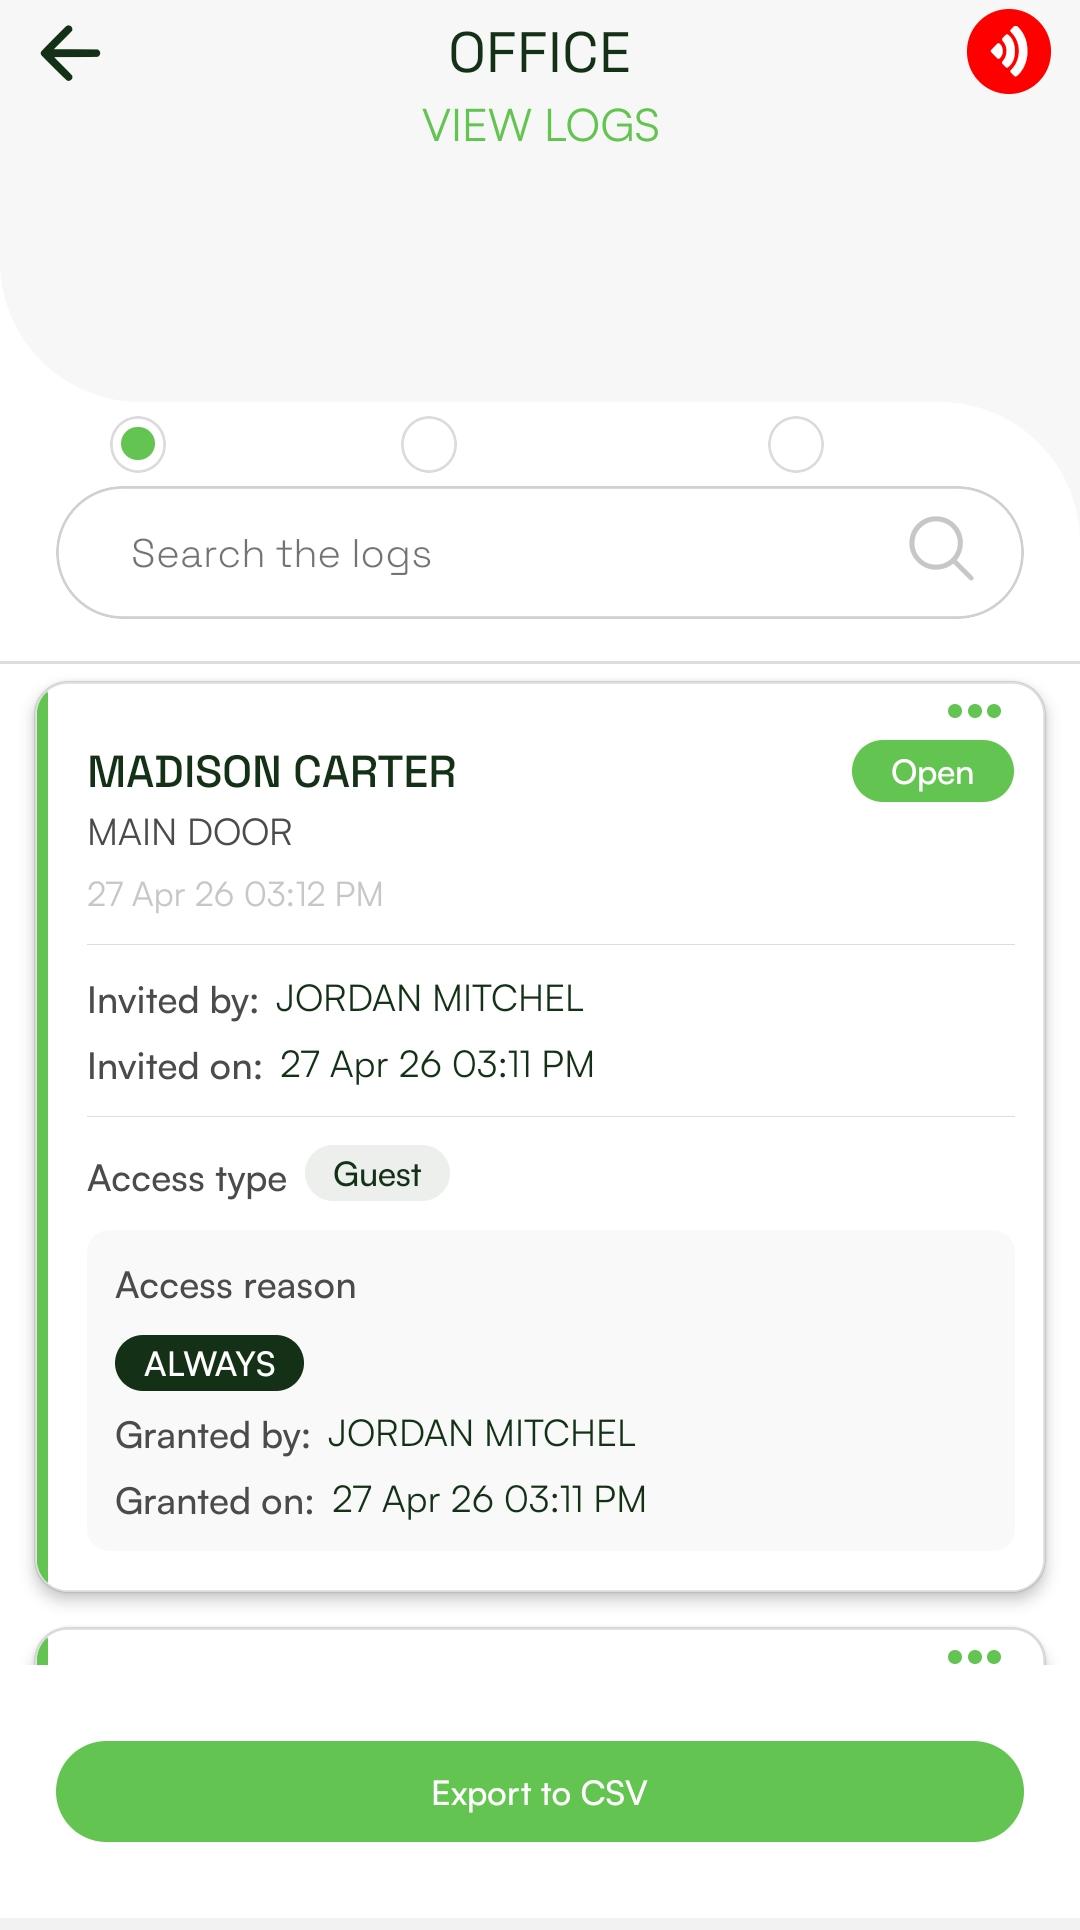
This screen enables administrators and managers to review which users accessed the site’s entry points, the time of access, and whether access was granted or denied
What are the changes?
The Access Log card now includes the following additional details for administrators and managers:
- Invited by:: The user who sent the site invitation.
- Invited on:The date the user was invited to the site.
- Access type:The user’s role (Admin, Manager, Guest, or Installer) and the time of access. If the user is a Guest or Installer and is assigned to an access rule, the rule name will also be displayed.
- Access reason:Details concerning the access right that permitted entry to the entry point, including who granted the right and when
View management logs
What is this screen?
The View Management Logs screen allows administrators and managers to monitor site user management activity, including invitations, updates, and removals. It also provides a historical record of changes to user settings and allows reviewing the status of invitation responses and acceptance
Getting to the view management logs screen:
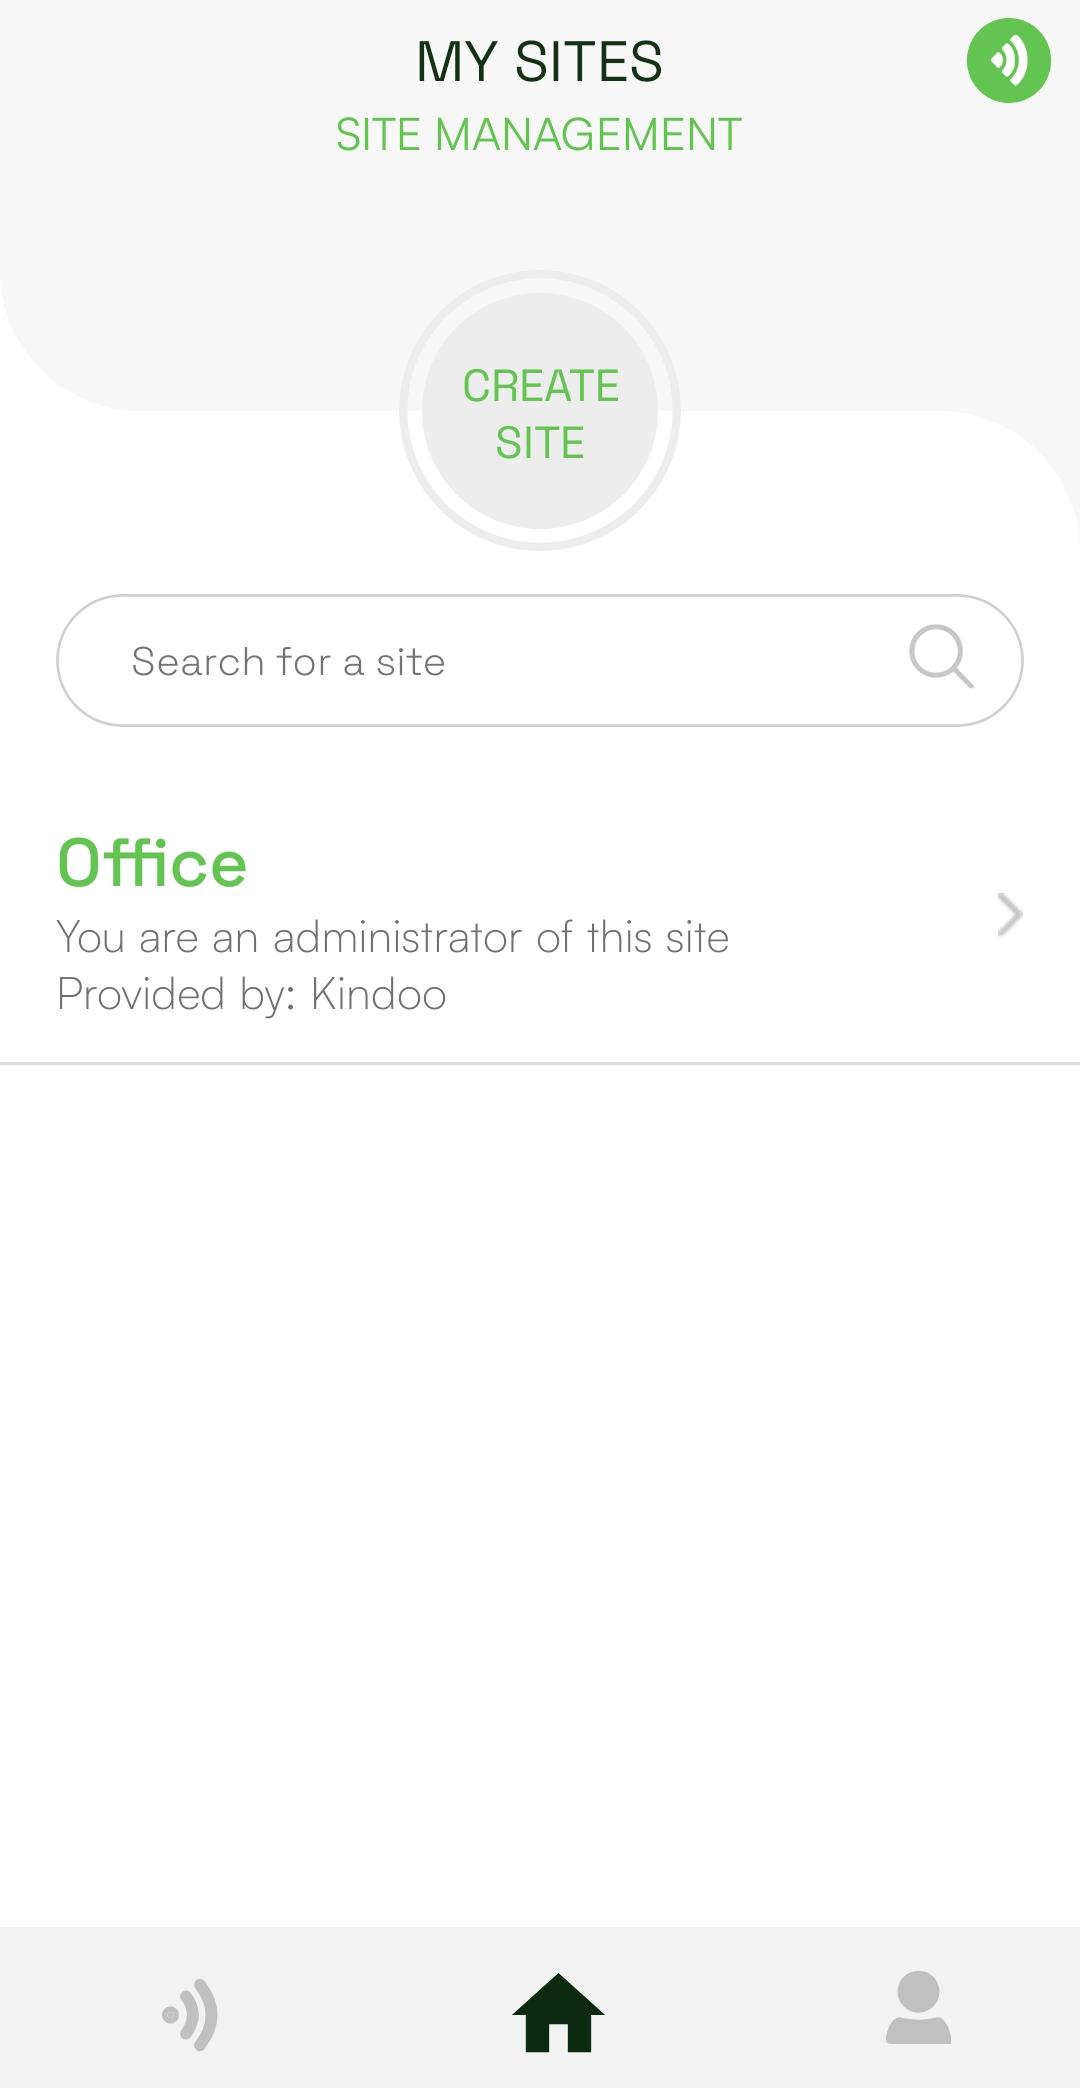
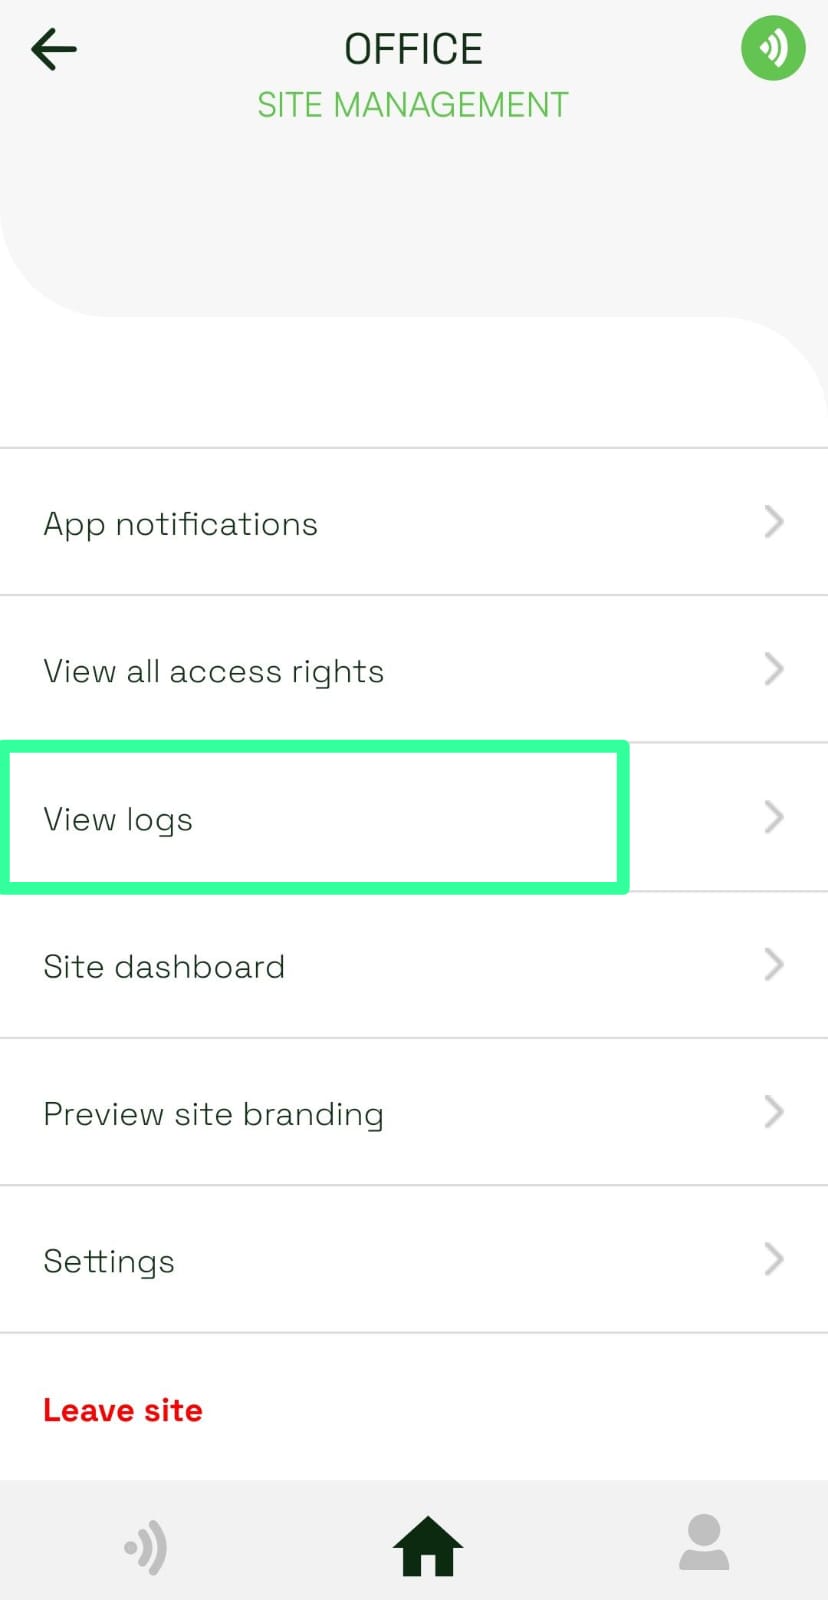
Navigate to your site via the Sites list → Press on a desired site → Locate and press View logs → Press on View management logs then continue
How to use?
Upon opening the screen, the management logs for the last 30 days are displayed by default.
Adjusting the Date Range: To change the dates, press the From-To date inputs, select new dates (range must not exceed 90 days), and then press Search.
Searching by User: To search for logs related to a specific user, enter the user's full email address in the search input and press Search. Logs can also be searched by user name, and the system will return all matching entries.
The logs list provides the following data:
- Action: The type of action performed (user invited, removed from site, left the site, or data updated).
- The user's full name and email address.
- The user's role on the site (Admin, Manager, Guest, or Installer).
- Who invited the user to the site and the date of the invitation.
- Whether the user replied to the site invitation and their acceptance status.
- If the user was removed from the site, the system displays who removed them and when.
- Details about the user settings (Description, whether the user is a temporary user or not, the expiry date and timezone)
PIN code can bypass site deactivation
What is this feature?
This feature allows a contractor to access an entry point using a PIN code that has been configured to bypass site deactivation.
How to enable this feature on a PIN code?
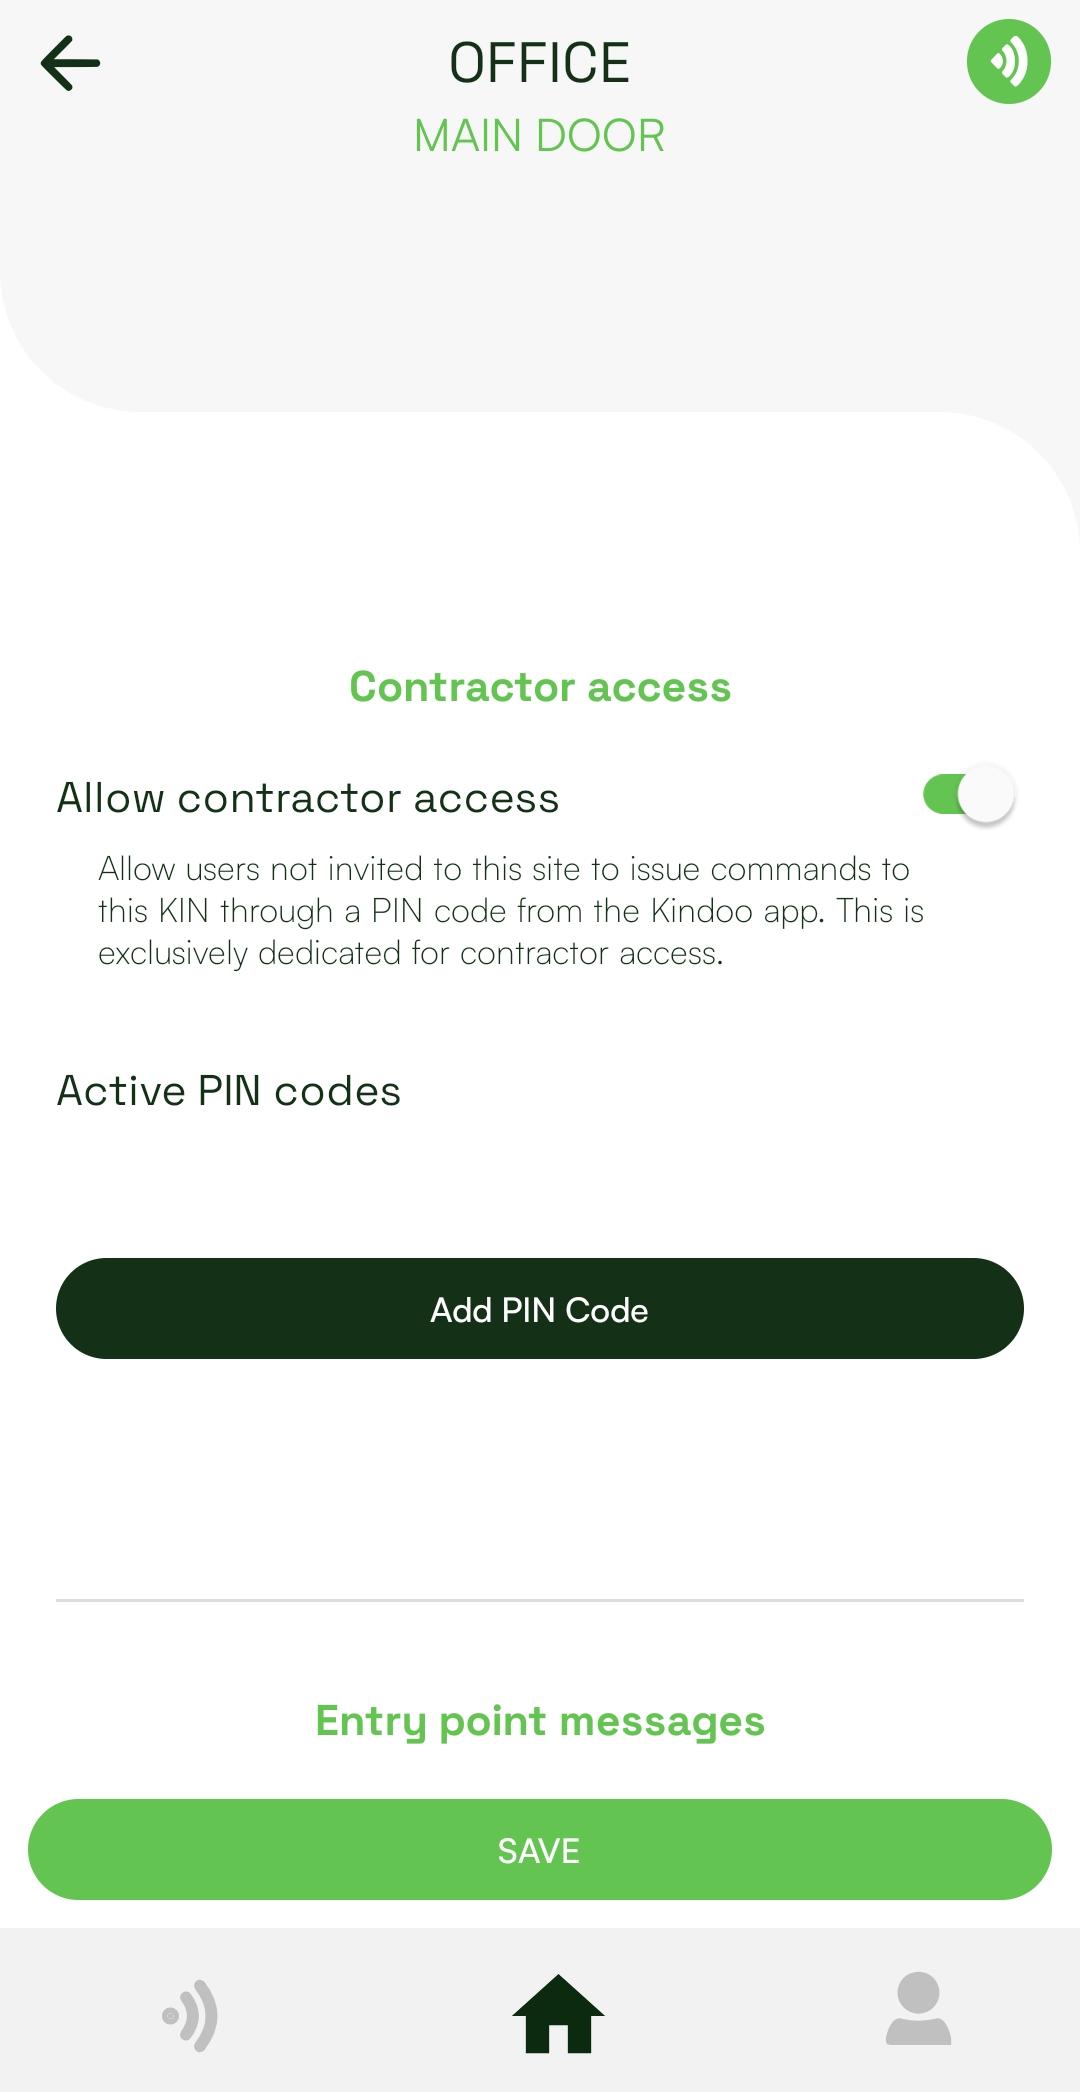
Navigate to your site via the Sites list → Press on a desired site → Then press on Entry points → Locate and press on the desired entry point → Scroll down to the contractor access section
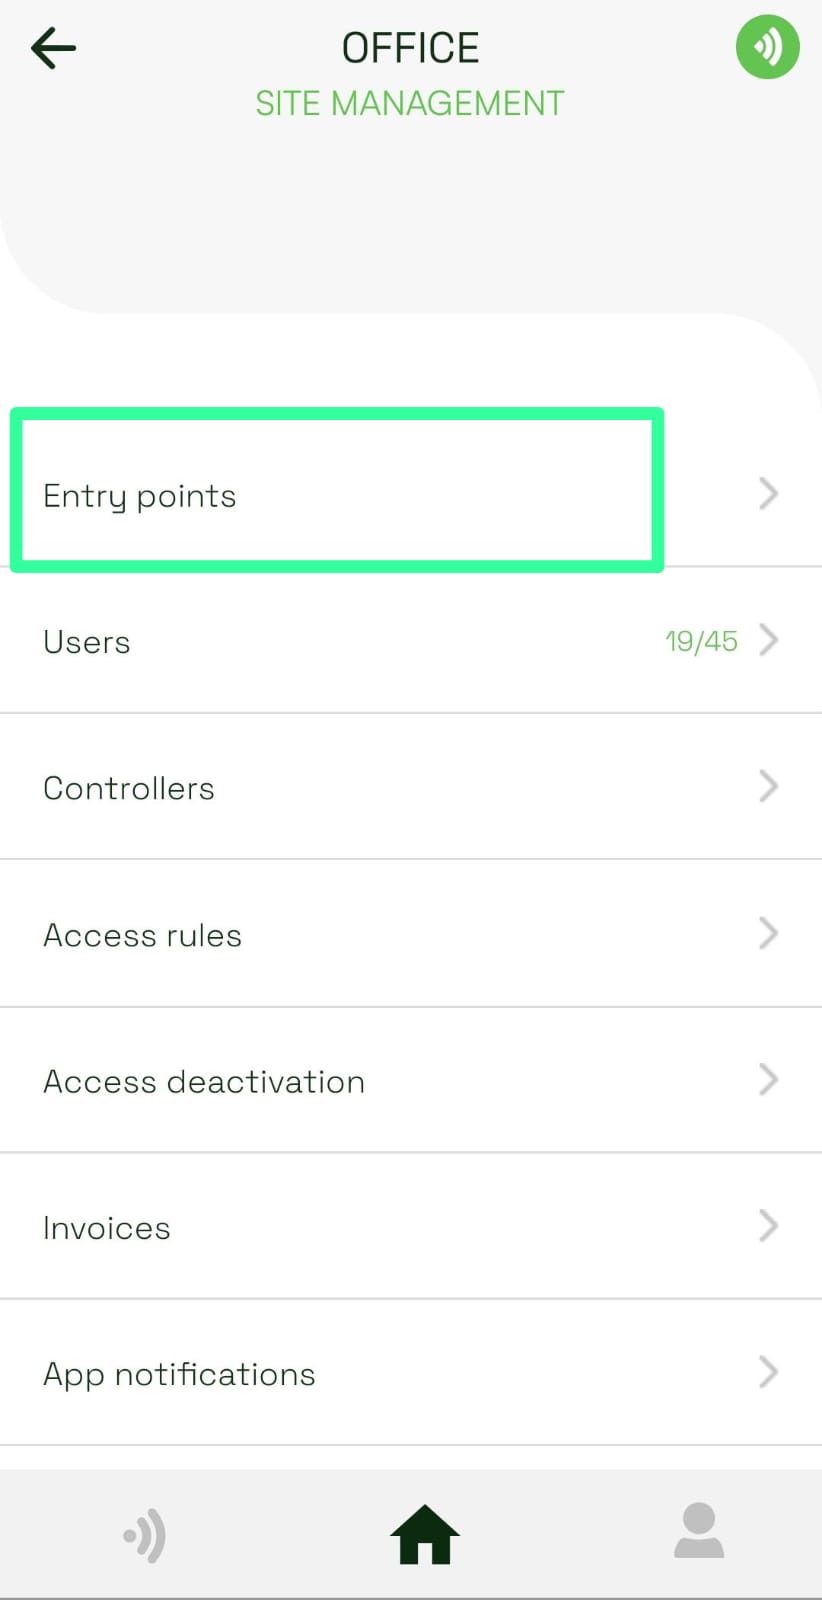
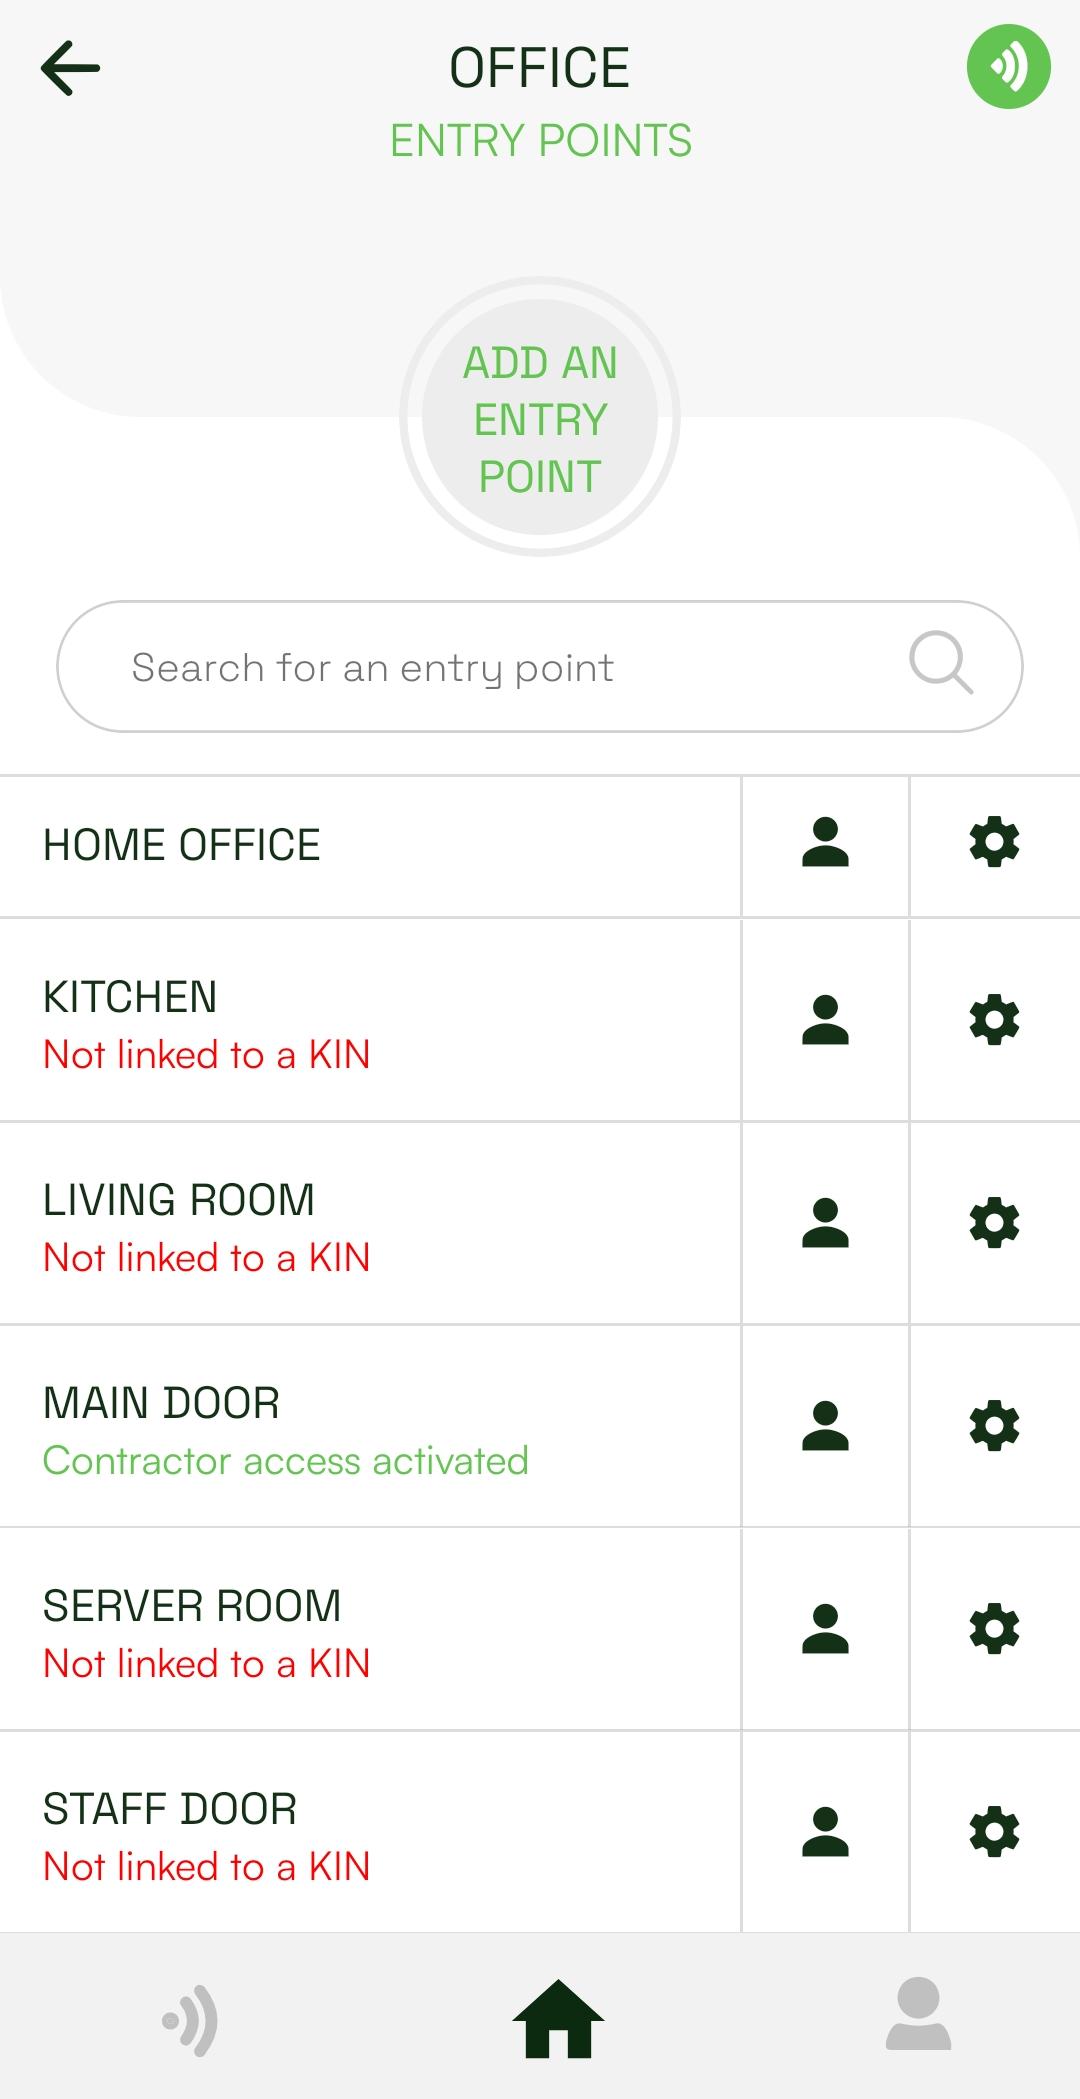
You can either edit an existing PIN code or add a new one. After choosing either of the options a modal will appear.
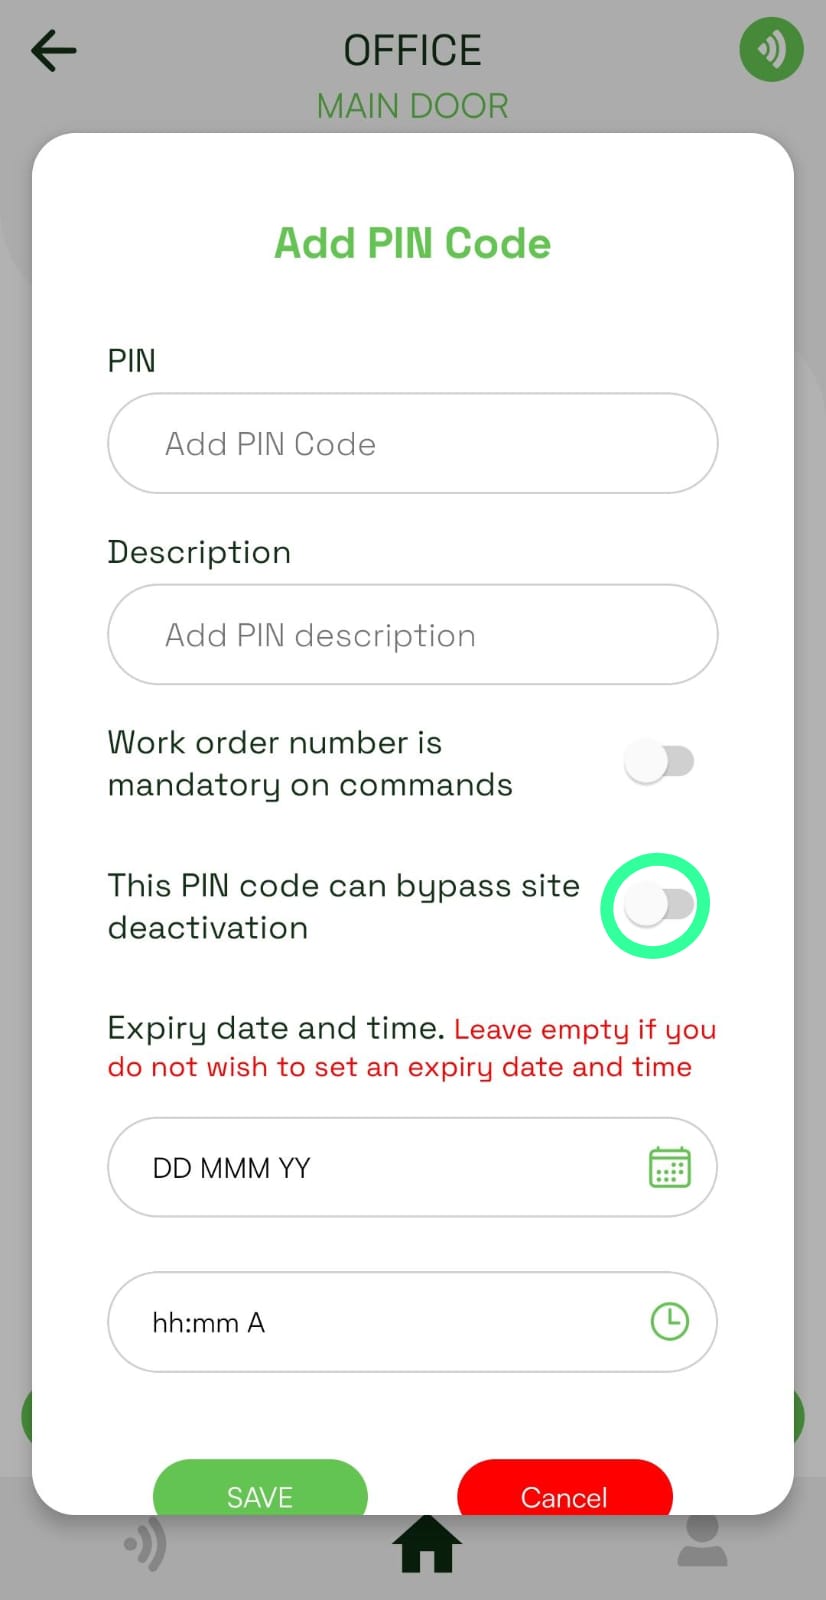
Toggle the switch button next to “This PIN code can bypass site deactivation”:
- On: PIN code can bypass site deactivation.
- Off: PIN code cannot bypass site deactivation.
▼v.6.0.8
07-04-2026Access Deactivation
What is this screen?
The Access Deactivation screen lets administrators and managers control physical access to a site by deactivating or activating individual or all entry points in real time. This is useful during emergencies, security incidents, or planned maintenance.
Important notes:
- No one will be able to access an entry point once it is deactivated, all commands of any type will be rejected until the entry point is re-activated.
- The system will analyze access logs to determine the state of each entry point and report the findings to the administrator. Should the status be undetermined or confirmed open, the system will attempt to enforce a locked state on the entry points that are linked to controllers.
- Deactivating an entry point will cancel all running controller execution schedules.
- Managers will only be able to activate/deactivate entry points if an administrator allows the managers to activate/deactivate site’s entry points by turning on the switch button under site settings.
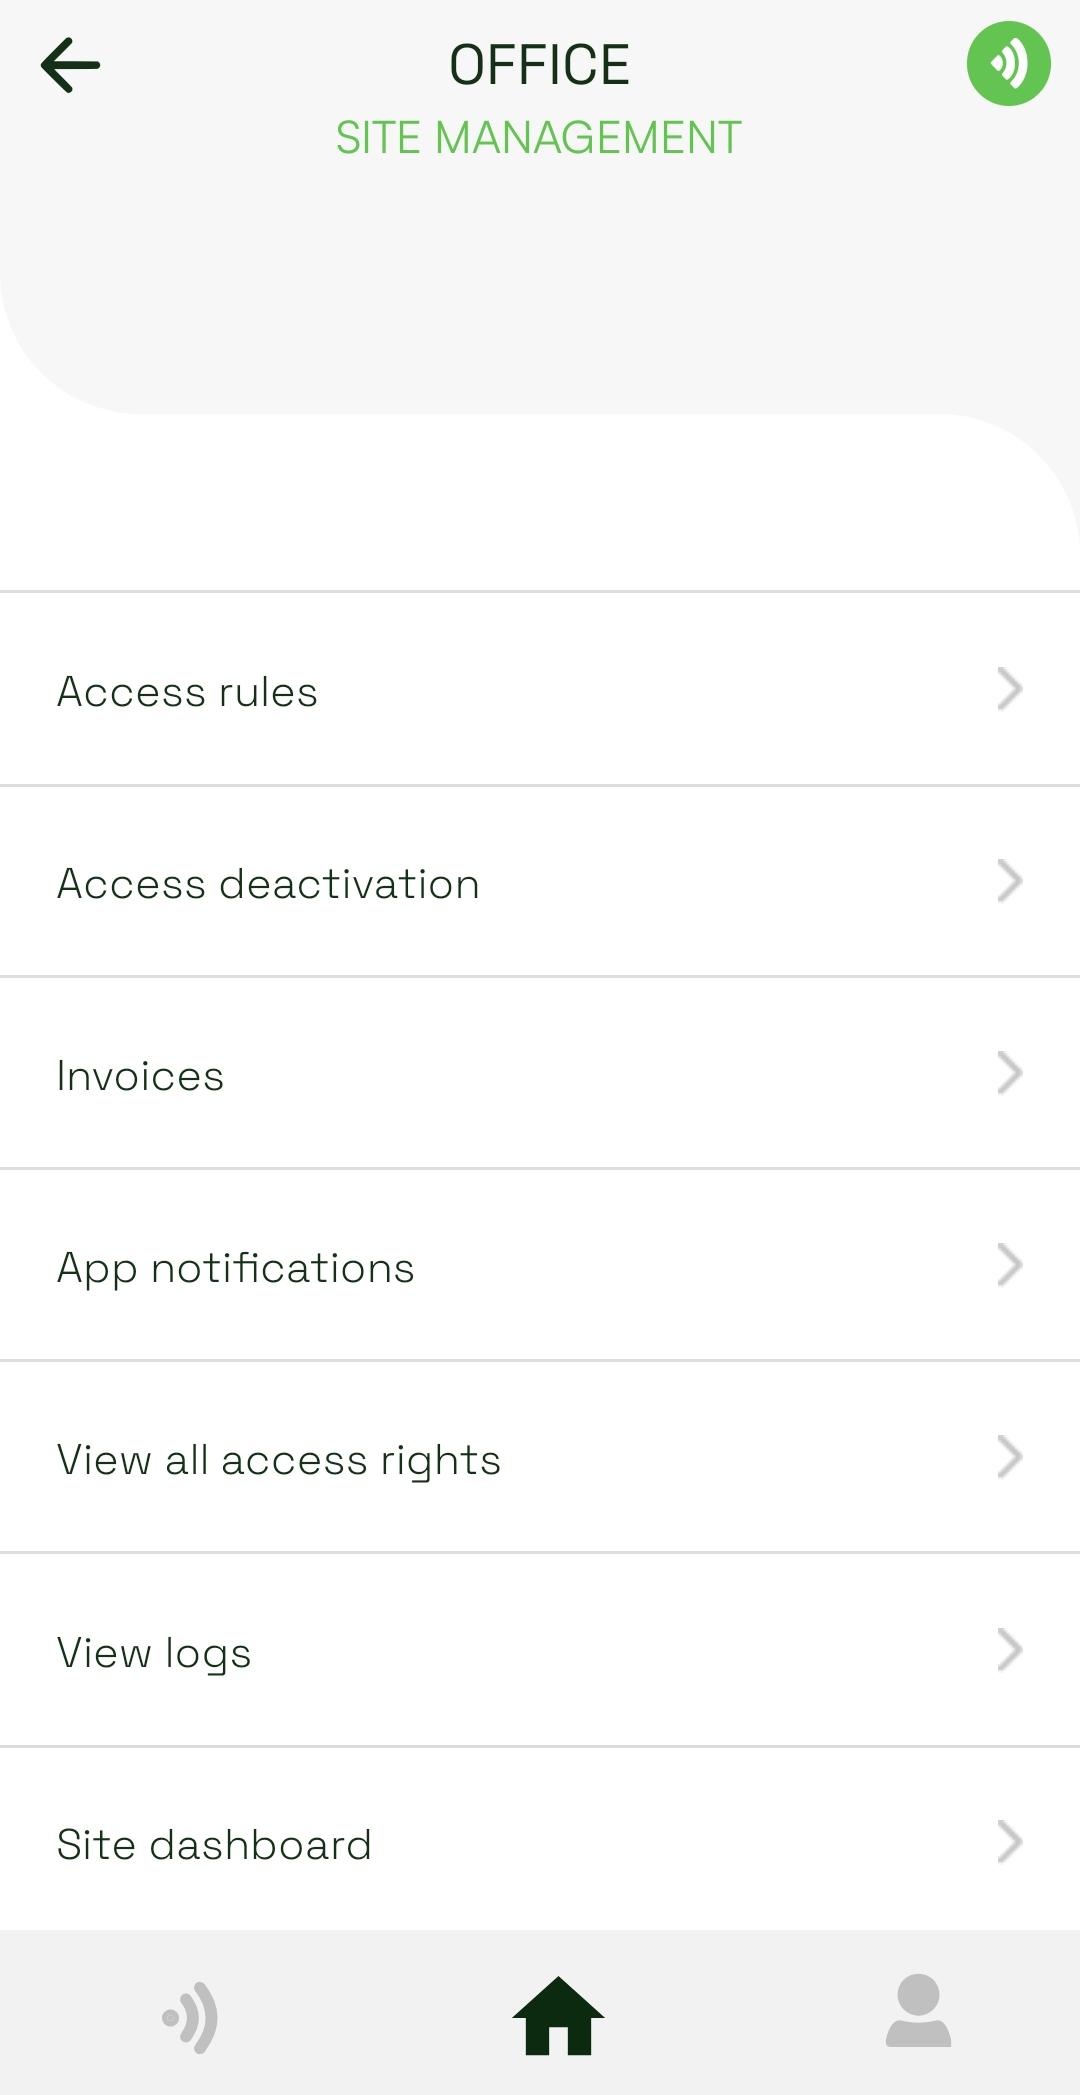
Getting to the Access deactivation screen
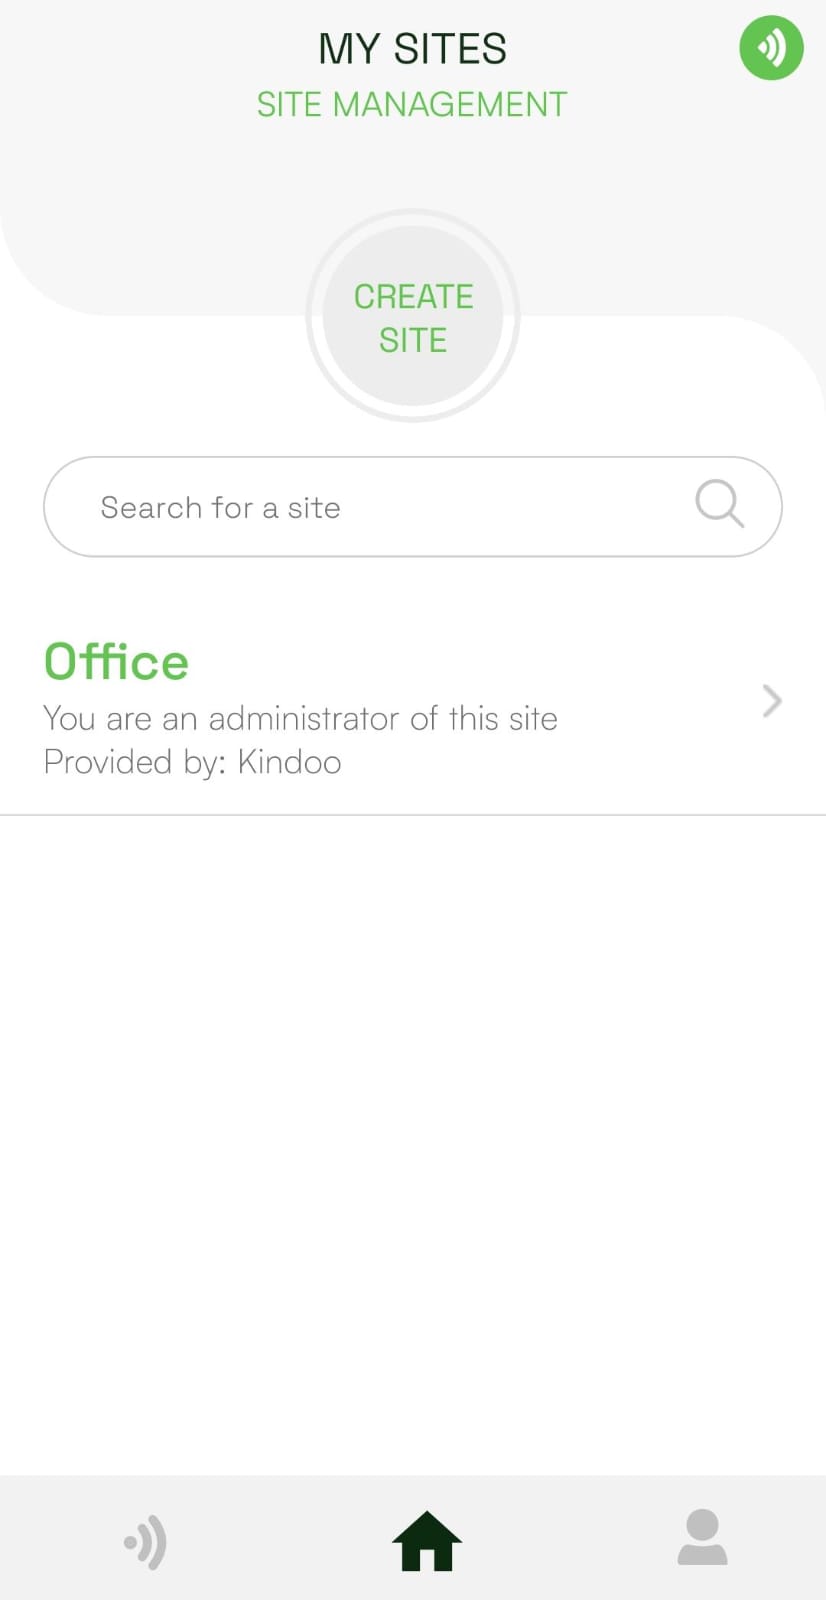
Navigate to your site via the Sites list → Press on a desired site → Locate and press "Access deactivation"
How to use?
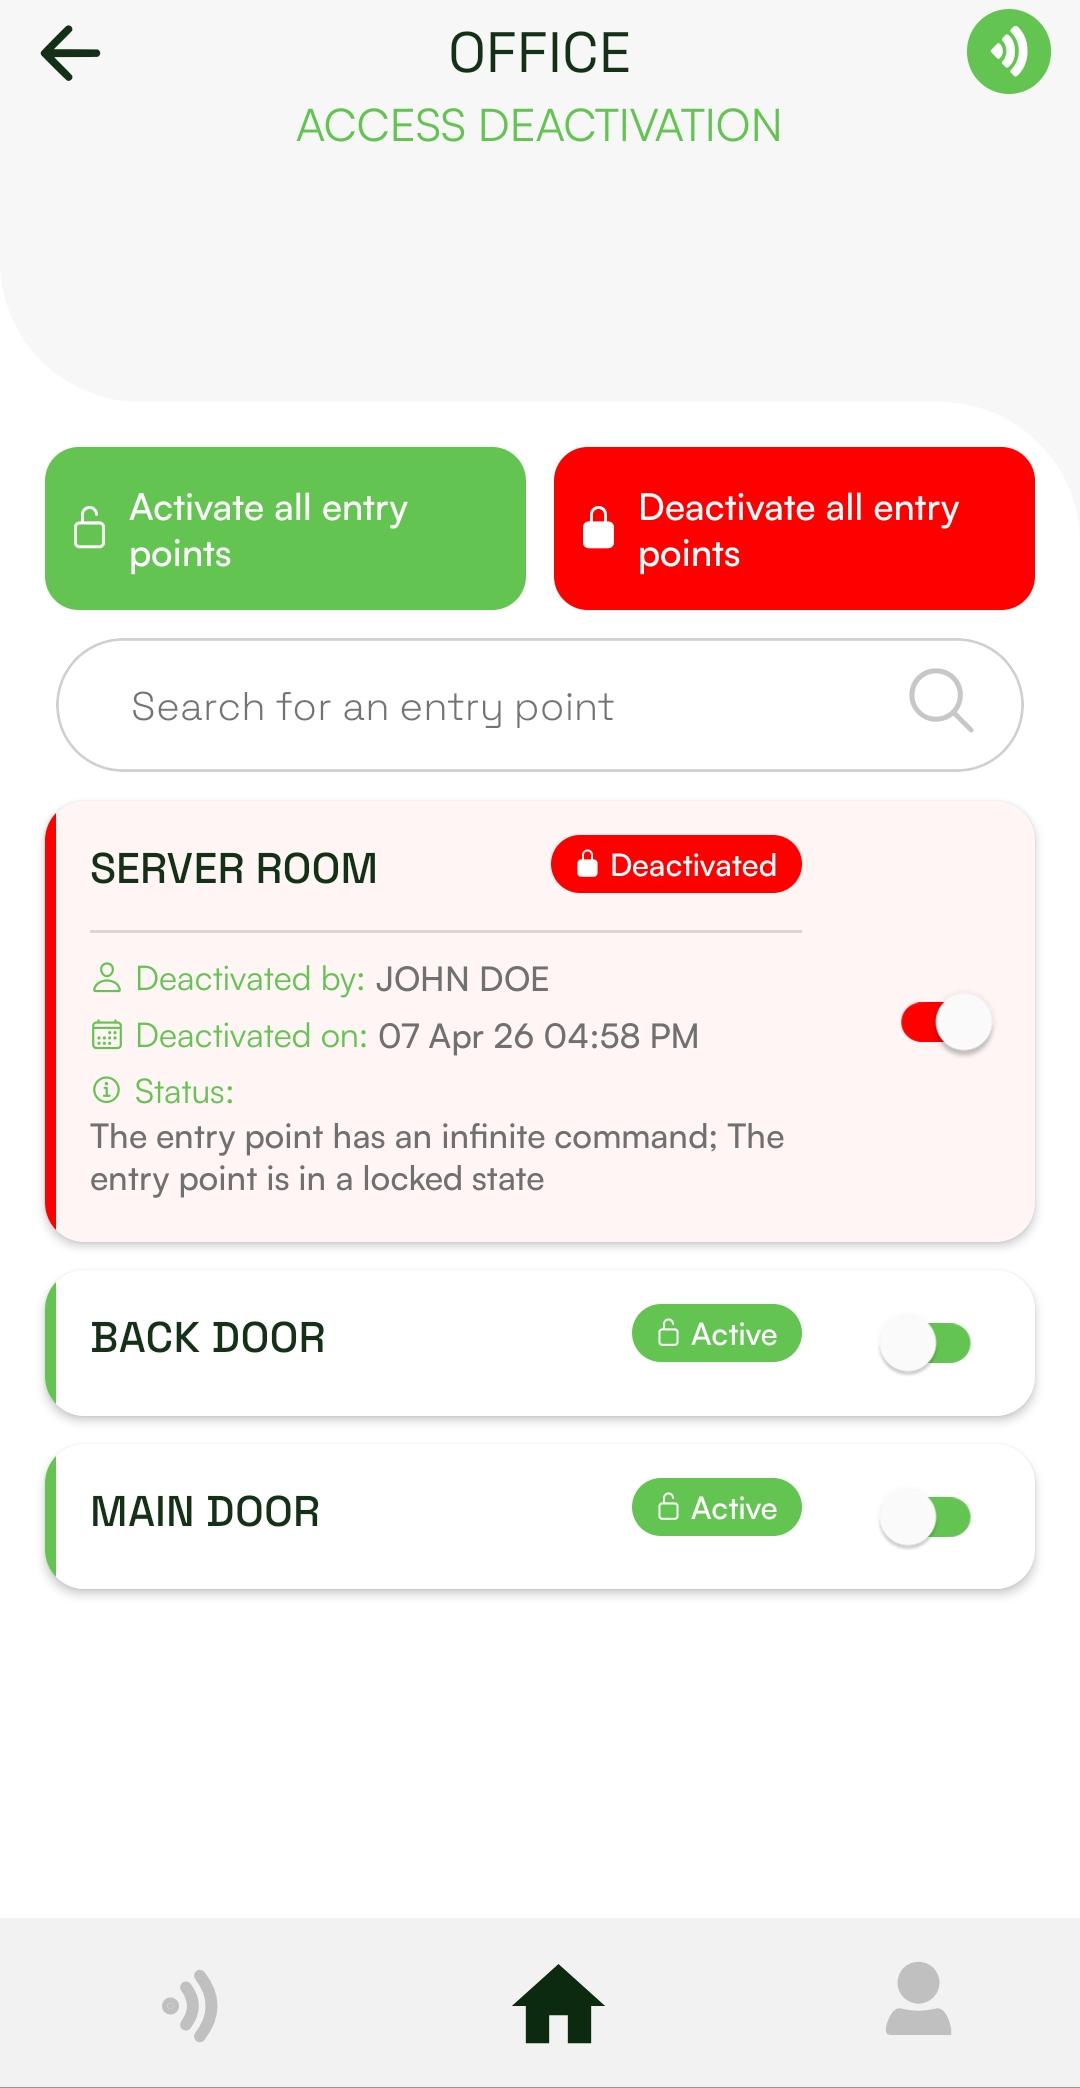
When you open the screen, you will see the entry points list and two buttons, Activate all entry points and Deactivate all entry points, clicking each button will either activate or deactivate all the entry points in the list.
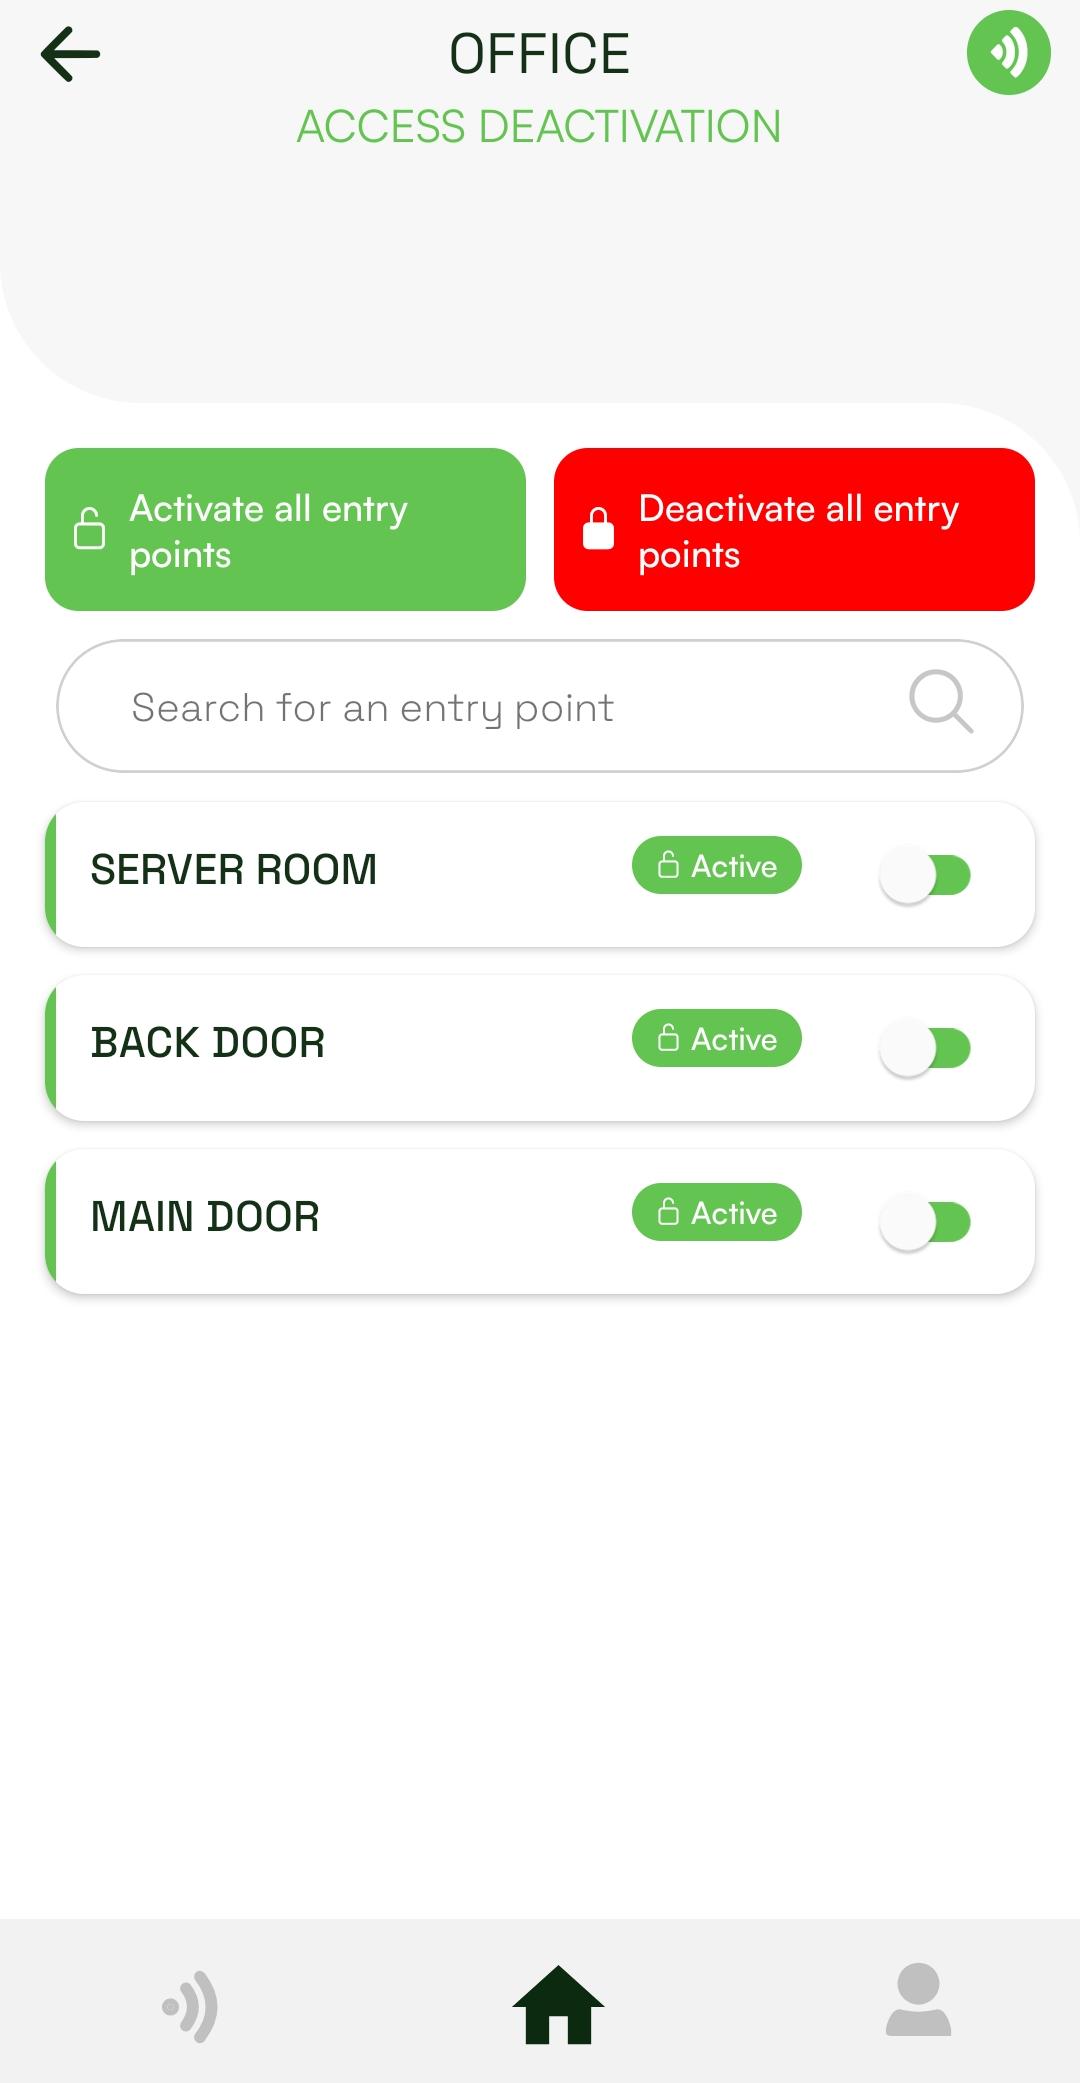
The entry points list will contain the following:
- Entry point name.
- Status of the access: Active (green). Deactivated (red).
- Toggle switch: Ability to activate or deactivate the entry point.
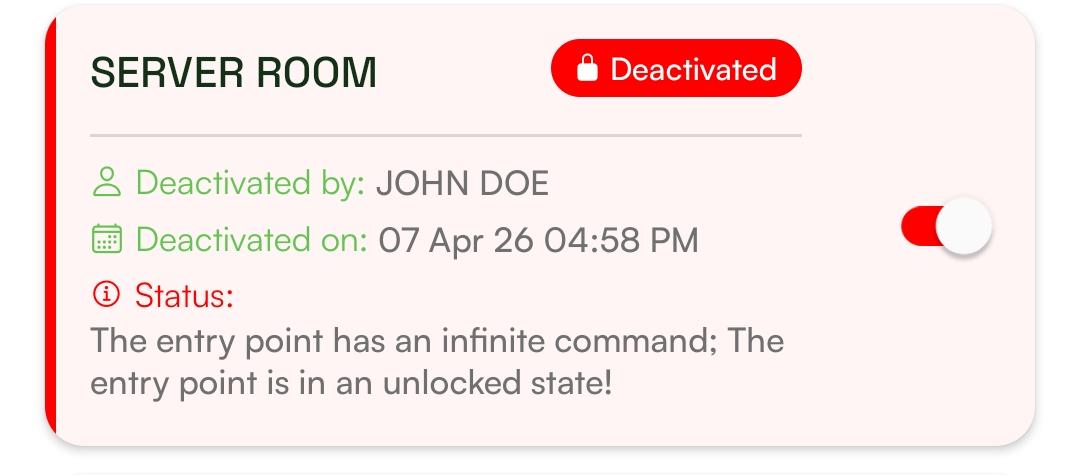
If access is deactivated:
- Deactivated by: The name of the admin/manager who deactivated it
- Deactivated on: The date and time it was deactivated
- Status: A message describing the current state of the entry point. It can have one of the four following
options:
- Locked state
- Unlocked state
- Pending. The controller linked to the entry point is attempting to set the state to locked
- Undetermined state. This occurs if there is insufficient information to determine the state of the entry point or if the communication between the controller and the KIN could not be established
Deactivating an entry Point:
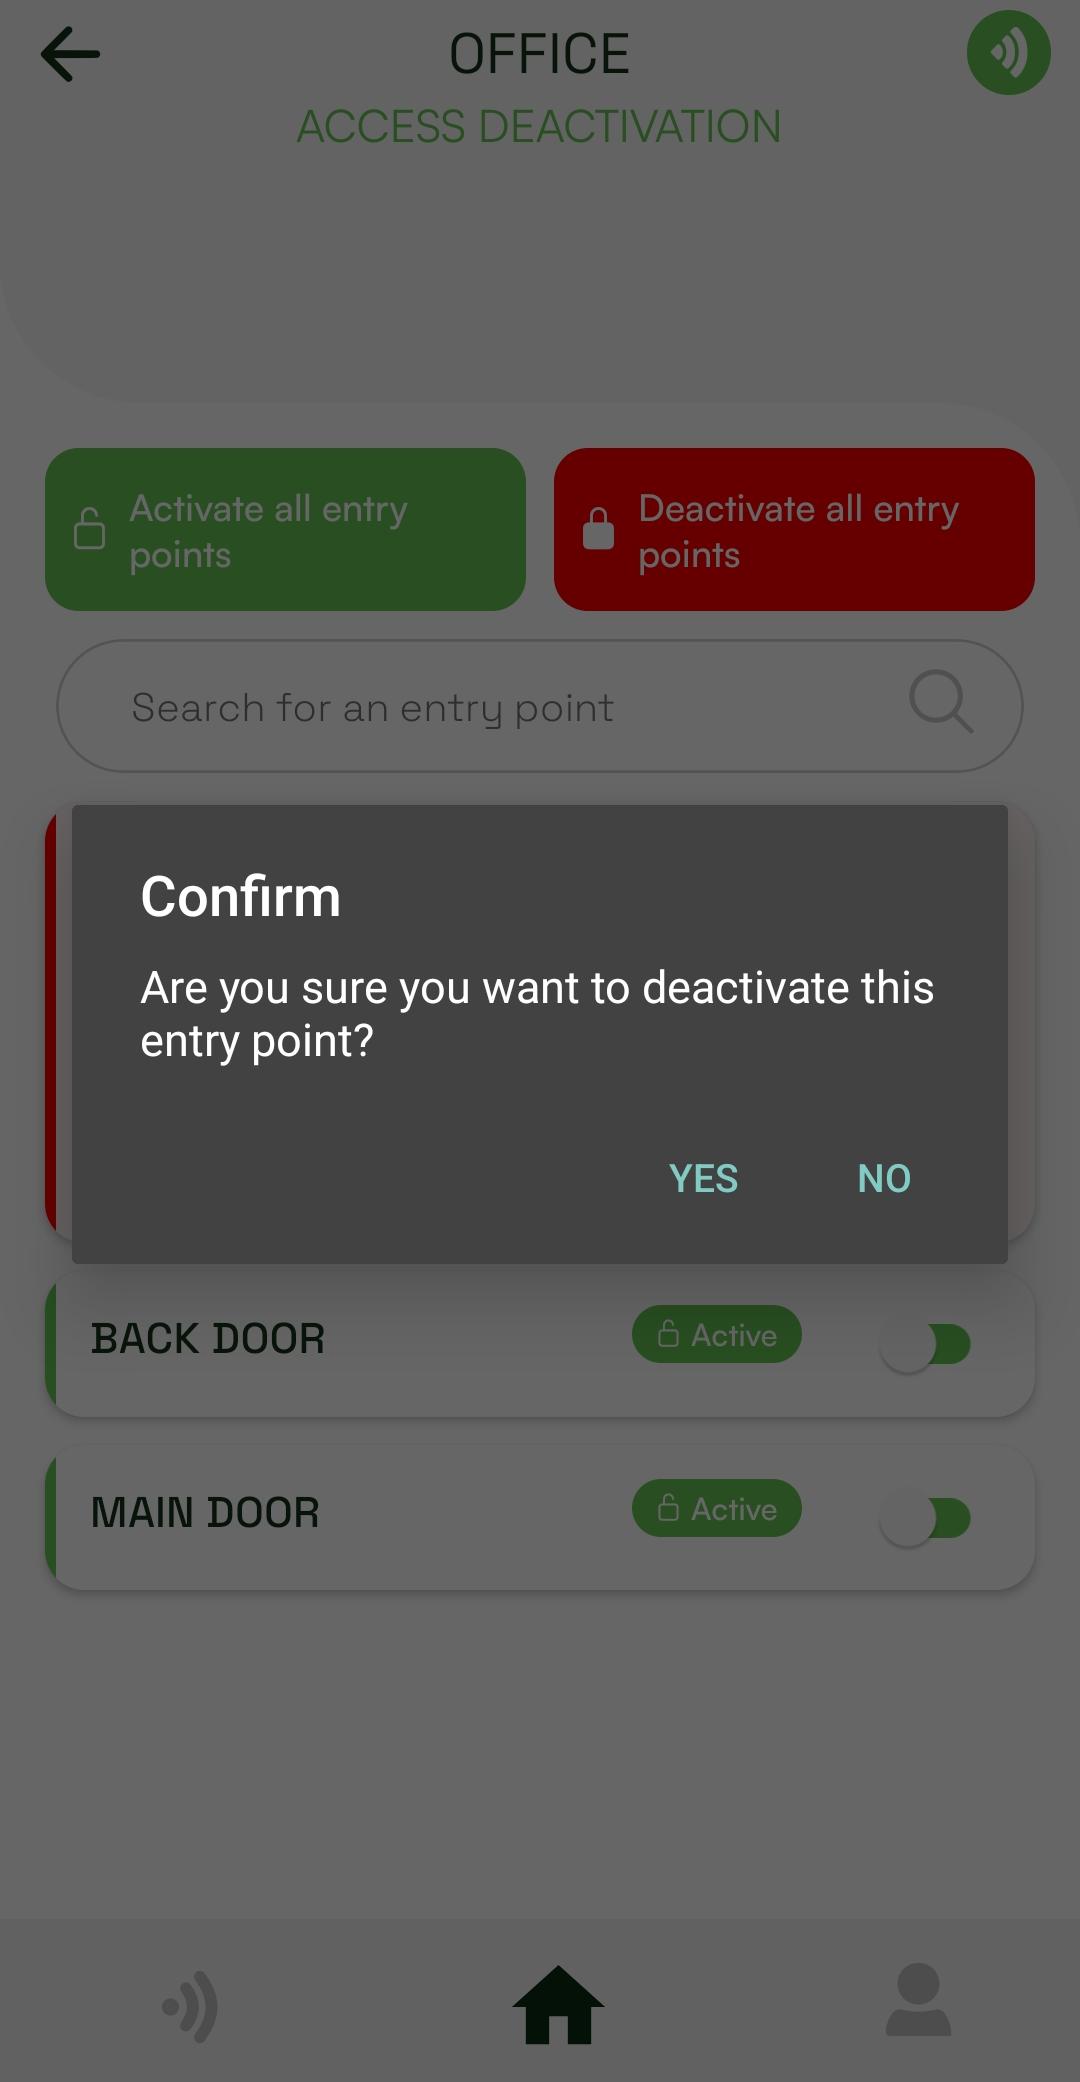
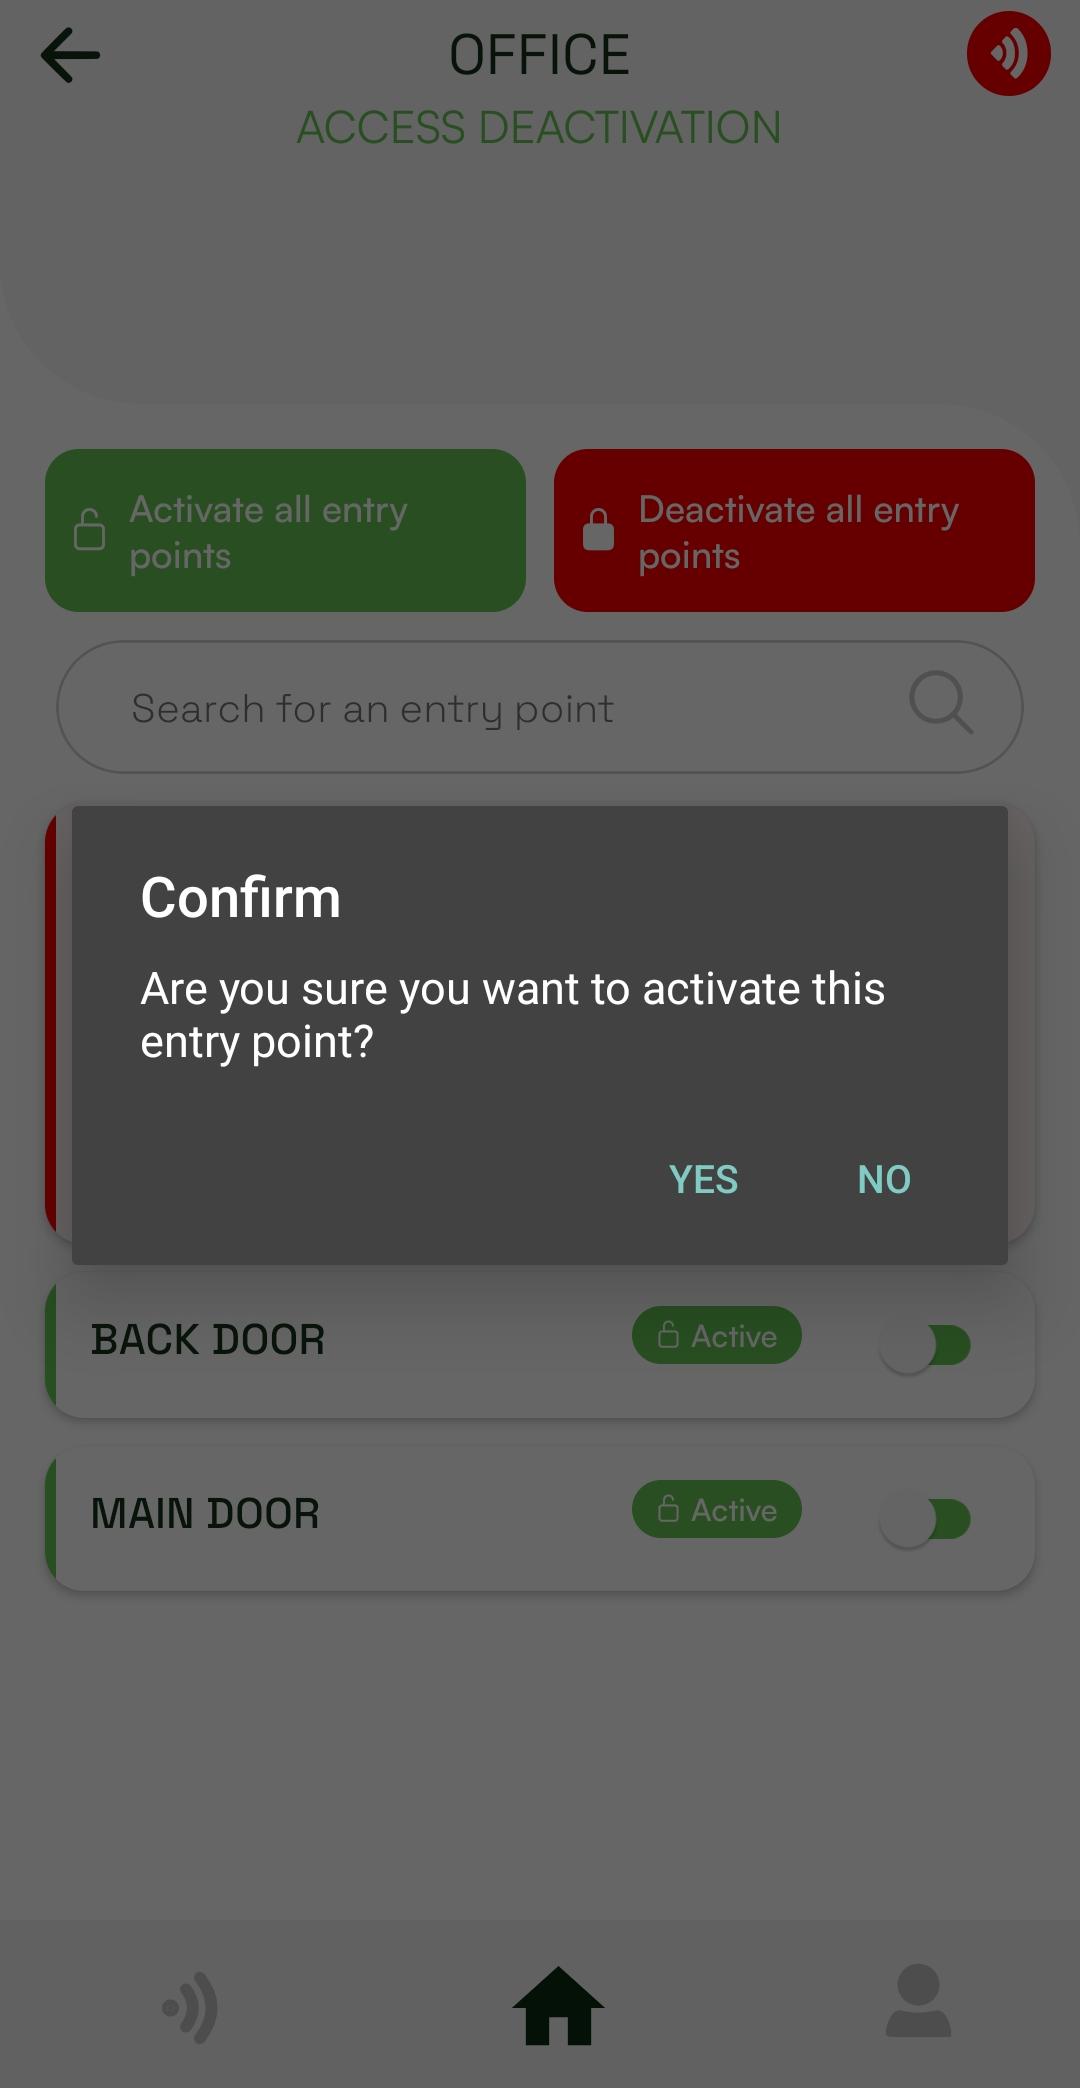
Find the entry point in the list, then press the switch button. An alert box will appear prompting you to confirm the deactivation of this entry point. Press Yes to proceed. The entry point will be deactivated and will not accept any type of commands.
Reactivating an entry point:
Find the entry point in the list, then press the switch button. An alert box will appear prompting you to confirm the activation of this entry point. Press Yes to proceed. The entry point will be activated.
▼v.6.0.6
09-03-2026Identifiers types
What is this page?
The Identifiers Types page allows you to enable additional ways to identify site users such as with RFID cards.
How do I reach this page?
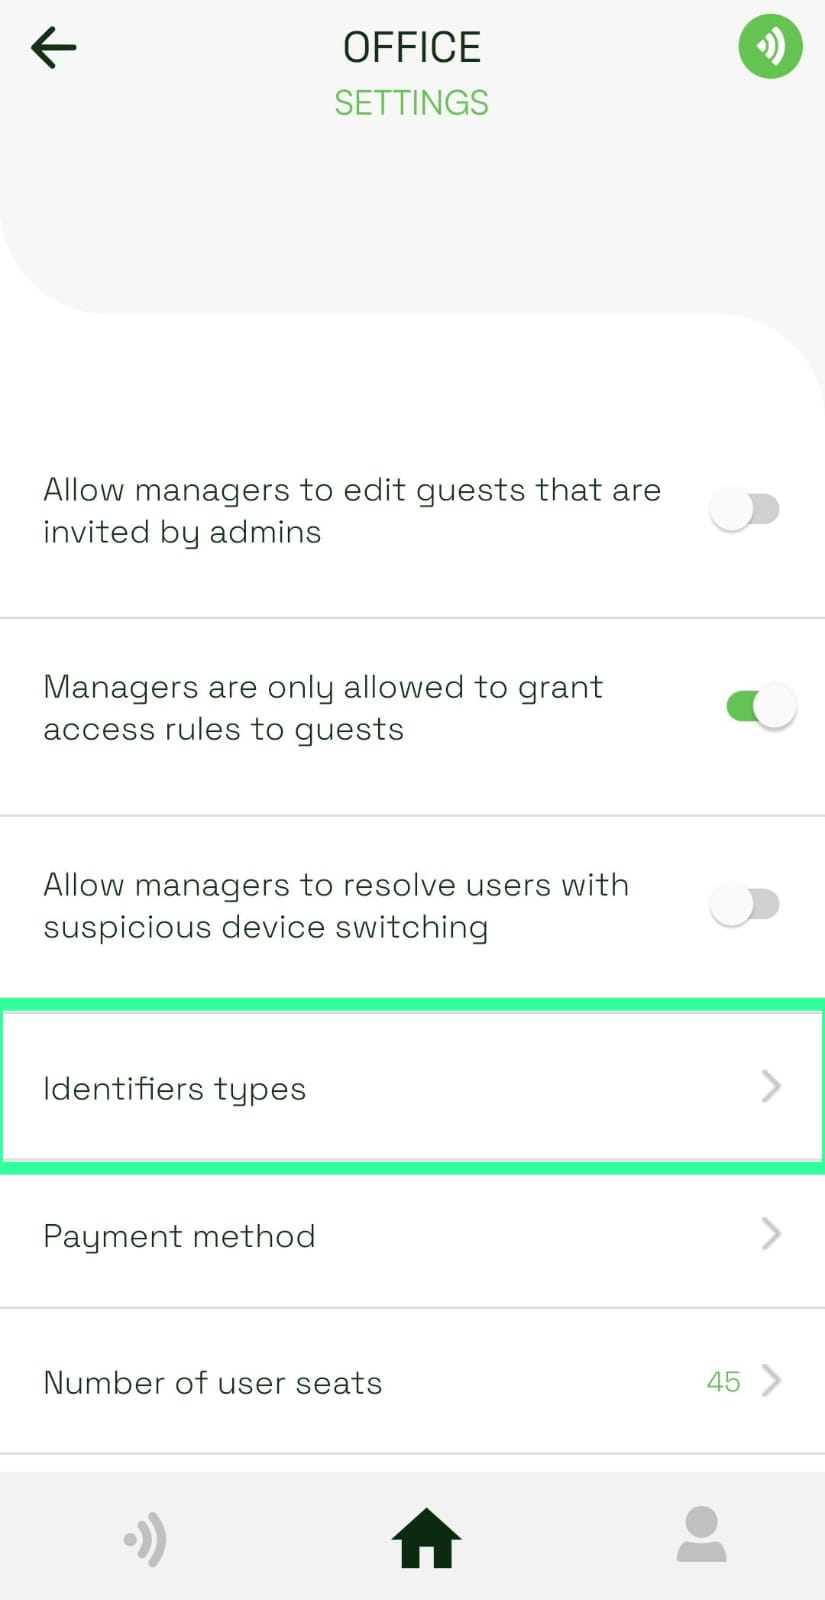
- Open Kindoo app, select your site and go to settings.
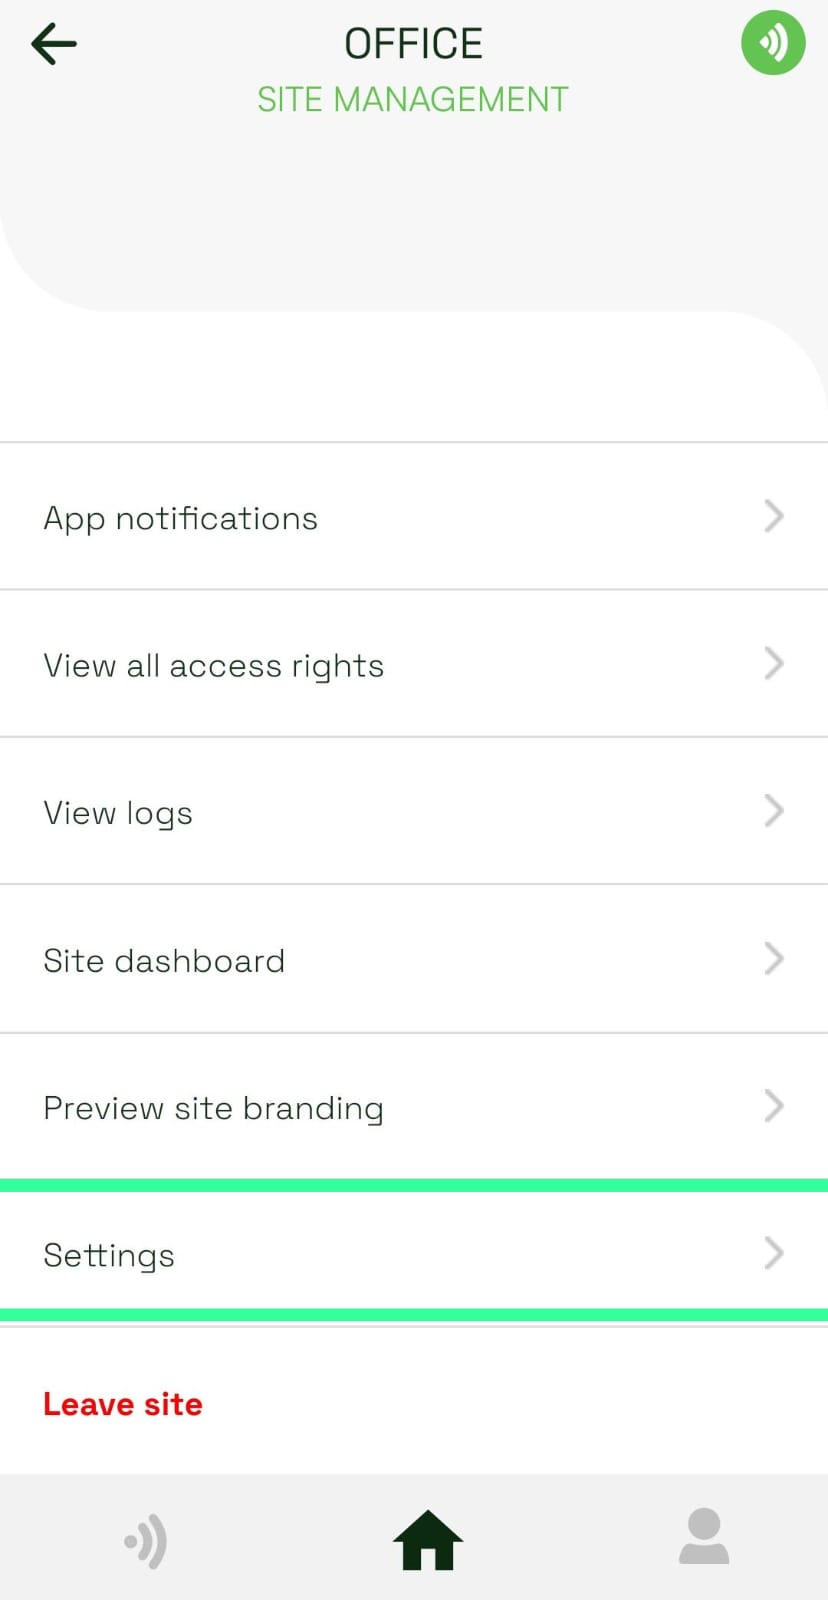
- In the settings menu, find “Identifiers types” and press it.
What can I do here?
-
View Identifiers types
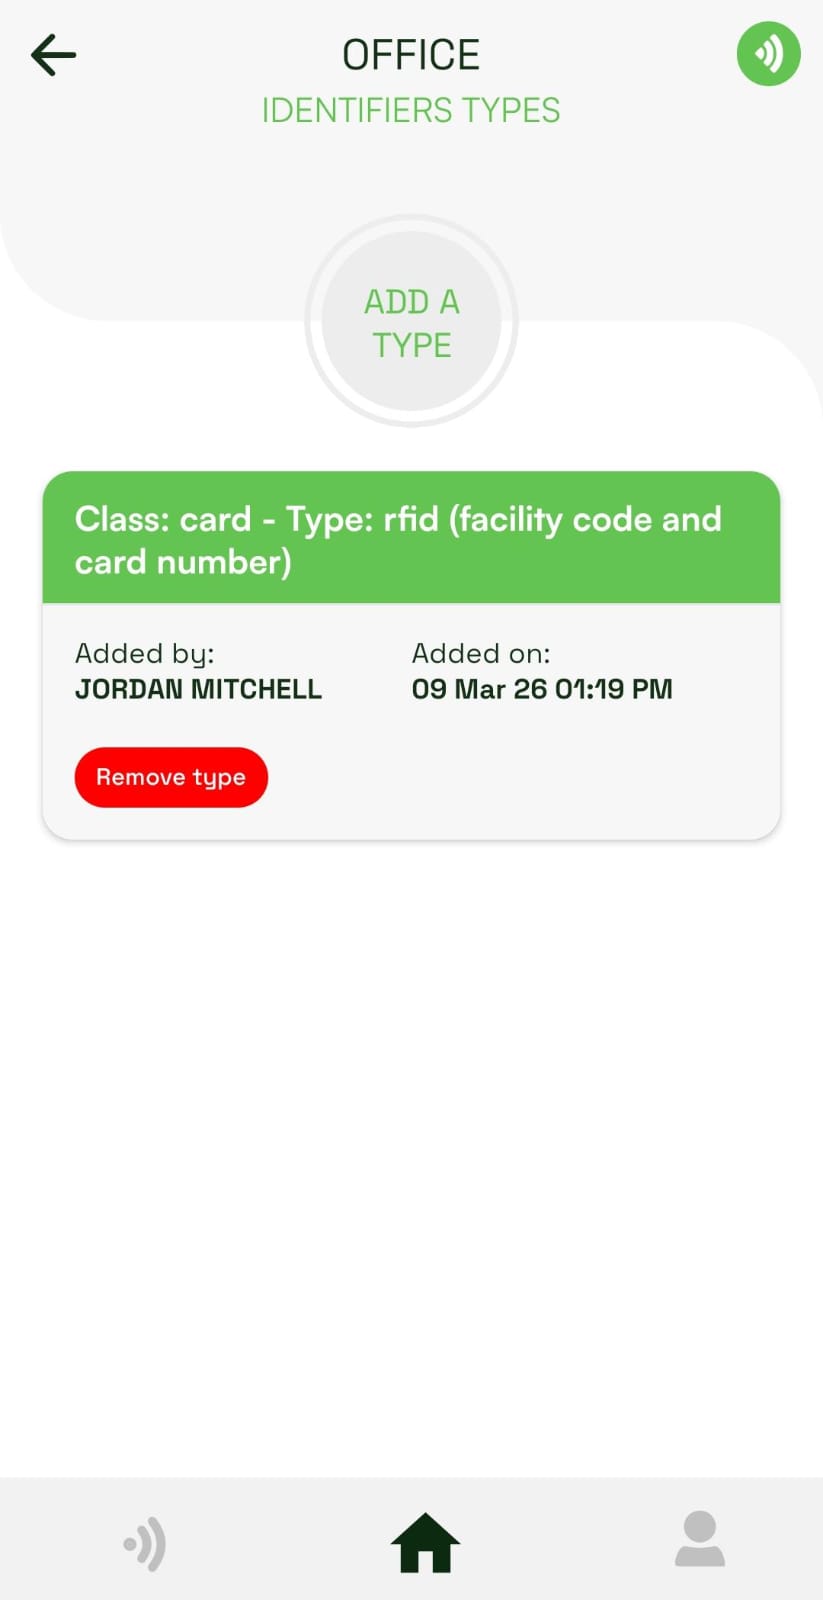
- You’ll see a list of identifier types already added to your site.
- Each row shows:
- The class and type of identifier.
- Who added it and when.
-
Add a new identifier type.
-
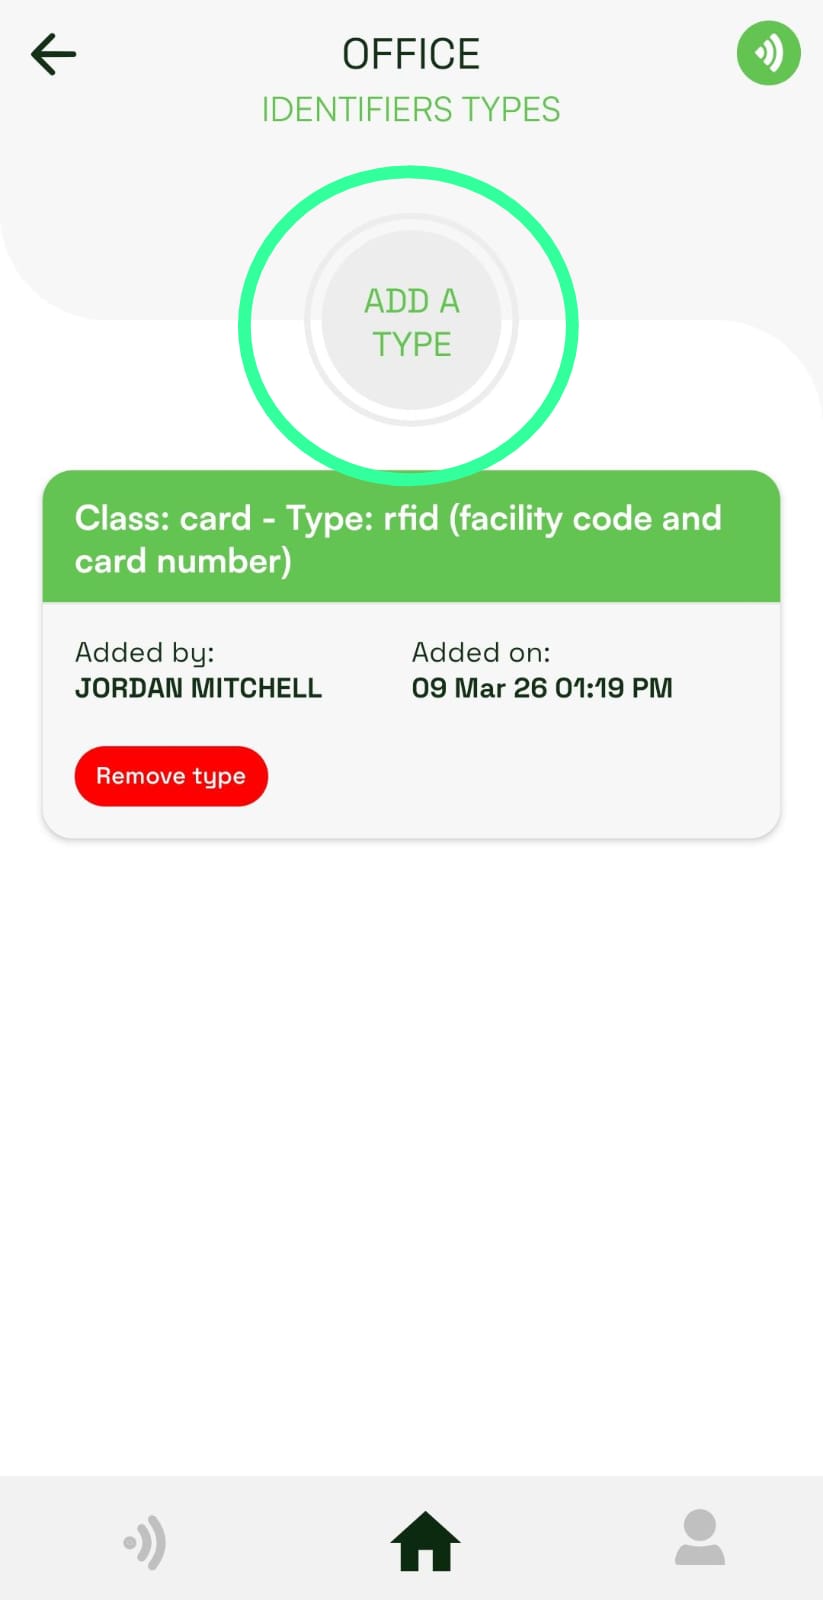
Tap the “ADD A TYPE” button.
-
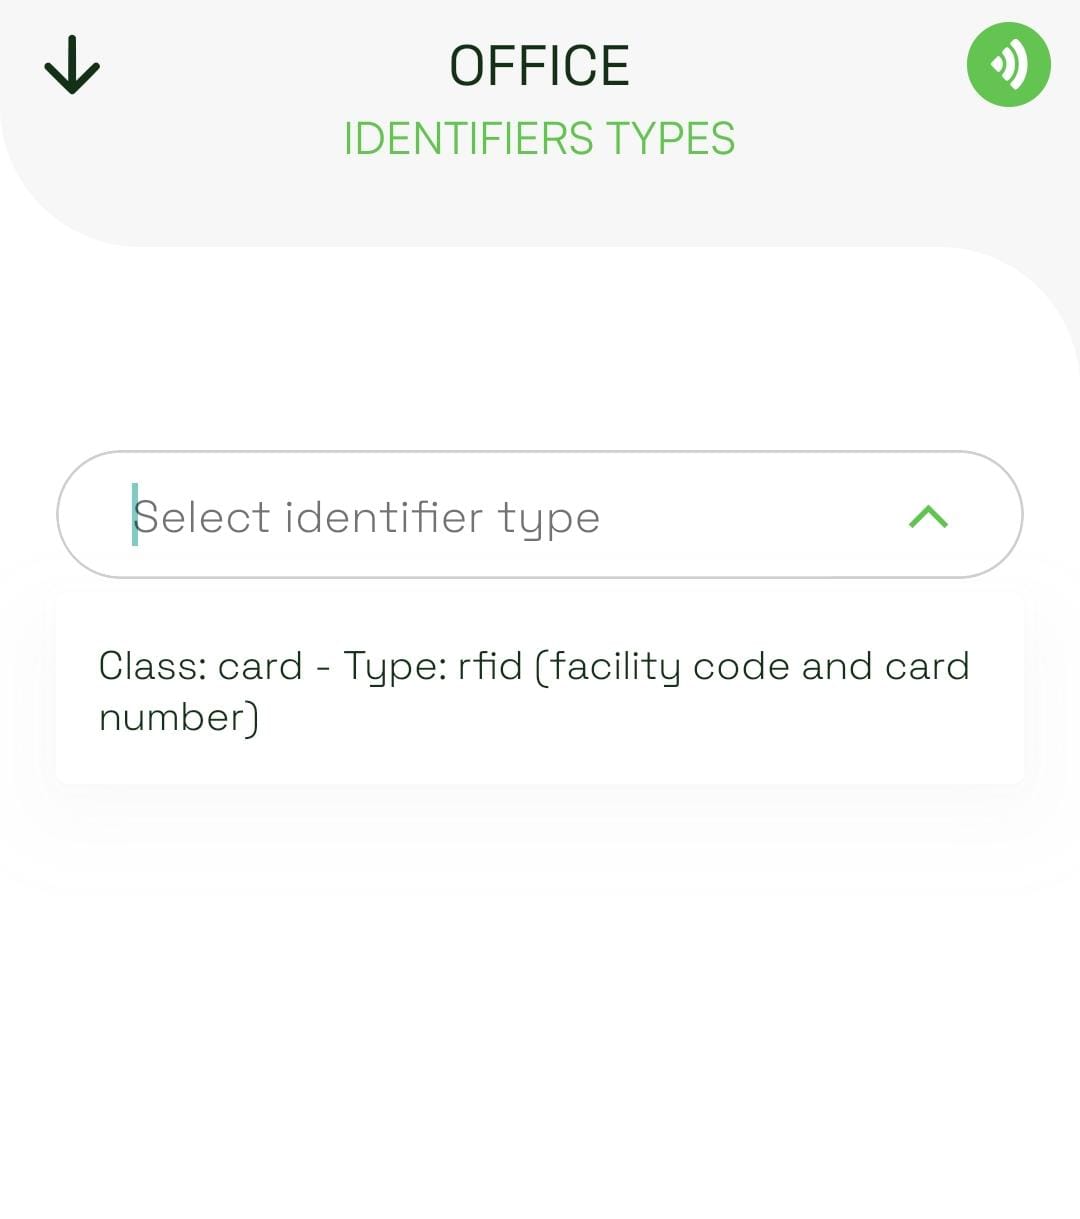
Choose the type you want to add from the suggestion list in the dropdown.
-
Confirm and commit your selection. The new identifier type will appear in the list of site
identifiers.
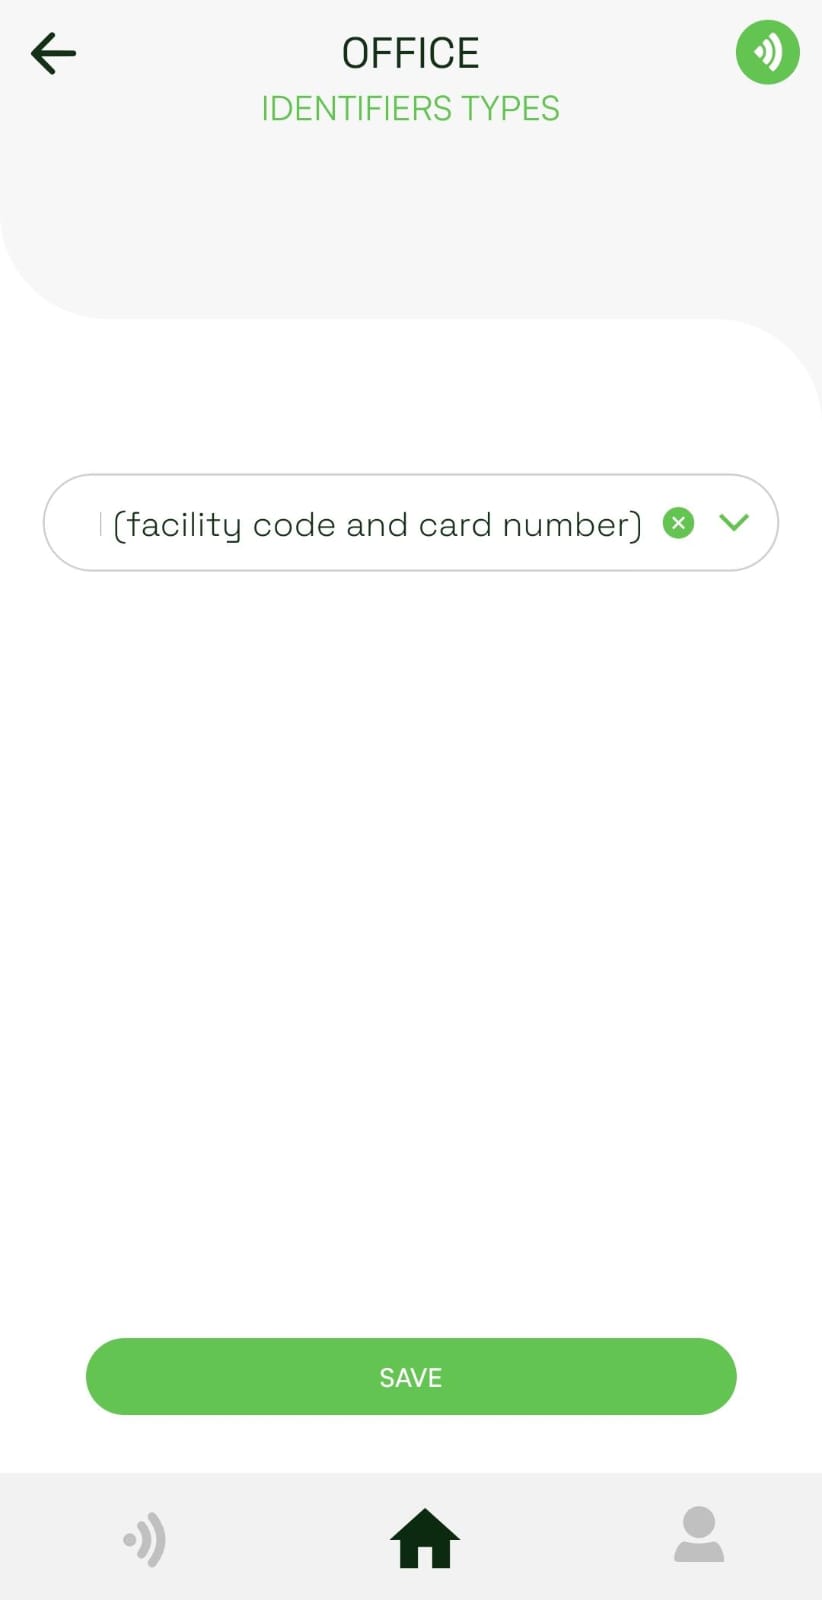
-
Tap the “ADD A TYPE” button.
-
Remove an Identifier type
-
Find the identifier type you want to remove from the list..
-
Tap the “Remove type” button.
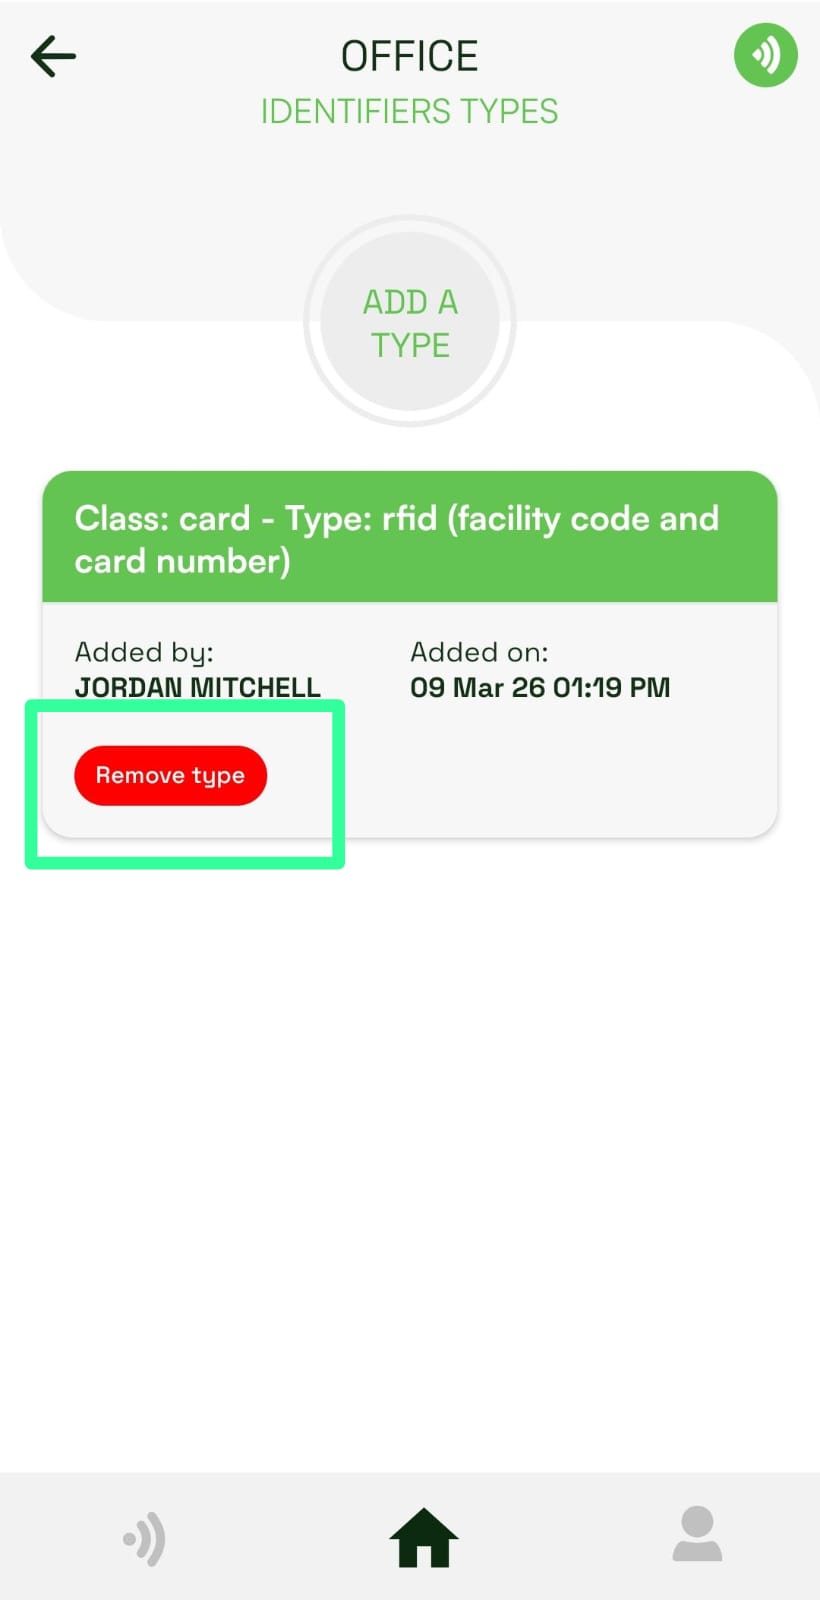
-
Confirm the removal in the popup..
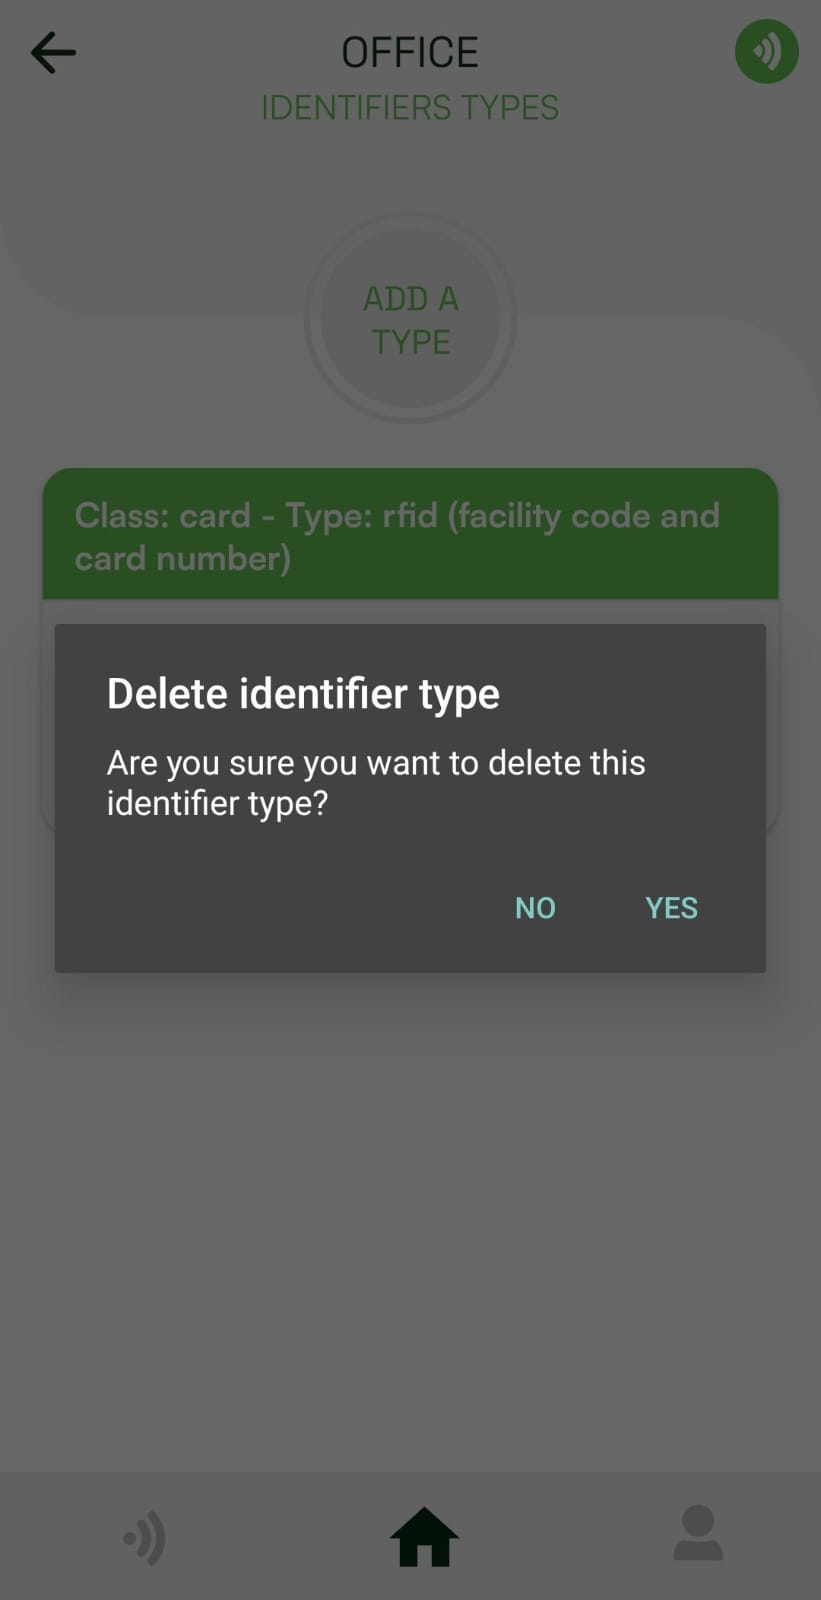
-
Find the identifier type you want to remove from the list..
Entry Point Controlled By Reader
What is this feature?
This section allows you to link a controller to a reader, select the reader format, and specify the entry point that will be controlled.
How do I use it?
-
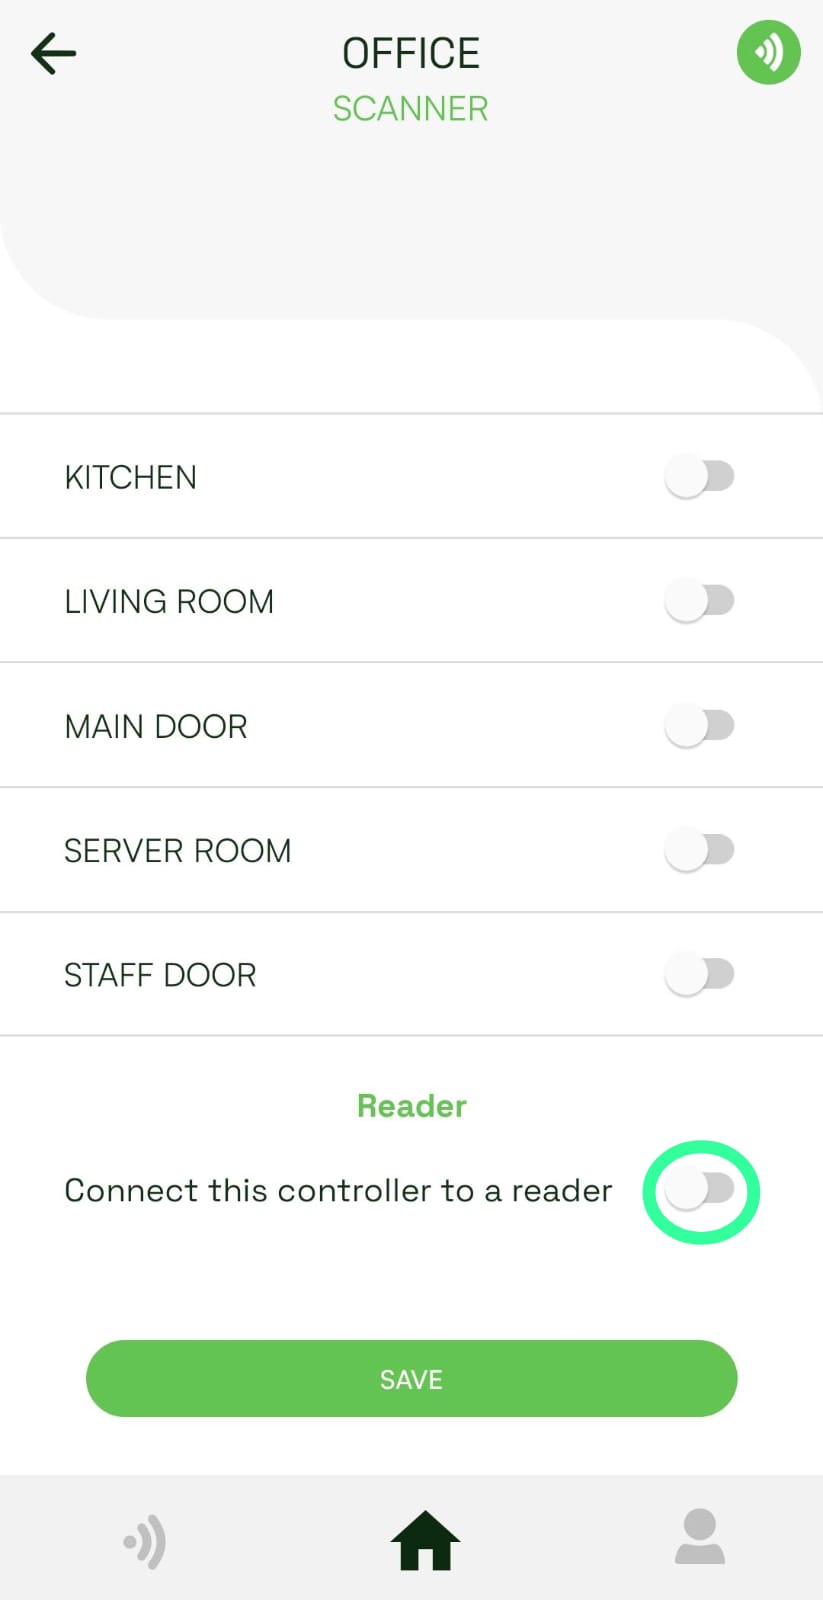
On the controller’s settings page, scroll to “Connect this controller to a reader” and toggle the switch to enable it.
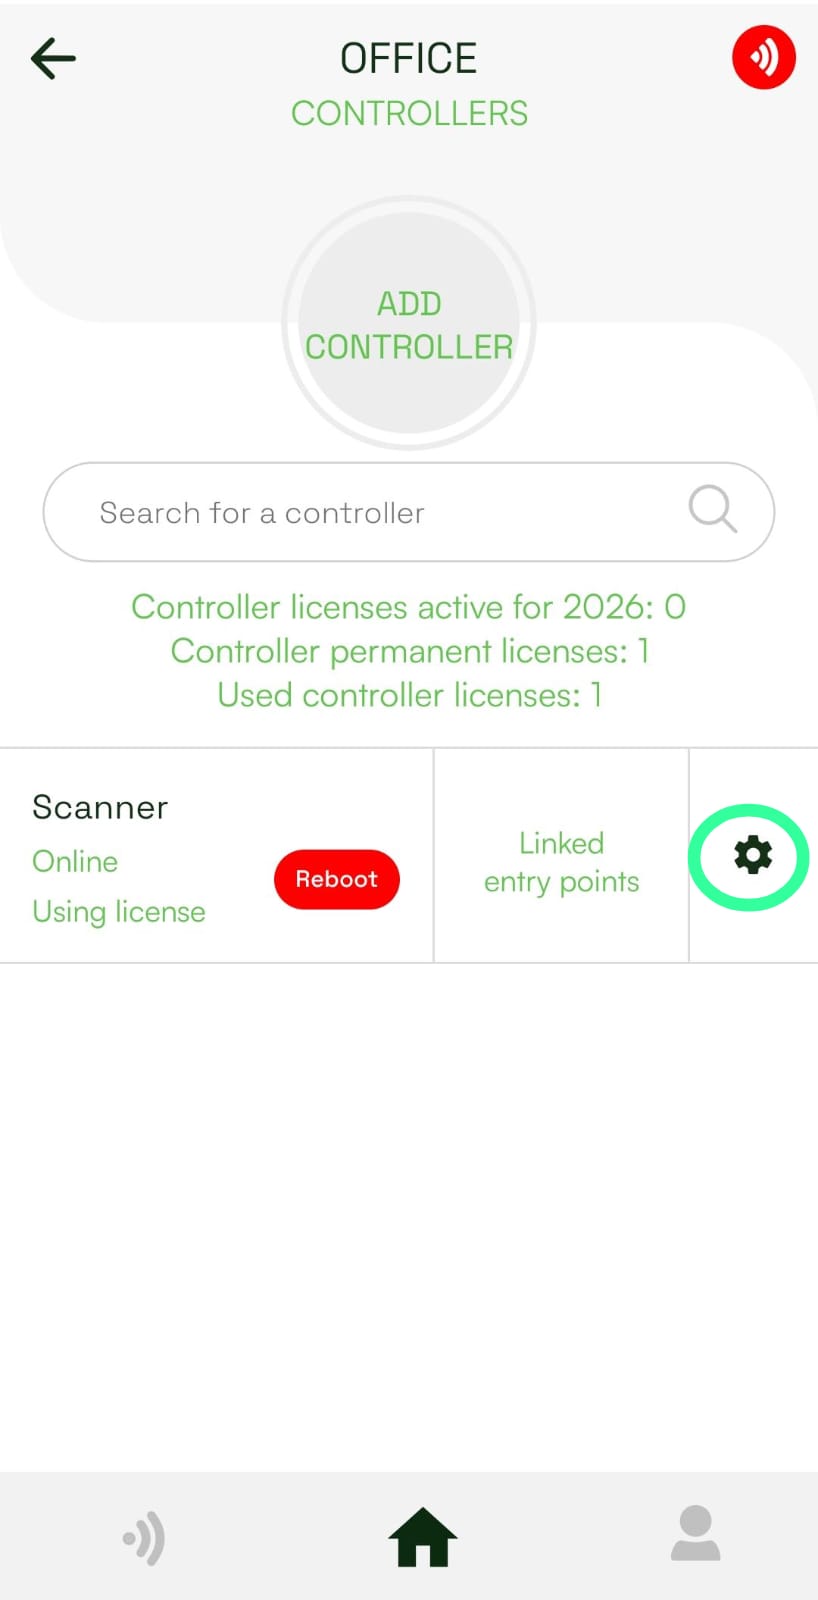
-
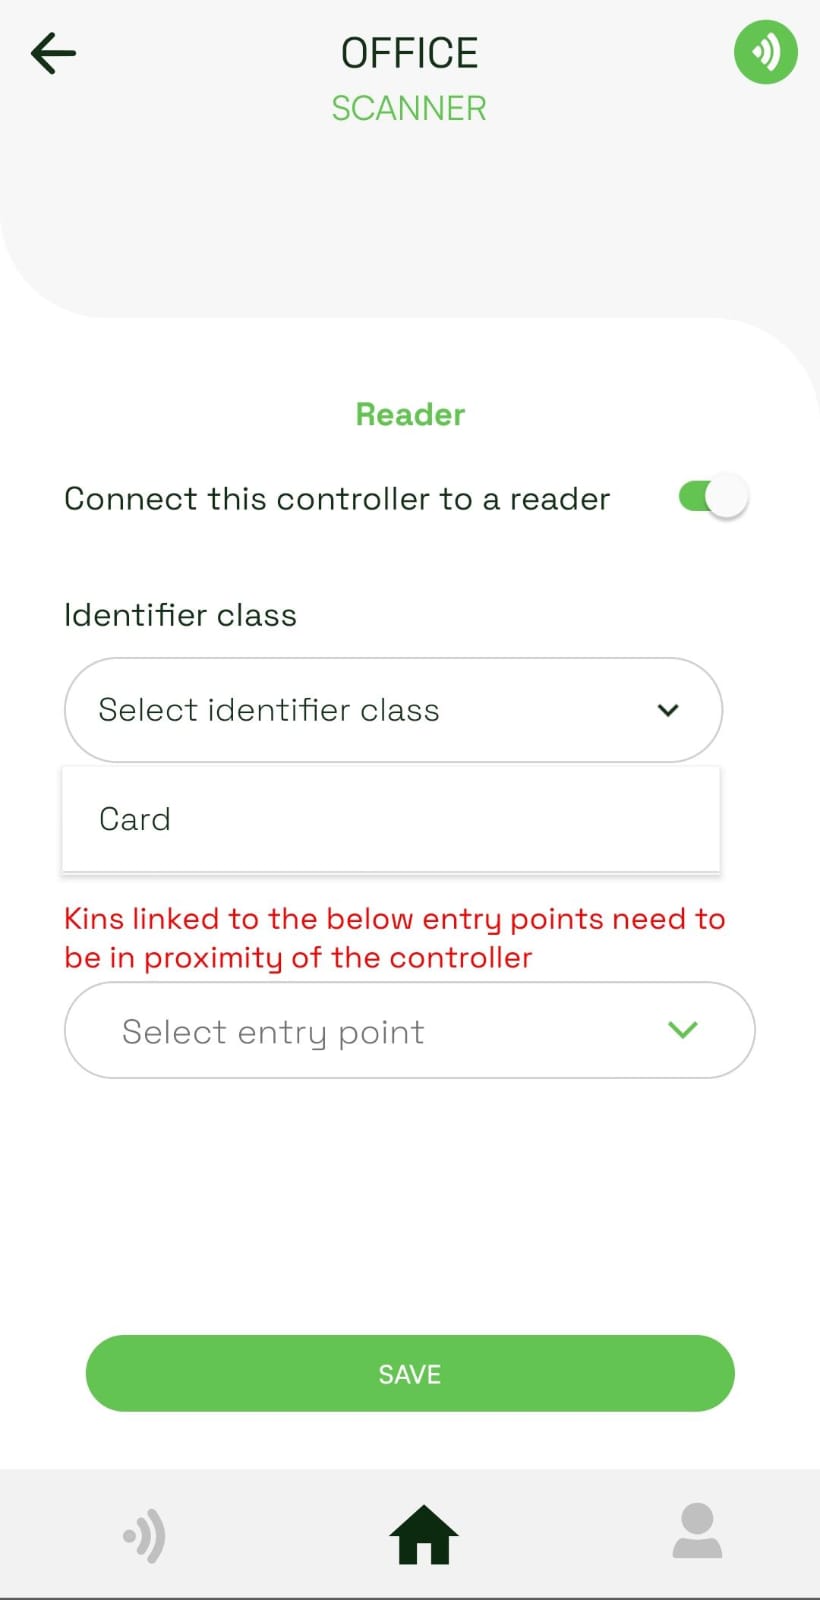
Select identifier class and reader format:
- Tap the dropdown menu labeled “Identifier Class.”
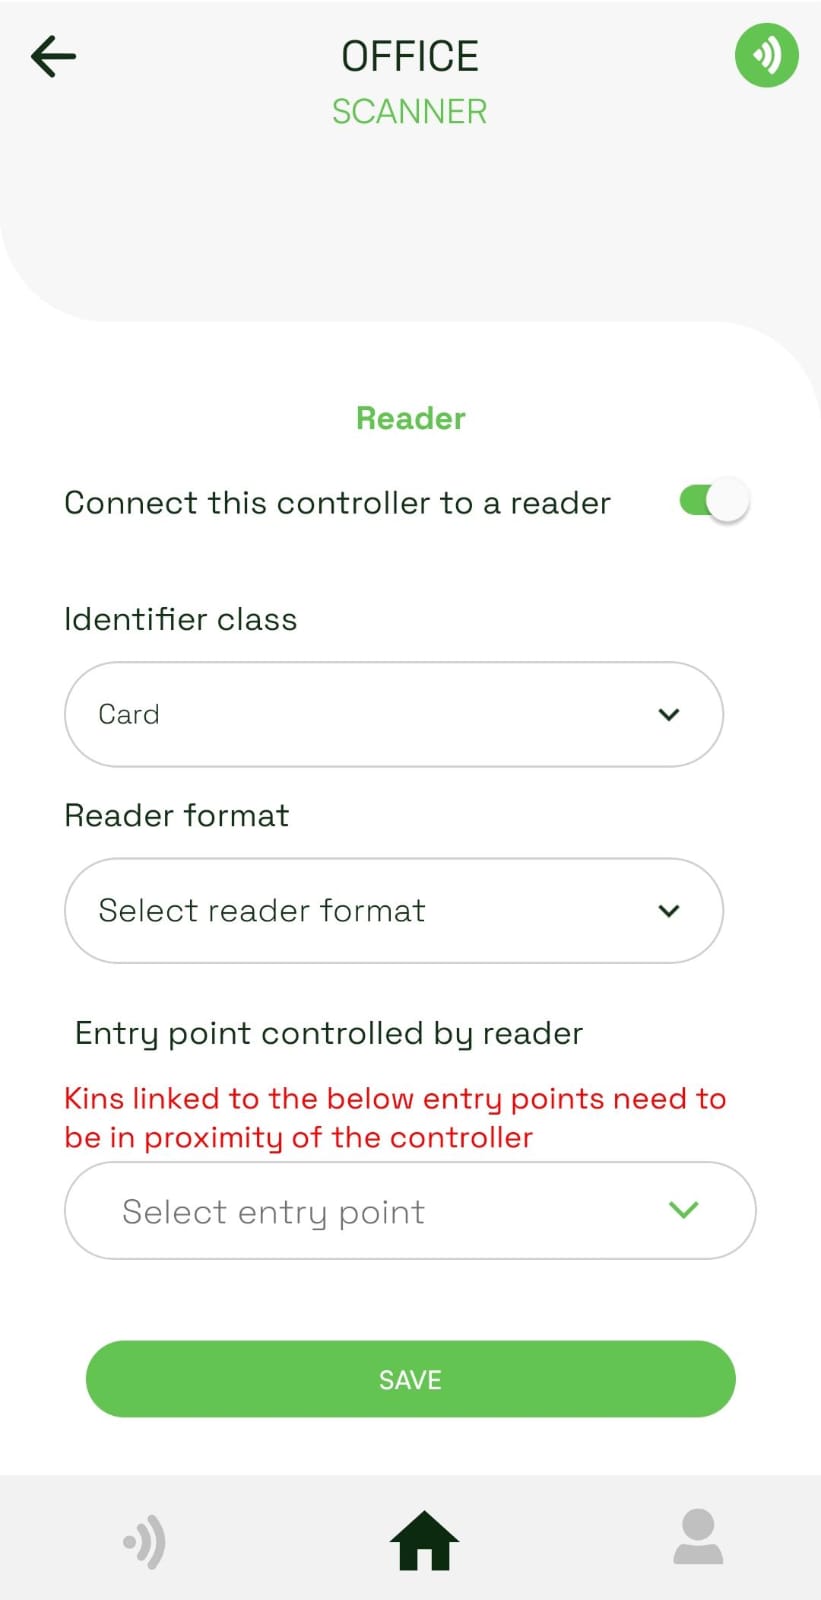
- After selecting a class, a “Reader Format” dropdown menu will appear.
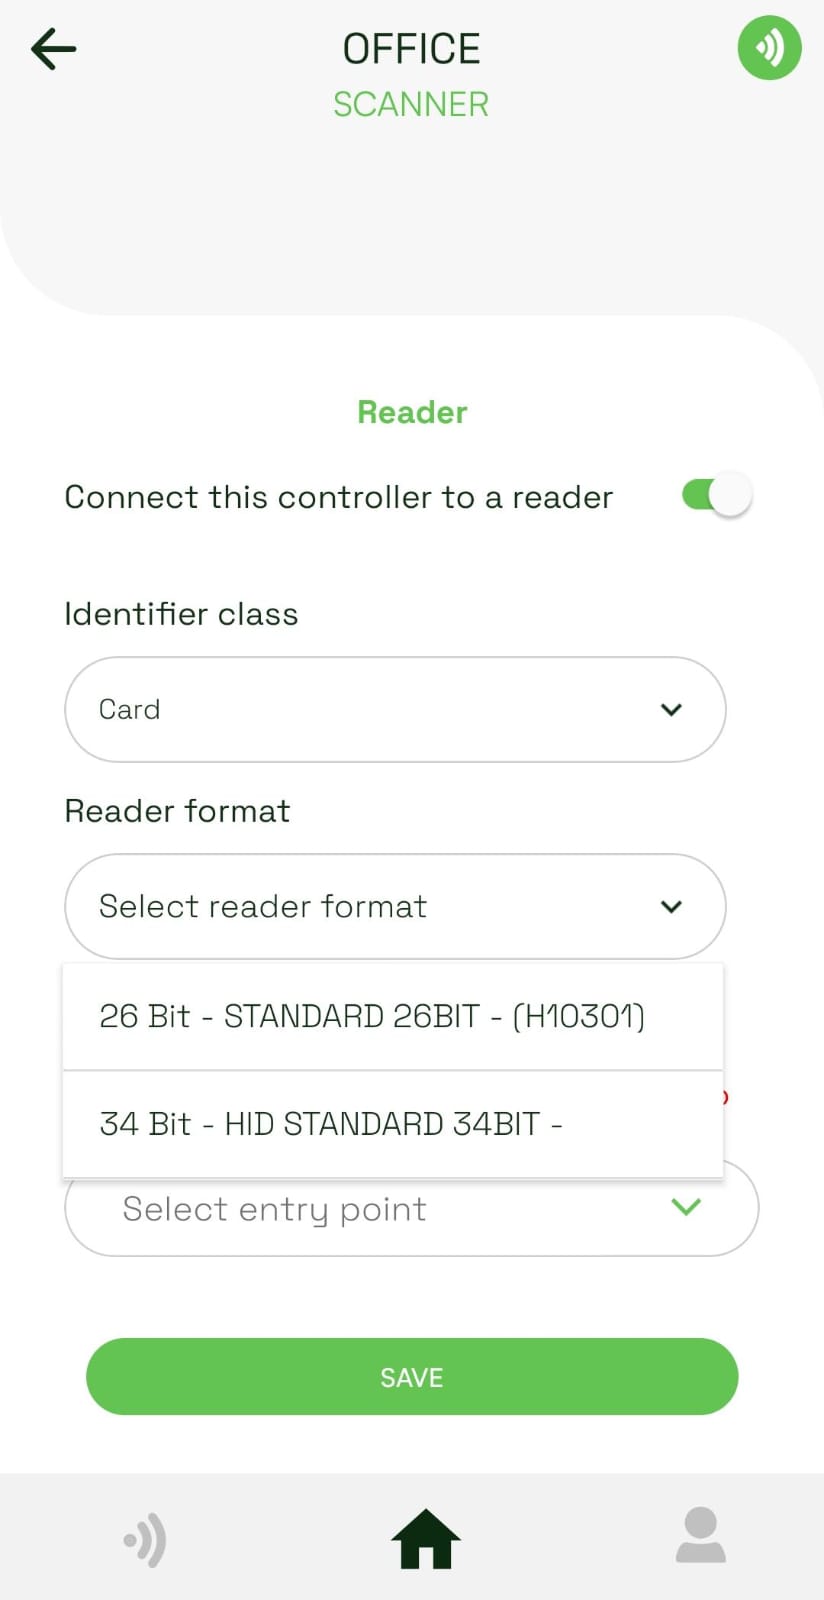
- Select the appropriate format for your reader.
- Tap the dropdown menu labeled “Identifier Class.”
-
Select an Entry Point:
- Tap the dropdown menu labeled “Select Entry Point.”
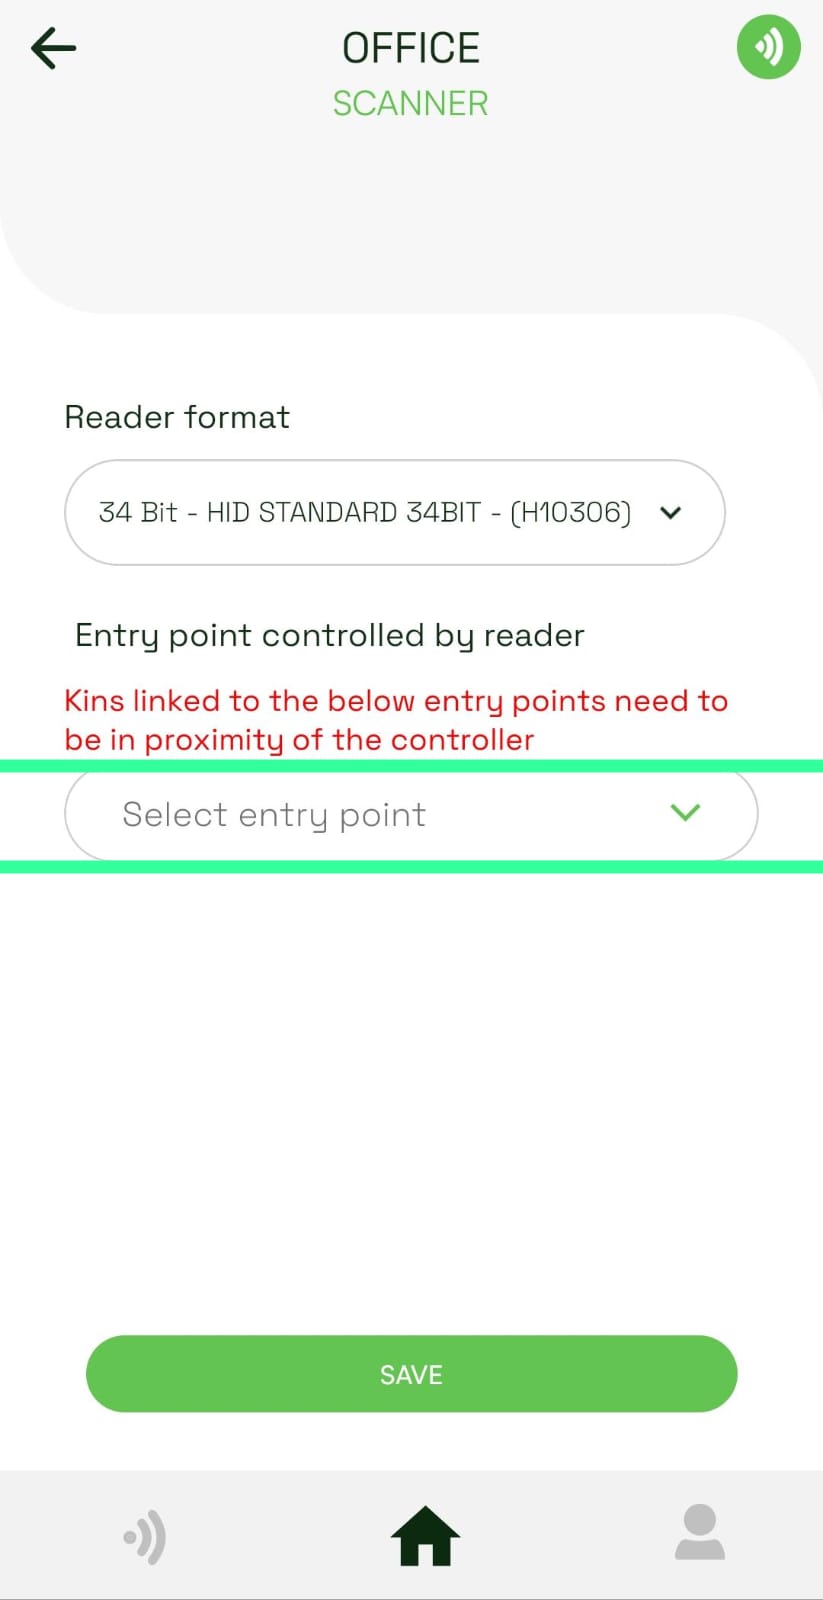
- Start typing the name of the entry point, or scroll through the list to find it.
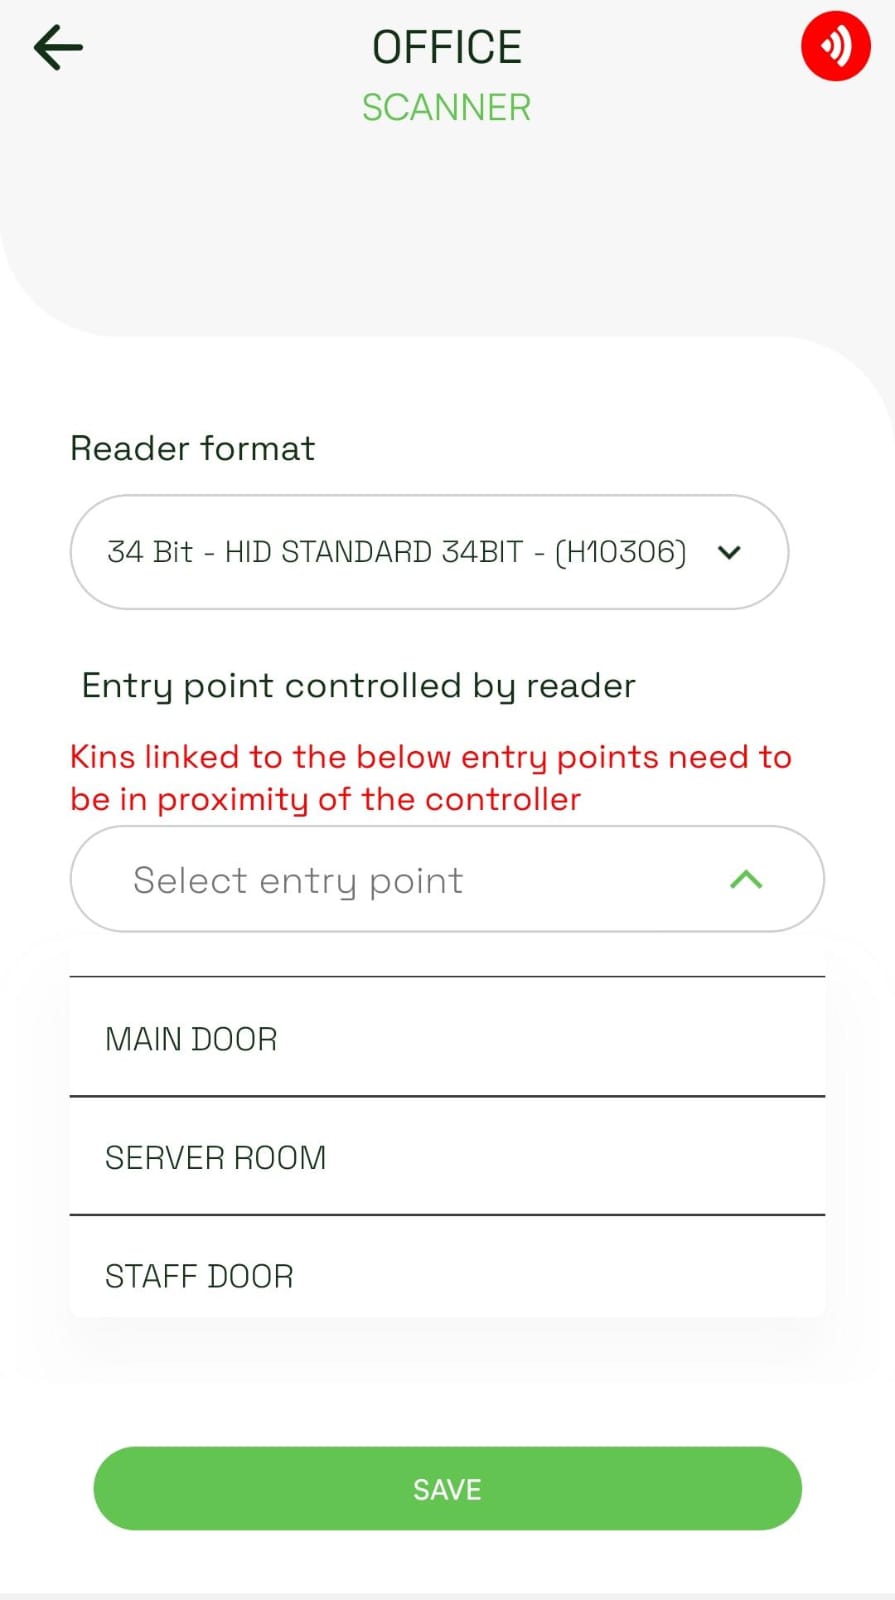
- Select the entry point you want to link to the reader.
- Tap the dropdown menu labeled “Select Entry Point.”
-
Confirm Selection:
-
The entry point will be shown in the dropdown.
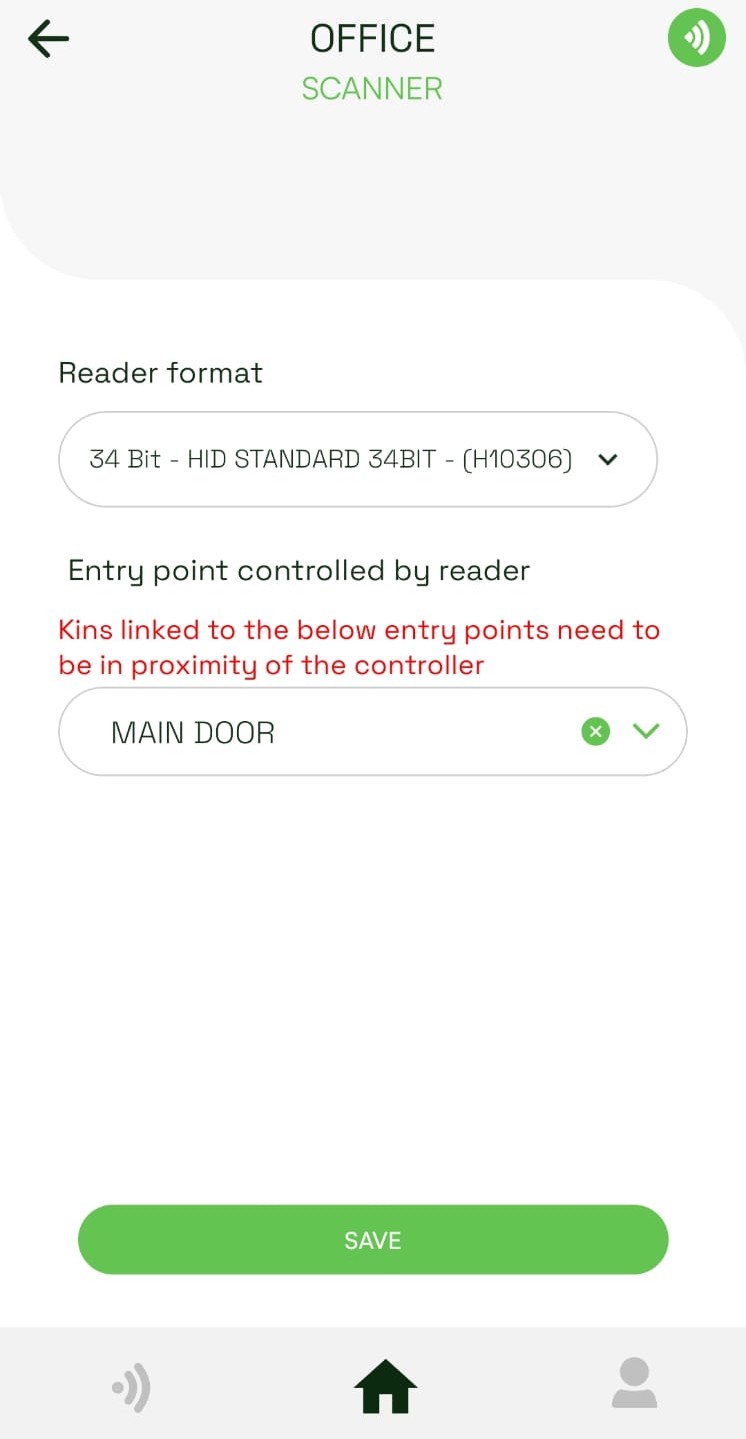
-
If you want to clear your selection, tap the clear icon.
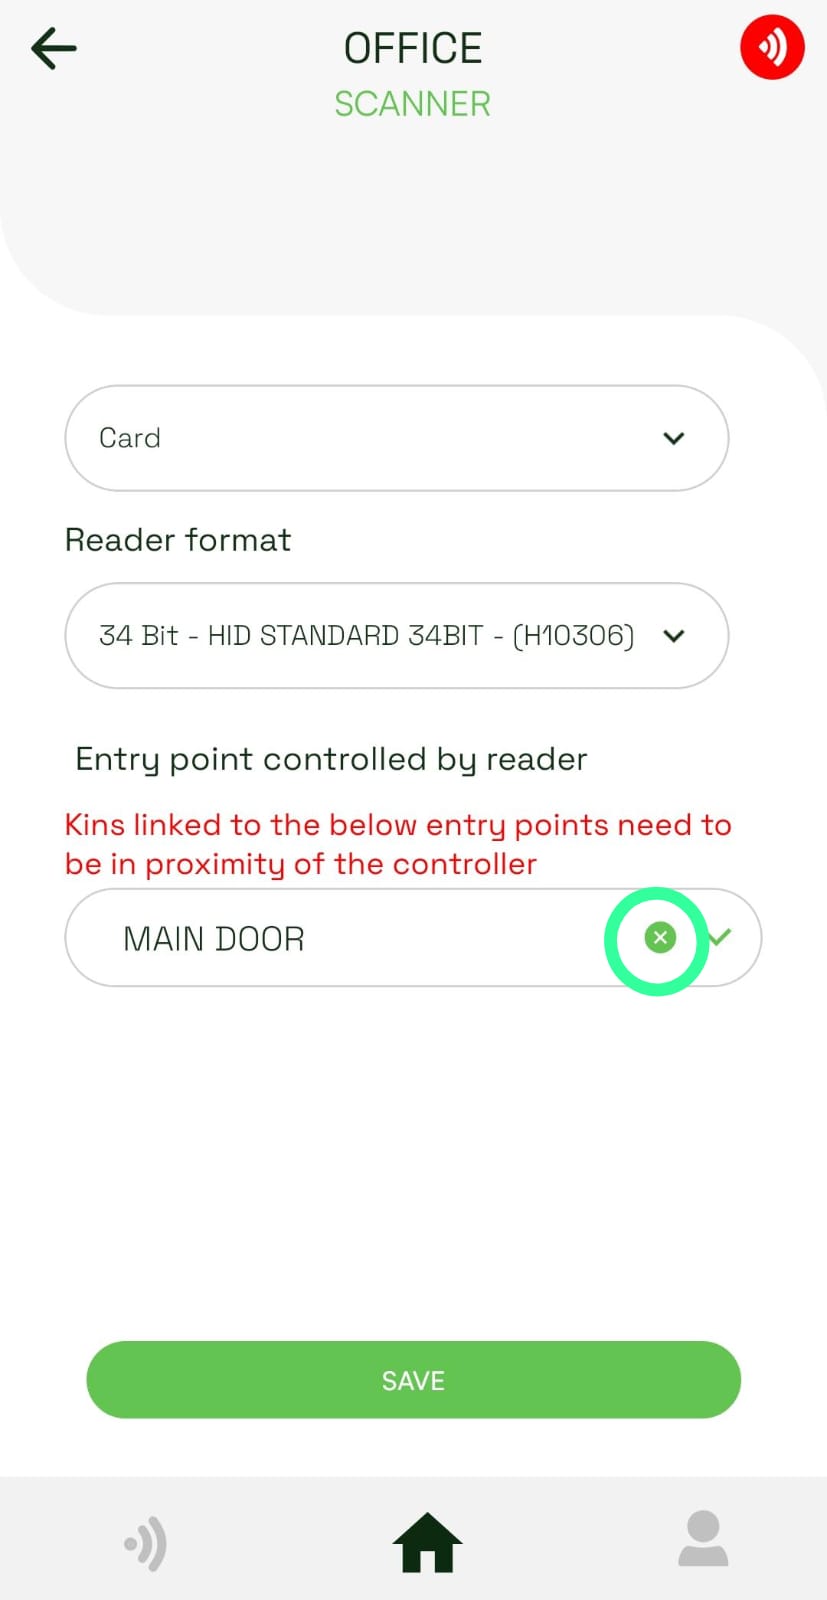
-
The entry point will be shown in the dropdown.
Site User Identifiers Management
What is this page?
This page allows you to view and manage the identifiers assigned to a specific user on your site. You can see all identifiers linked to the user, add new ones, or remove existing identifiers. Note that adding identifiers alone does not grant the user access to activate entry points; you must also manage their access rights.
How do I reach this page?
- Navigate to your site’s User List.
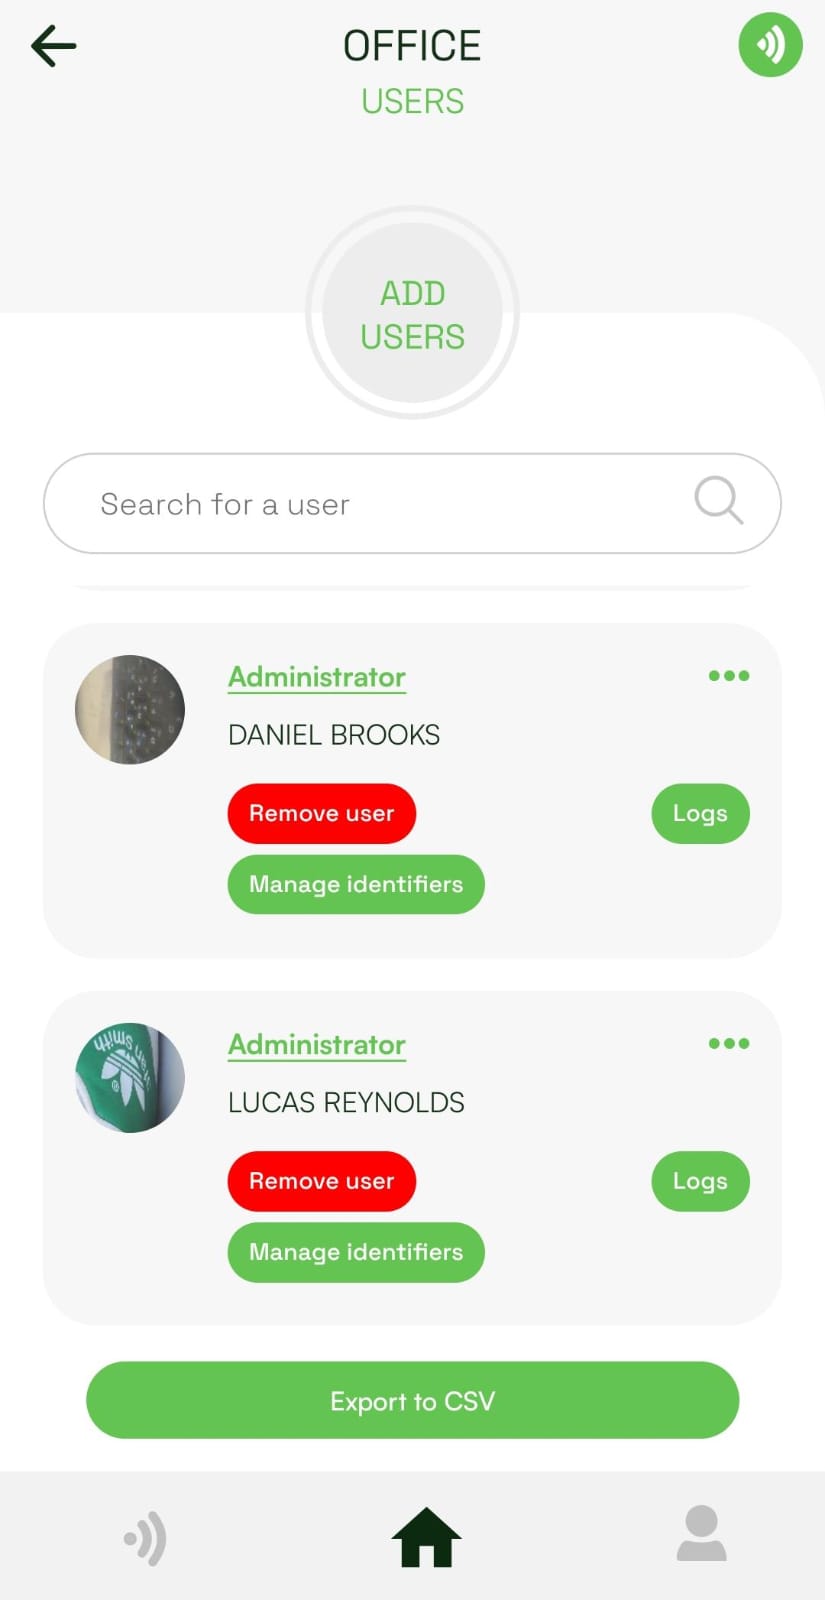
- Search for the user you want to manage.
- Tap “Manage Identifiers”
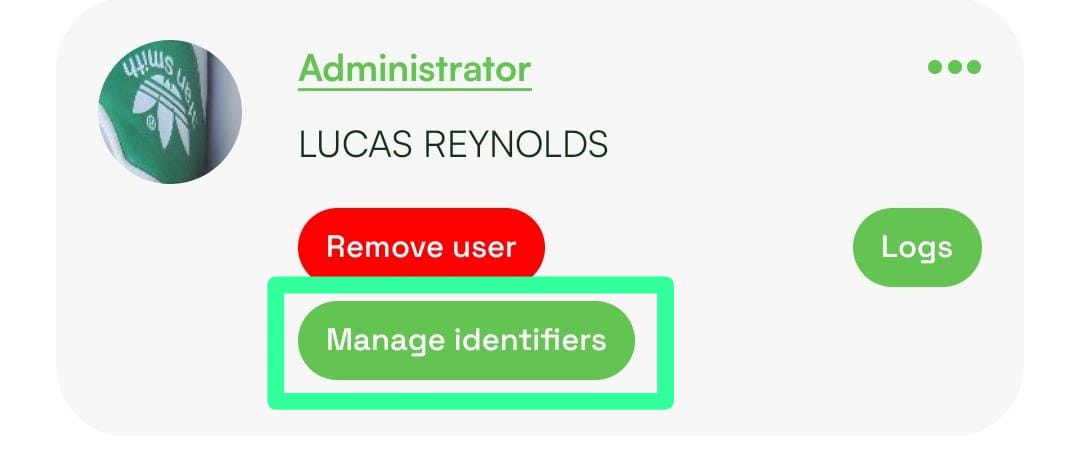
What actions can be performed on this page?
-
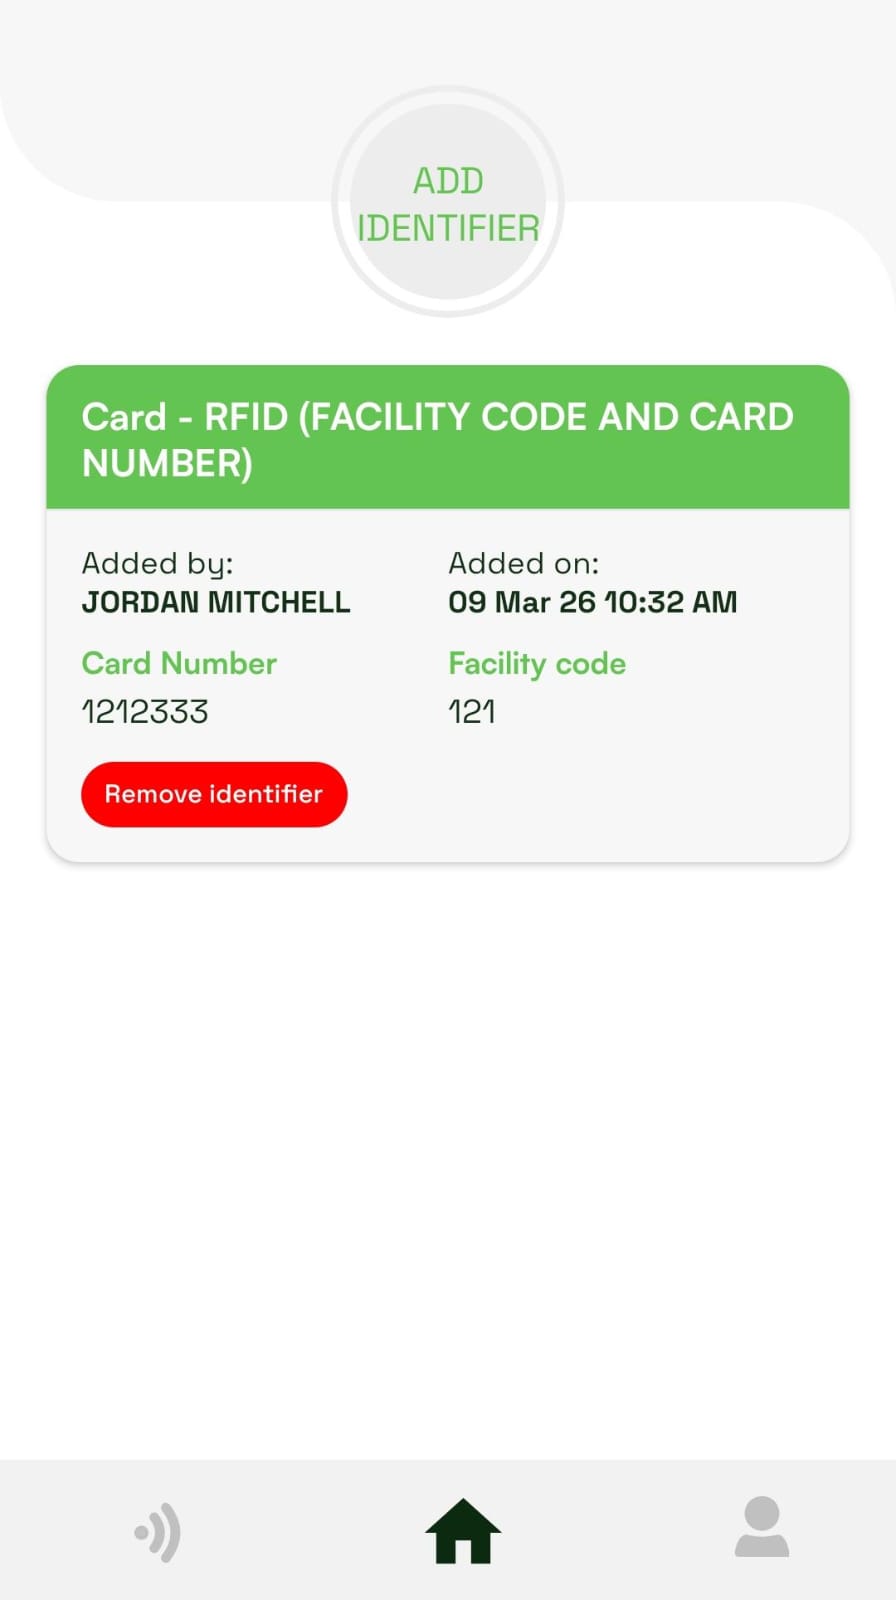
View User Identifiers
- You’ll see a list of all identifiers assigned to the selected user.
- Each row shows:
- The identifier class and type.
- Who added it and when.
- Details about the identifier fields (like number, code, etc.).
-
Add a New Identifier
- Tap the “Add Identifier” button at the top.
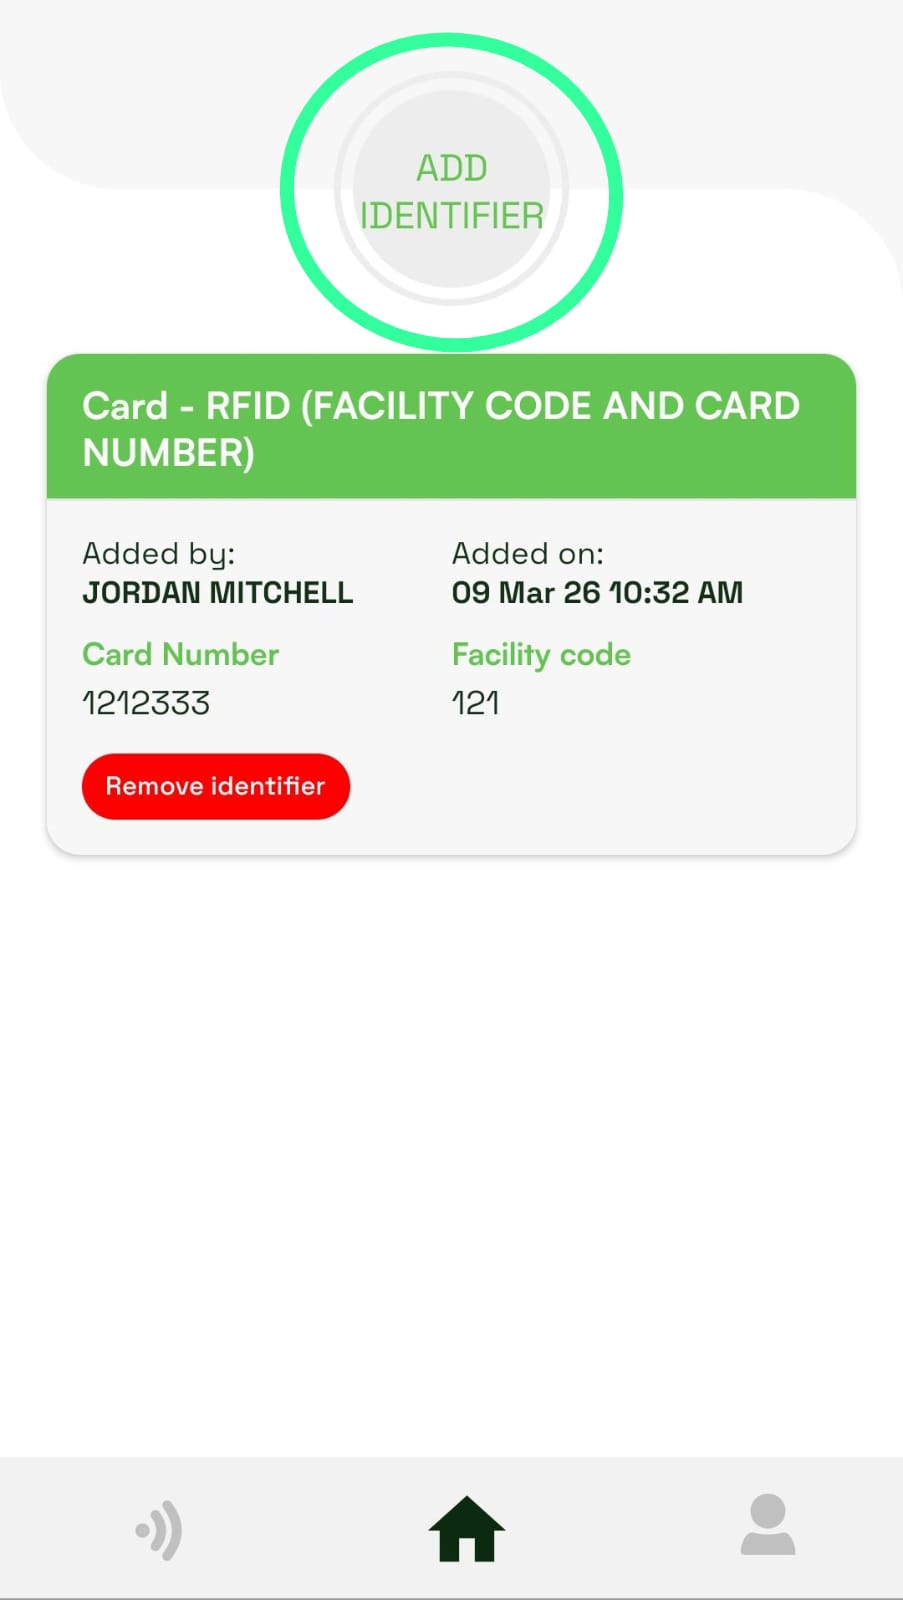
- Follow the on-screen prompts to select and add a new identifier for the user.
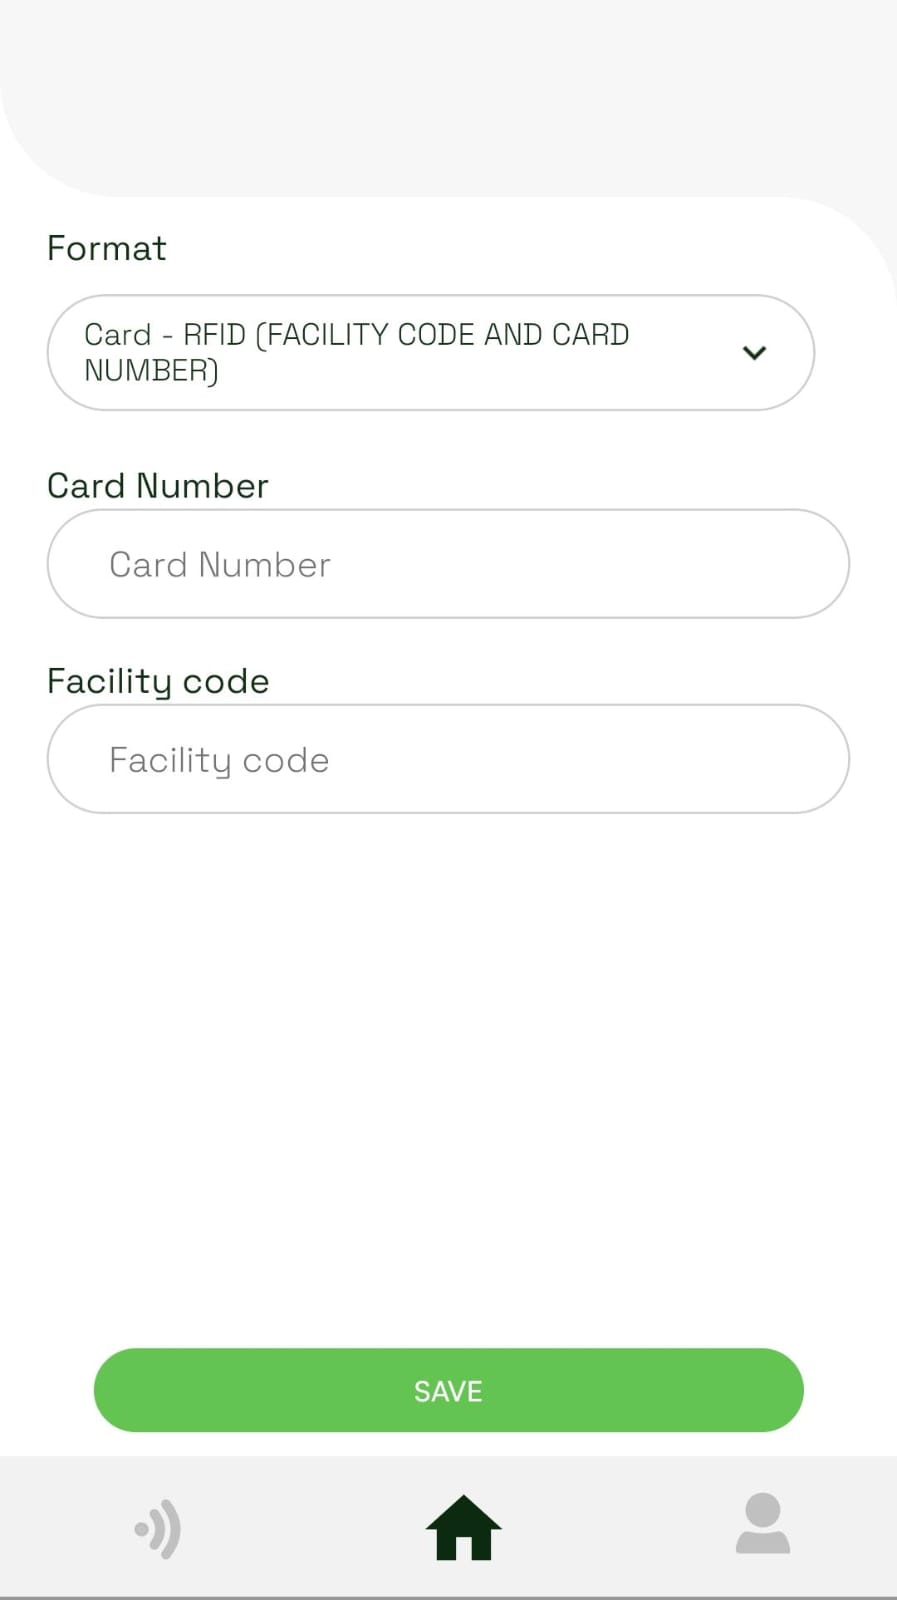
- Tap the “Add Identifier” button at the top.
-
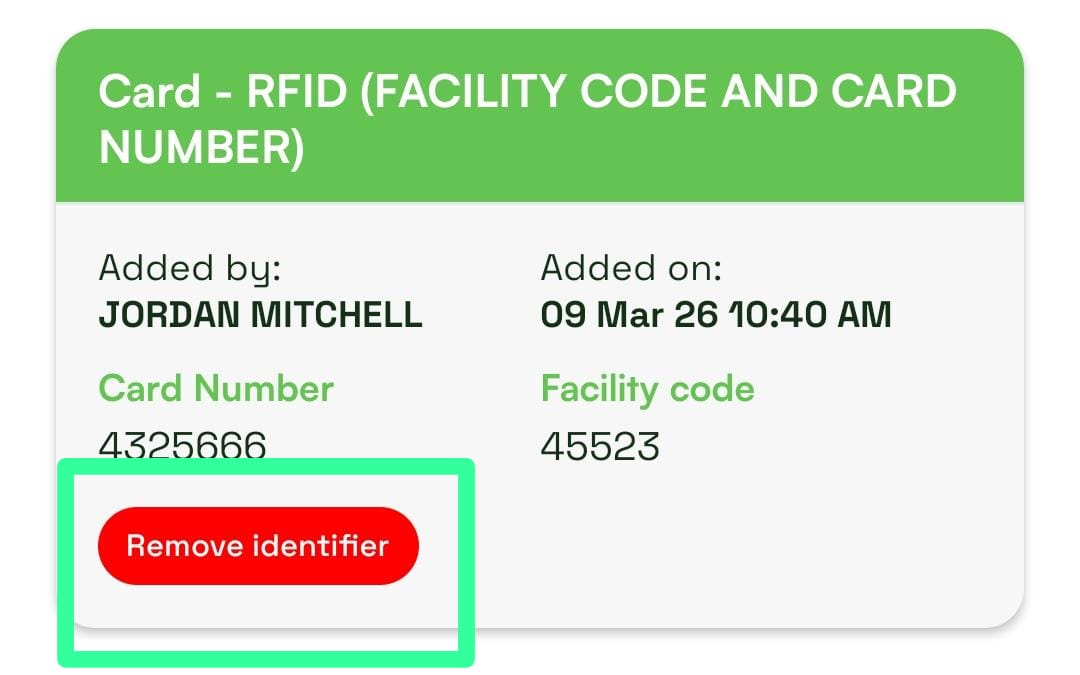
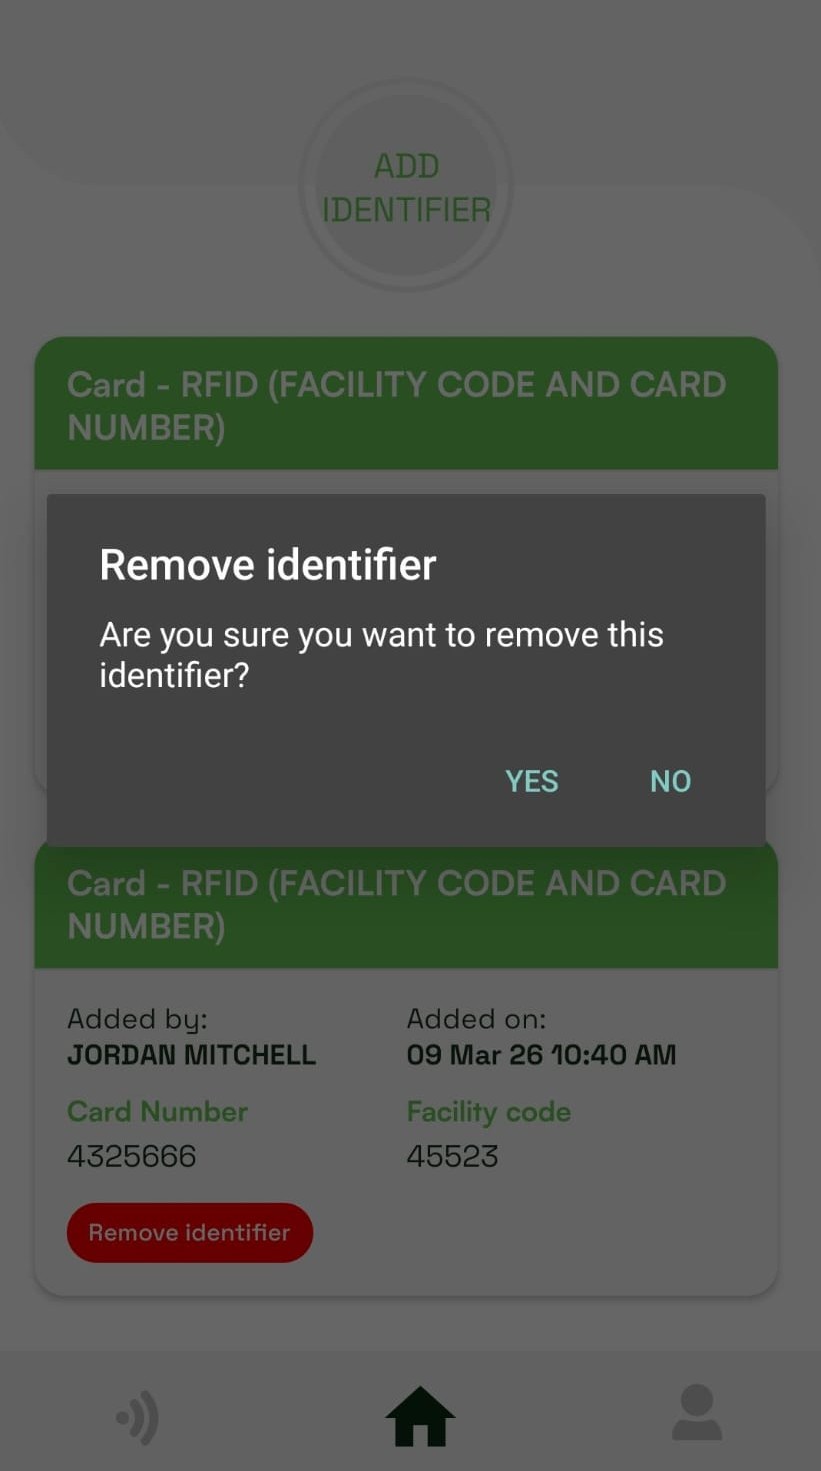
Remove an Identifier
- Find the identifier you want to remove in the list.
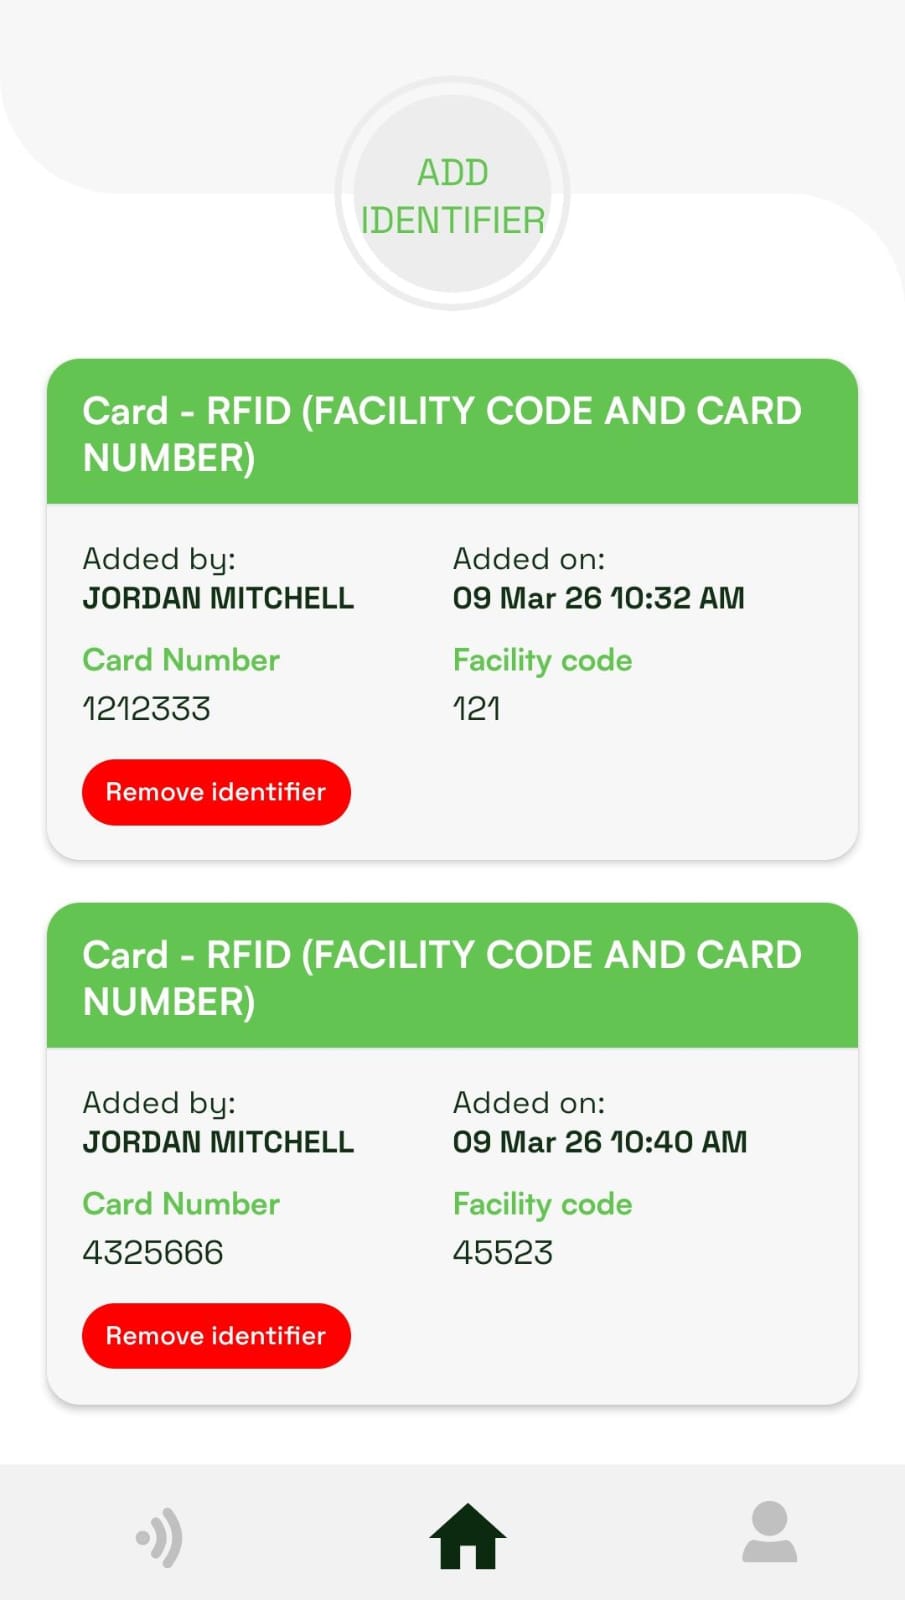
- Tap the “Remove Identifier” button.
- Confirm the removal in the popup.
- Find the identifier you want to remove in the list.
▼v.6.0.3
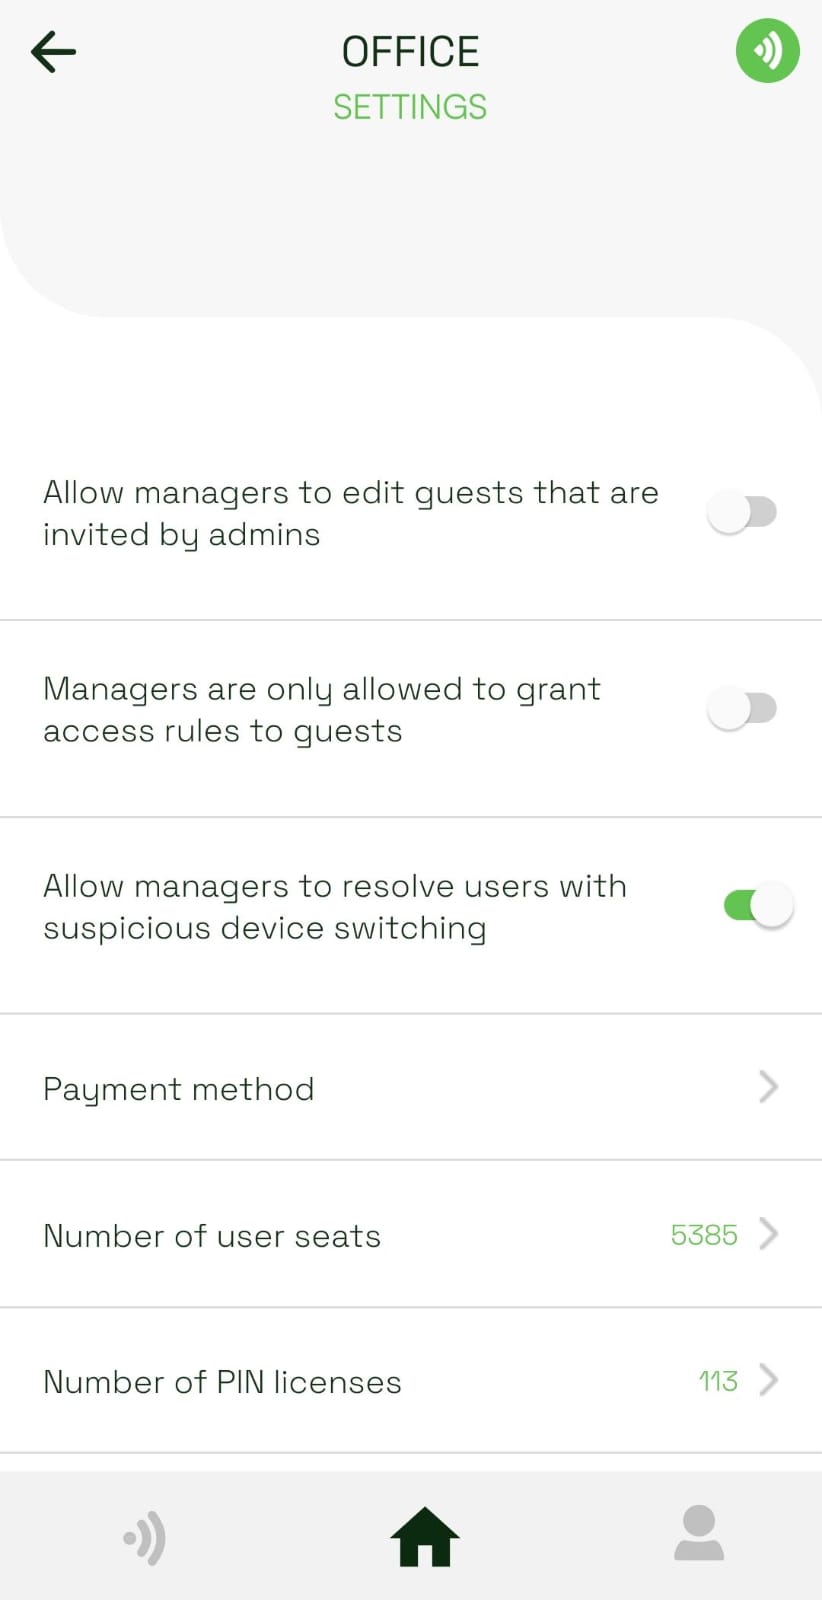
30-12-2025In the site settings, the ability for site managers to resolve suspicious user cases can be enabled or disabled. This action must be performed by a site administrator. By default, site managers are not allowed to resolve suspicious user cases.
▼v.6.0.2
04-12-2025Bulk user invitations now support adding users as temporary users.
Suspicious User Activity Detection
We have introduced a new feature that enhances the visibility and control over user Suspicious User Activity. This feature helps identify users who access entry points within a site from multiple recurring devices, which may indicate irregular or risky behavior.
Example
- User opens a door within site S using Device A
- The same user opens a door within the same site S using Device B
- Then the same user opens a door within the same site S using Device A
This pattern will automatically flag the user as suspicious.
Where to Access This Feature
You can access the Suspicious User Detection section directly from the site dashboard. It will appear as a chart titled “Users with suspicious device switching”, which gives an overview of users who may require attention.
Understanding the Suspicious Users Chart
In the Suspicious Users section, you will find a dedicated chart specifically designed to highlight user device-switching behavior. This chart is divided into three categories:
- Users with unresolved device switching
- Users with resolved past device switching
- Users flagged as permanently resolved
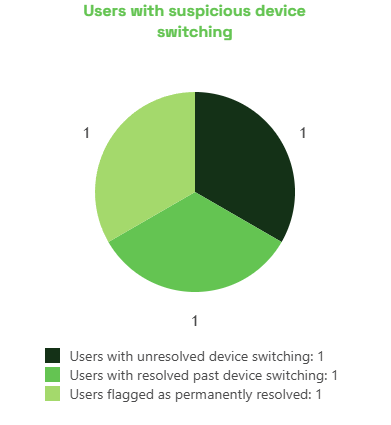
You can access more details about the users by clicking on a segment of the chart or the corresponding label in the legend.
Next to each user you will see these action buttons:
- Remove User
- Check Logs
- View details
- Resolve (only available for users with unresolved device switching)
Additionally, you can export the user(s) data to a CSV file for further analysis or reporting.
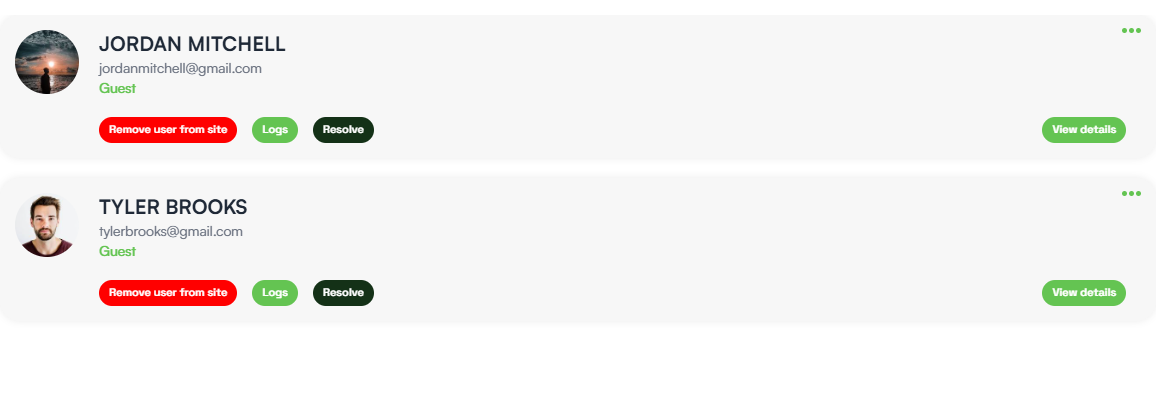
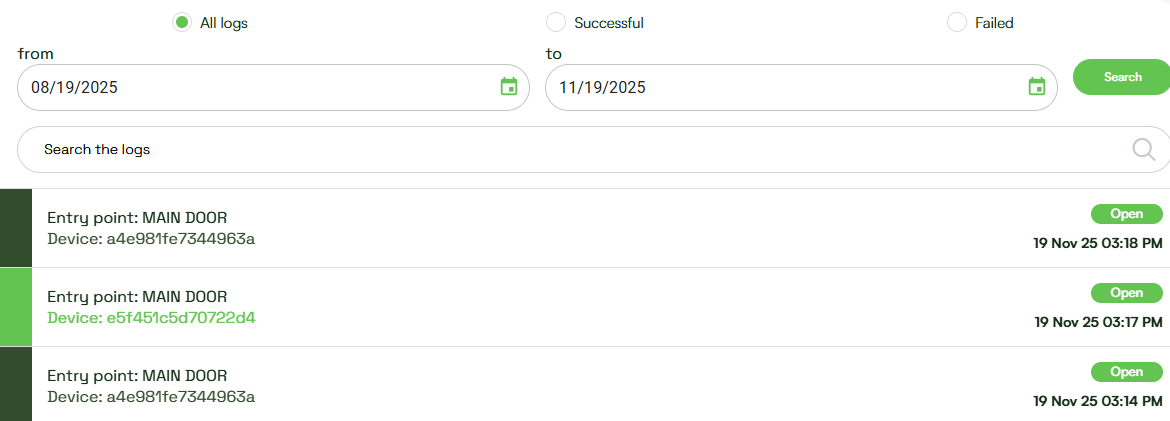
For users in the resolved or permanently resolved categories, the Resolve button will not appear, but you can still check their logs.
Inside the logs, each device used by a user is displayed in a different color, making it easy to understand access patterns and device-switching behavior. You can also export the user’s logs to a CSV file for further analysis or reporting.
Viewing User Details
When you click on the View Details for a given user, the following information will be displayed:
- Resolutions – Shows the history of resolutions applied to the user, including type, who resolved or unresolved them, and dates.
- Device Usage Timeline – Displays the user’s device activity, each device is represented by a color, first and last use dates, total commands, and which resolution each device is associated with.
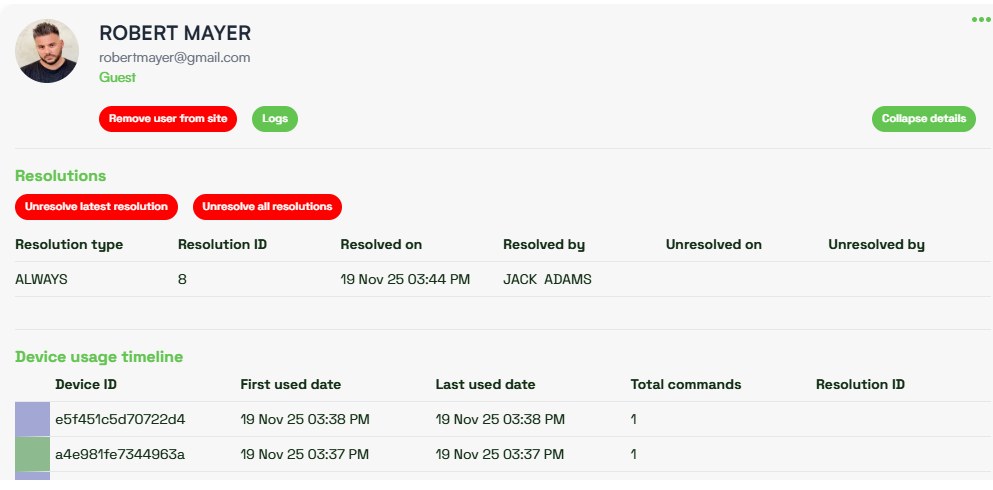
Resolving Suspicious Users (Can be done only by Admins)
Admins can resolve suspicious users in two ways, after entering the “Users with unresolved device switching” segment of the chart (or selecting its corresponding color in the legend):
- Resolve always – Permanently resolves the user. They will never be flagged again.
- Resolve for the past – Temporarily resolves the user. If they repeat the switching pattern (A → B → A), they will be flagged again.
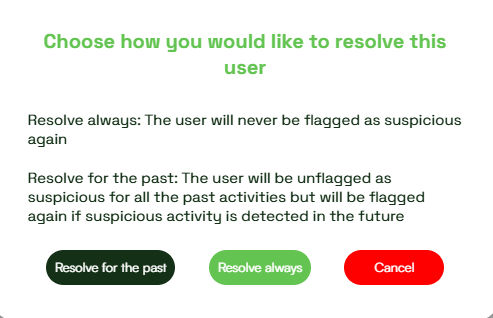
After resolving users, the “Users with suspicious device switching” chart updates automatically to reflect the current status of unresolved, temporarily resolved, and permanently resolved users.
Unresolving Users (Can be done only by Admins)
Admins can also reverse a previous resolution. To do this, go to the “Users with resolved past device switching” or “Users flagged as permanently resolved” segments in the chart, and click on a user to view details. There are two types of unresolve actions:
-
Unresolve Latest Resolution
- Reverts only the most recent resolution applied to the user.
- Previous resolutions (if any) remain intact.
- The user may become suspicious again if their device-switching pattern meets the criteria.
-
Unresolve All Resolutions
- Clears all resolutions for the user, including temporary and permanent ones.
- The user will be fully treated as unresolved and will appear in the “Users with unresolved device switching” category again.
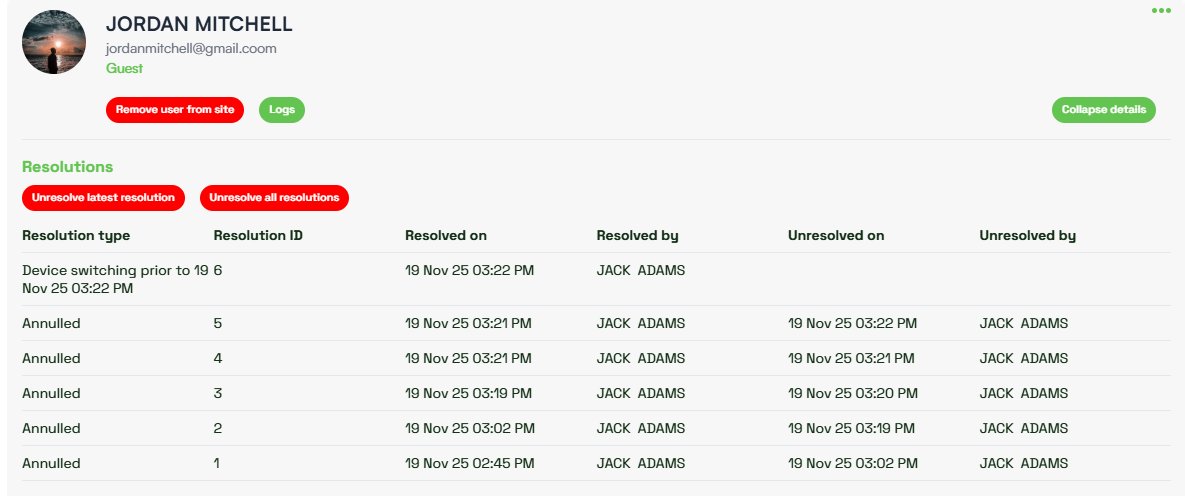
After unresolving users, the “Users with suspicious device switching” chart updates automatically to reflect the current status of unresolved, temporarily resolved, and permanently resolved users.
Automatic Background Scanning & Alerts Process
Kindoo now runs a background scan every 24 hours to detect users with recent suspicious activity.
If any suspicious activity is detected within the past 48 hours, the system will send an email to the site admins.
Any Kindoo user that is an admin of 1 or multiple sites in Kindoo will receive at most 1 email per day relating to suspicious behaviors. This email will include a recap of all their sites that have suspicious users that are unresolved with last access date and total number of suspicious users in each site.
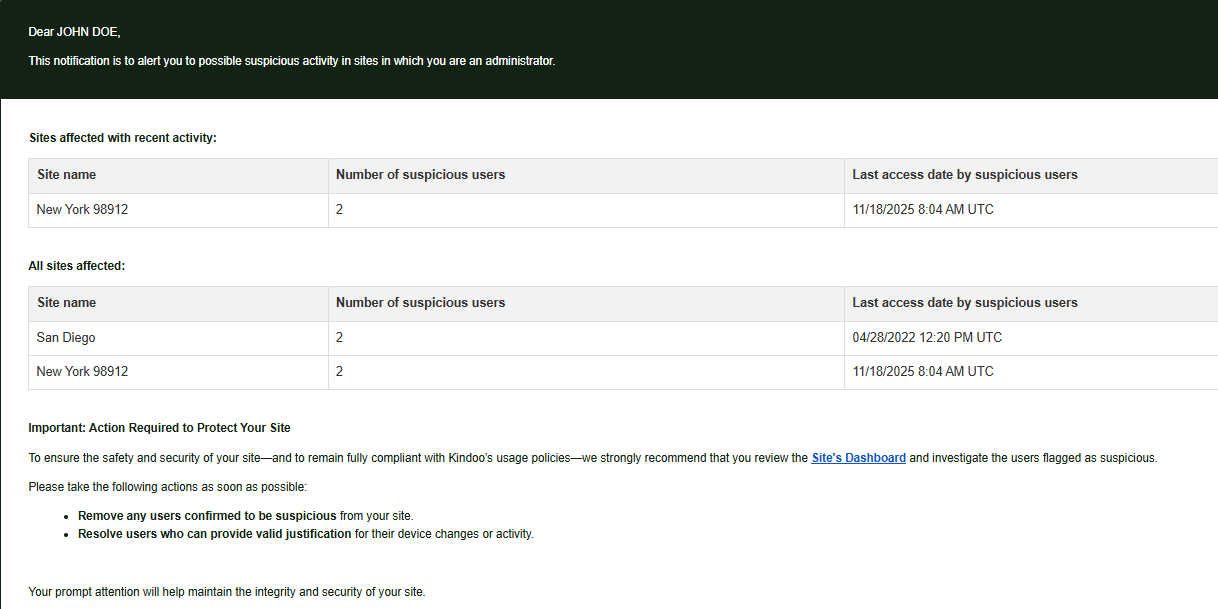
▼v.6.0.1
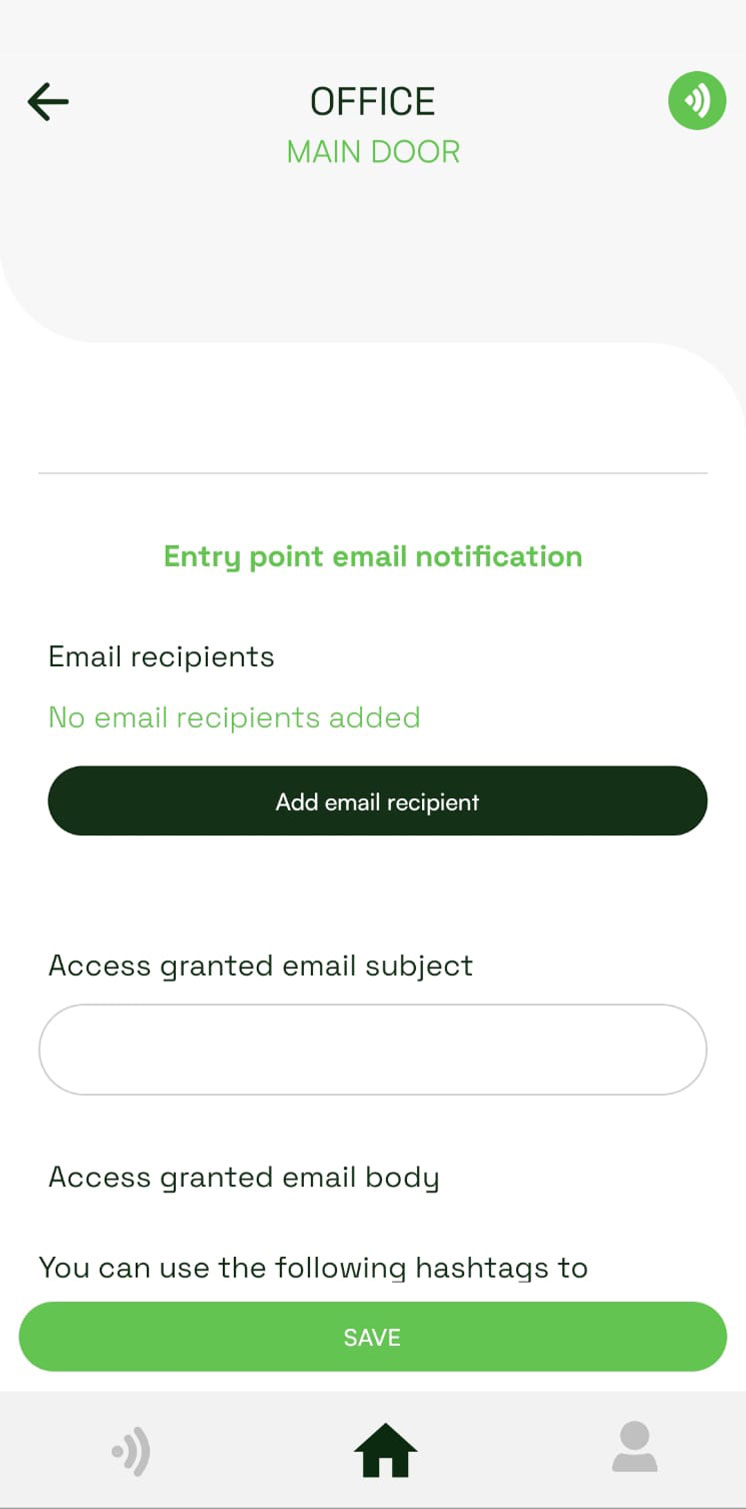
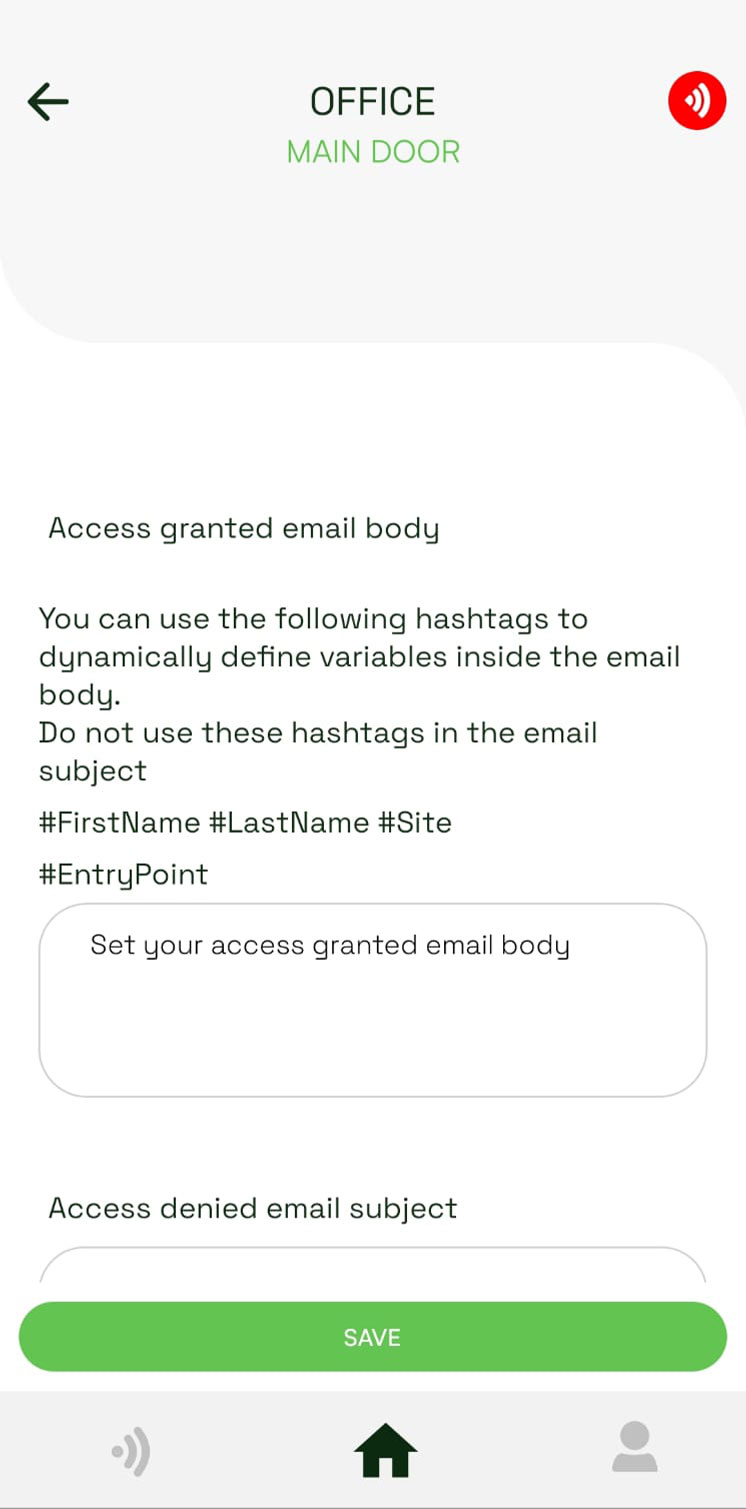
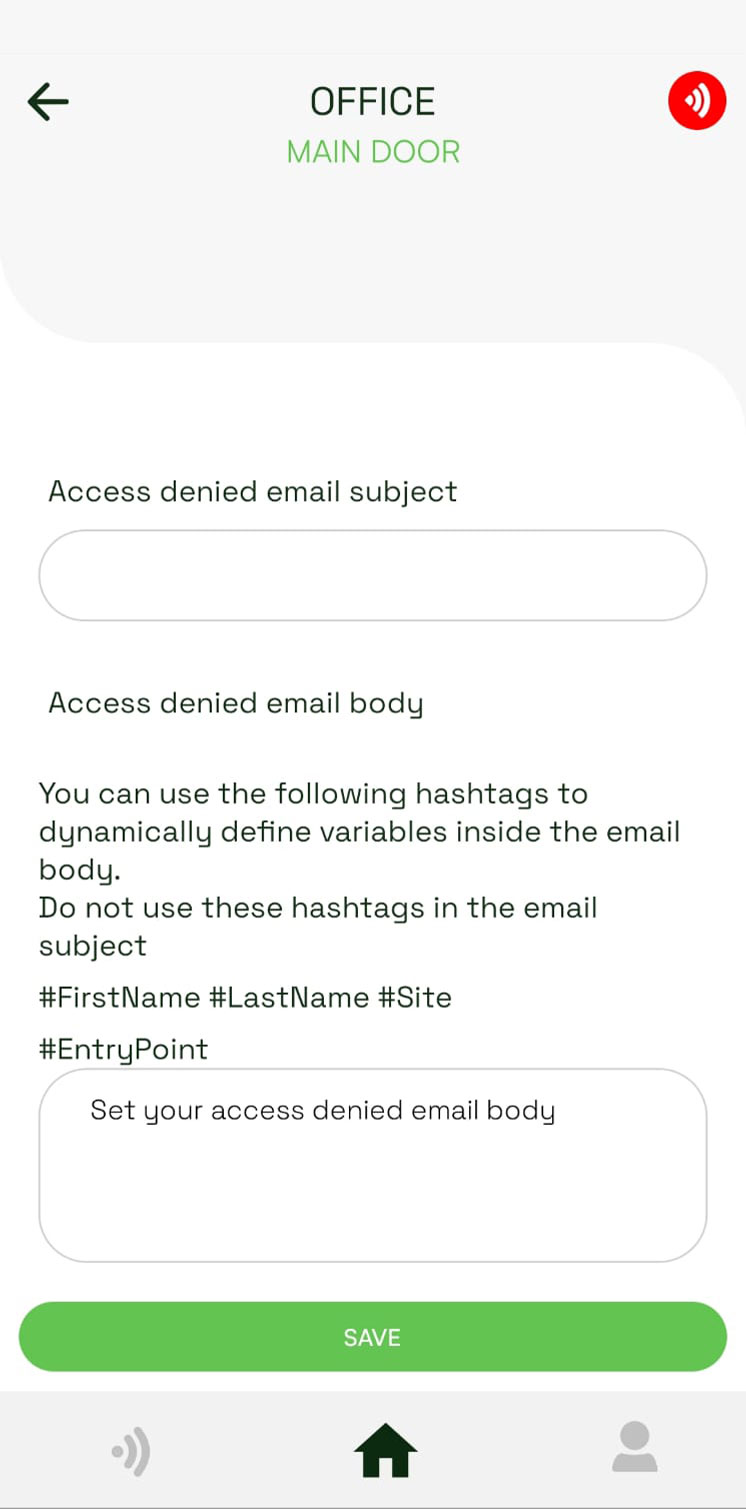
24-10-2025In the Entry Point settings, you can now enable event notification by email that will be sent out to a list of recipients (limit 5). The body and subject of the notification email can be customized for the Access Granted and Access Denied events.
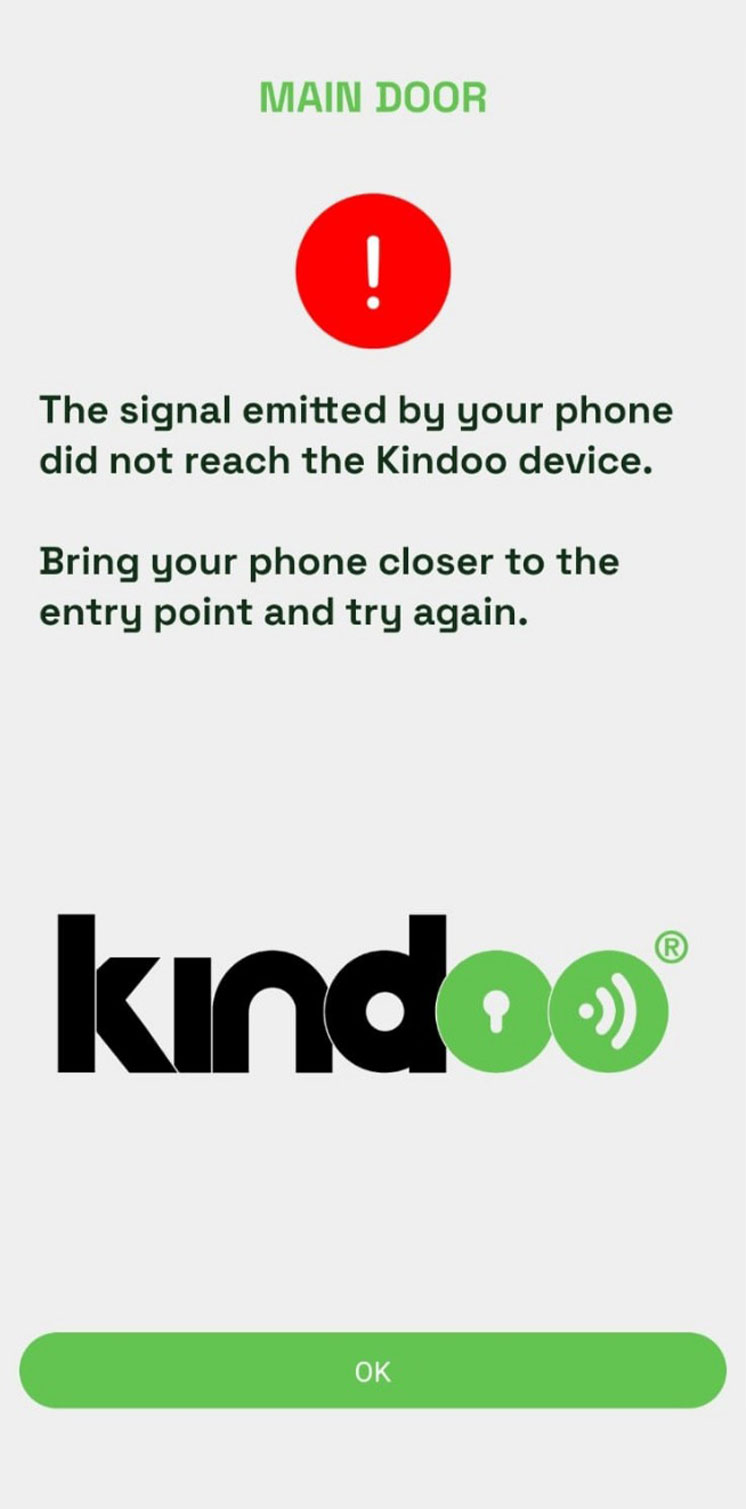
When issuing a command to an entry point, a validation step is now added that will notify the user if the command emitted by the phone reached the entry point recommending to get closer to the entry point in case of failure.
▼v.5.5.4
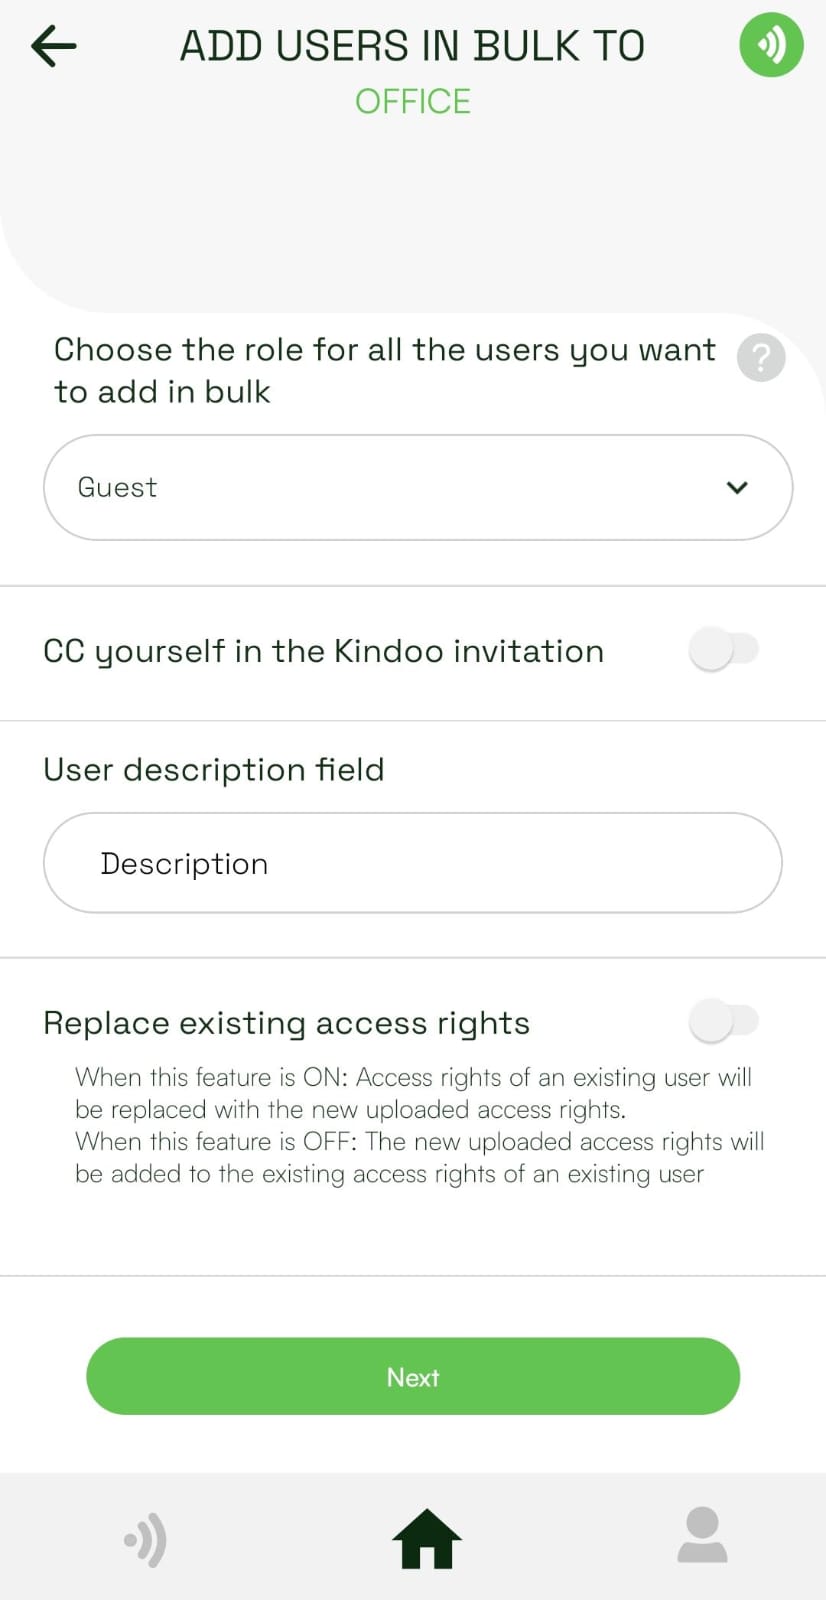
19-05-2025Users bulk upload edits the user information if the user already exists in the site. In addition, a switch button is now available to choose if the bulk upload should replace the access rights of an existing user or simply add new access rights to the previous existing access rights of the user.
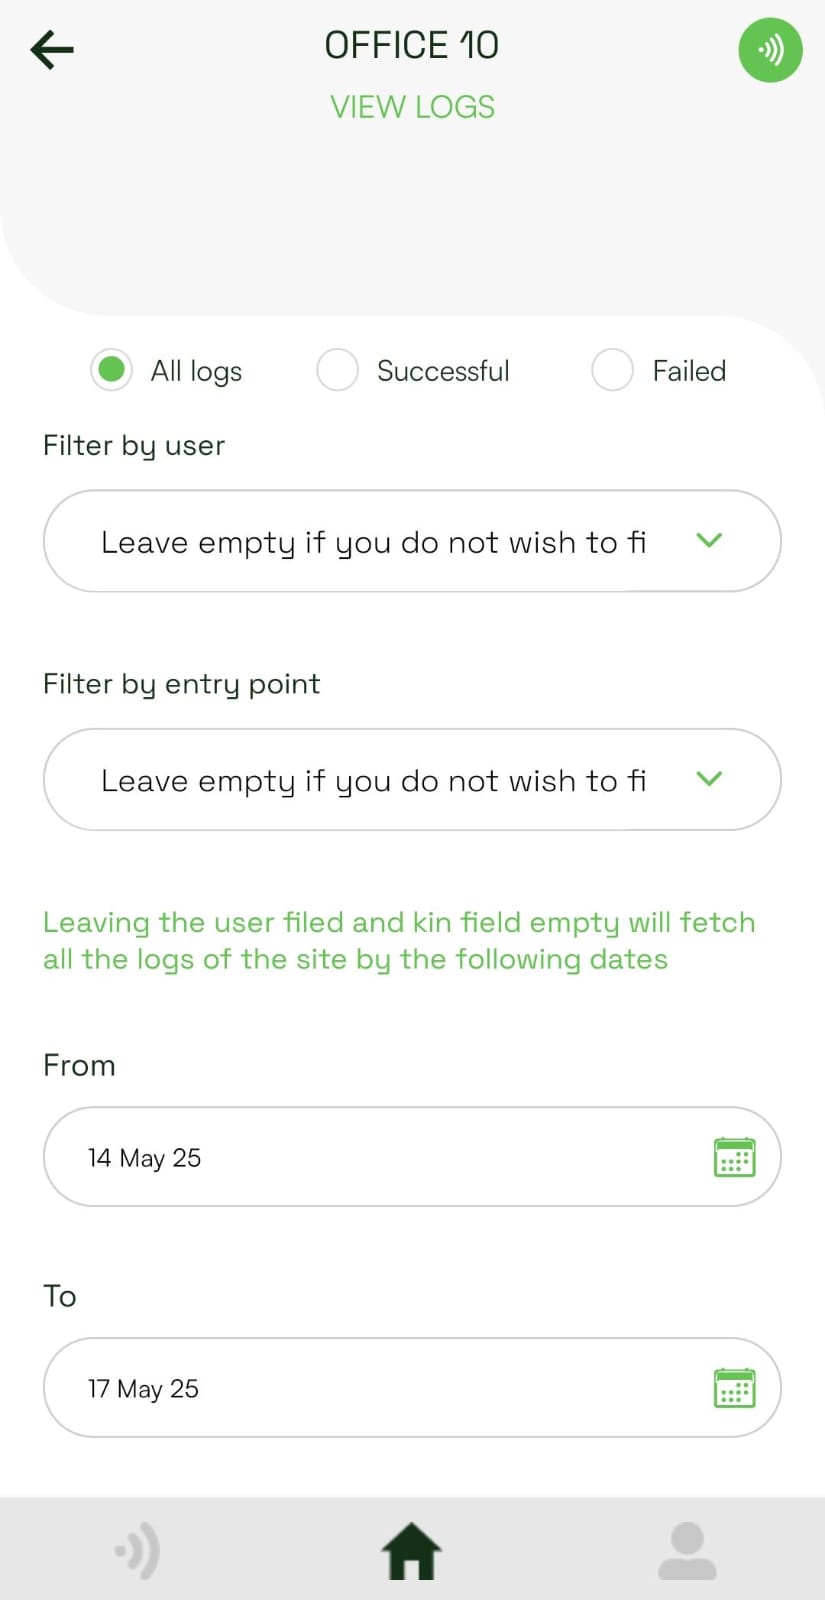
In the access logs view, we added 3 radio buttons (All logs, Successful, Failed). Only one can be selected at a time. The logs will be filtered according to the selected radio button.
When pressing on a log of a user not existing in the site, a modal popup will show the user profile picture, full name and email address. If the user account has been deleted from Kindoo, you will receive an alert that the profile has been deleted.
When pressing on a log of a user existing in the site with a role equal or less than your role, you will be redirected to the user's management page (admin can access all roles, manager can access manager, guests, installers).
When pressing on a log of a user existing in the site with a higher role than yours, a modal popup will show the user profile picture, full name and email address.
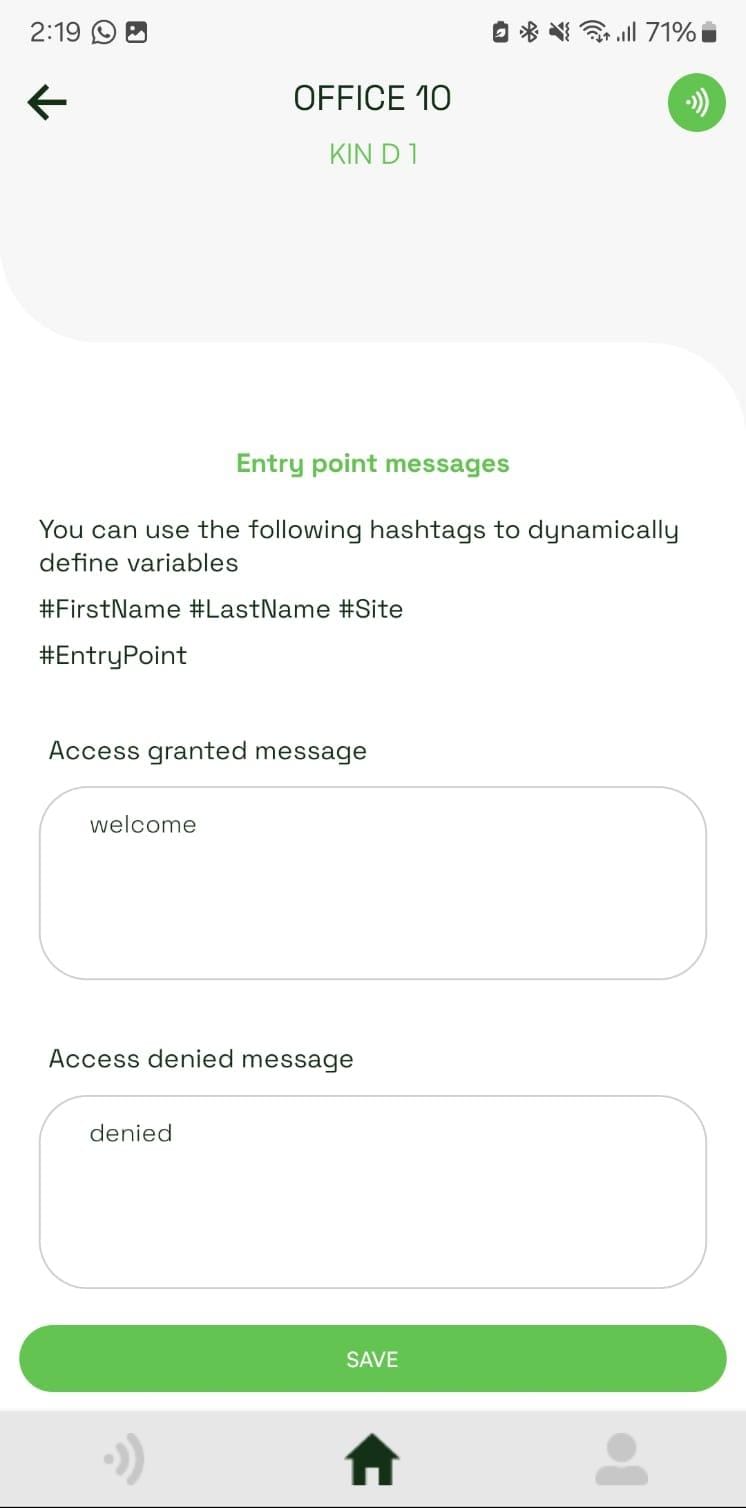
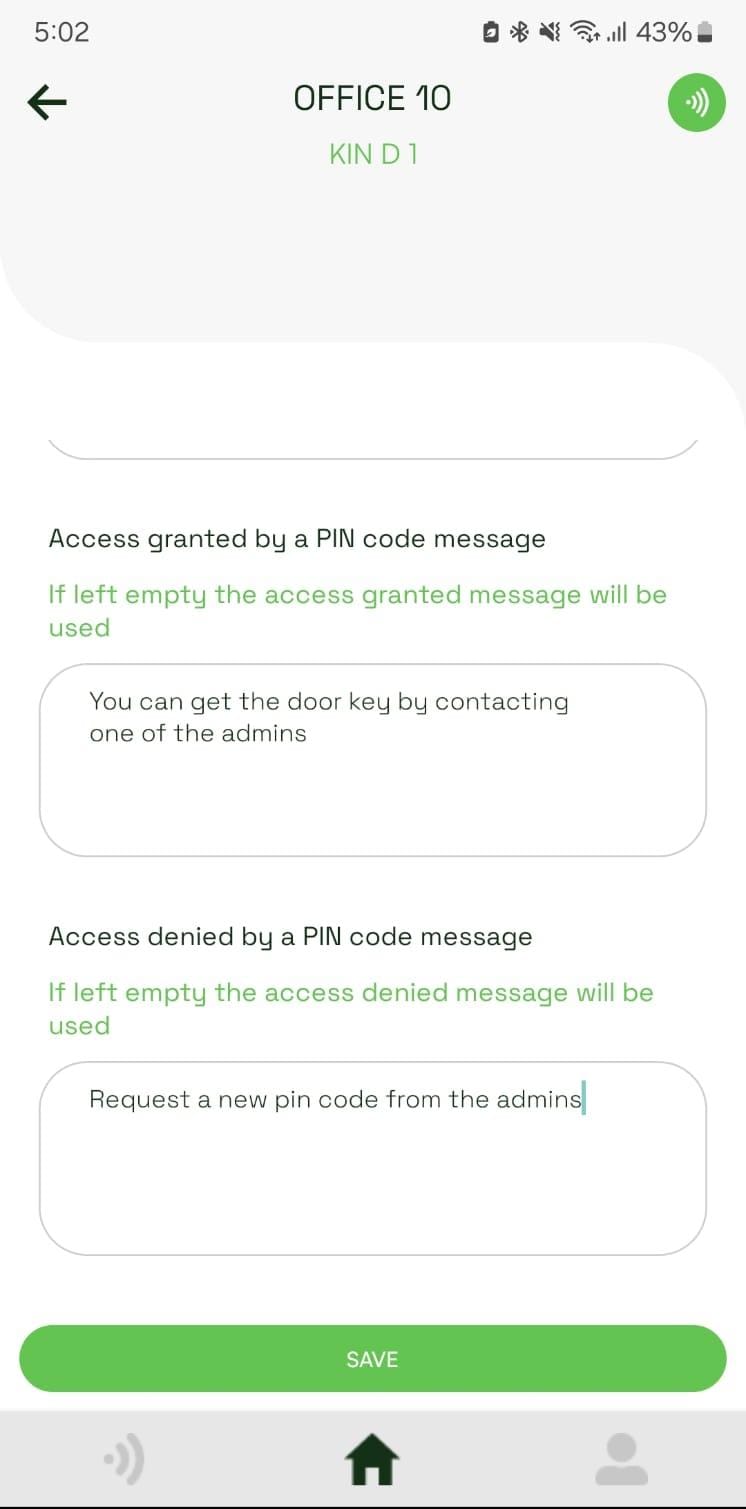
In the entry point settings, if the entry point contractor access is turned on, two new messages can be defined: Access granted by a PIN code message and Access denied by a PIN code message. If these inputs are left empty the entry point granted and denied messages will be used by default.
▼v.5.3.6
14-05-2025Introduction of new KIN hardware to the app
Compatibility with KIN S W01, KIN S B01, Controller 2.0, KIN H
Performance optimization
Bug fixing
▼v.5.3.5
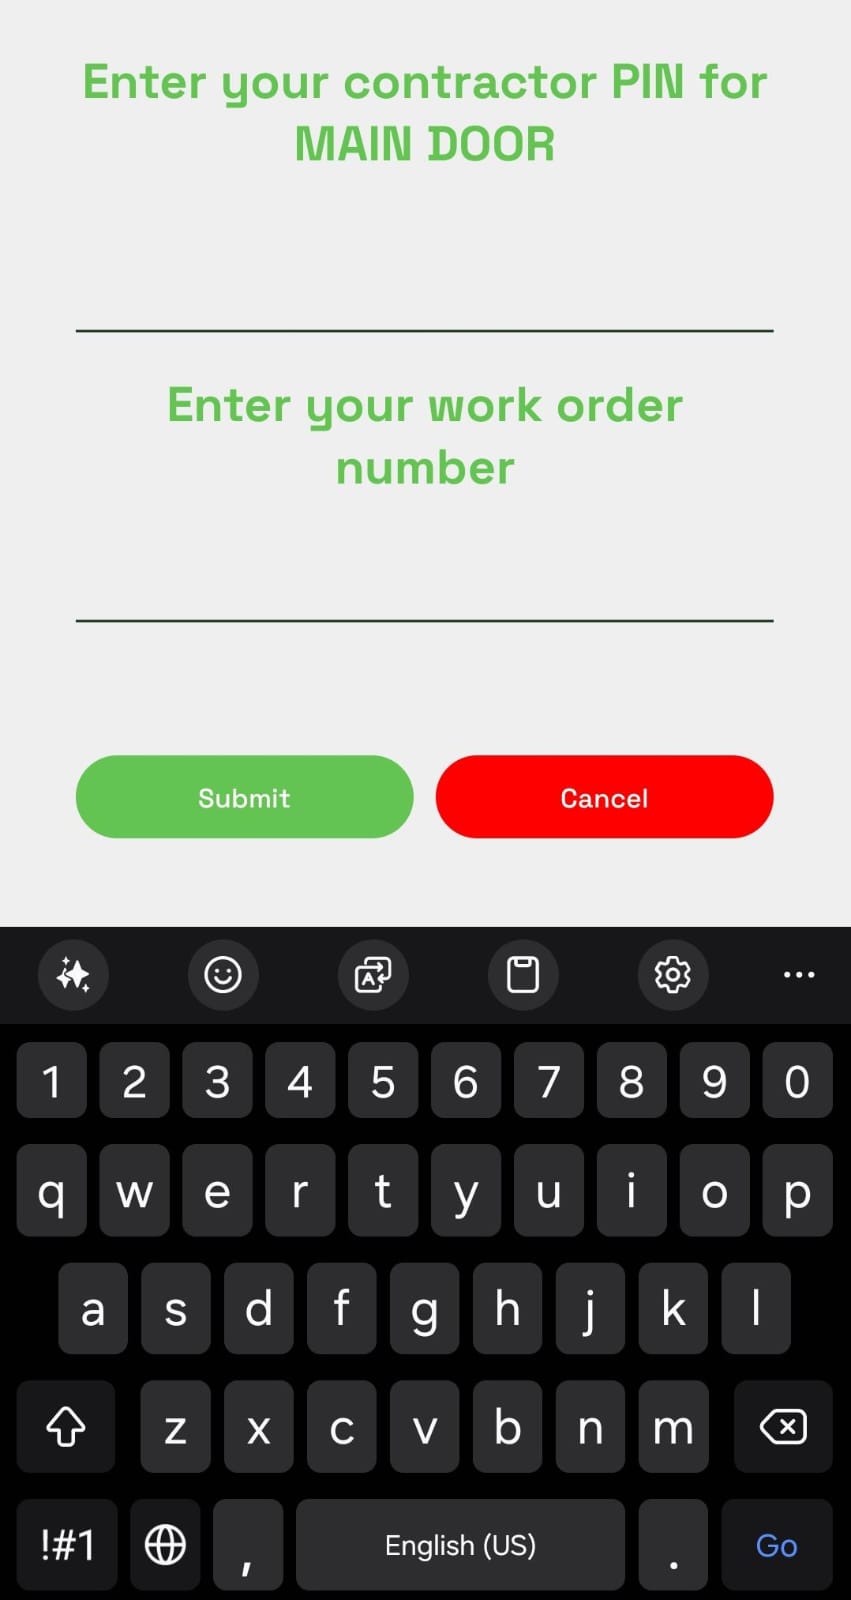
11-05-2024When issuing a command to a KIN with a PIN code, the user is able to enter a work order number
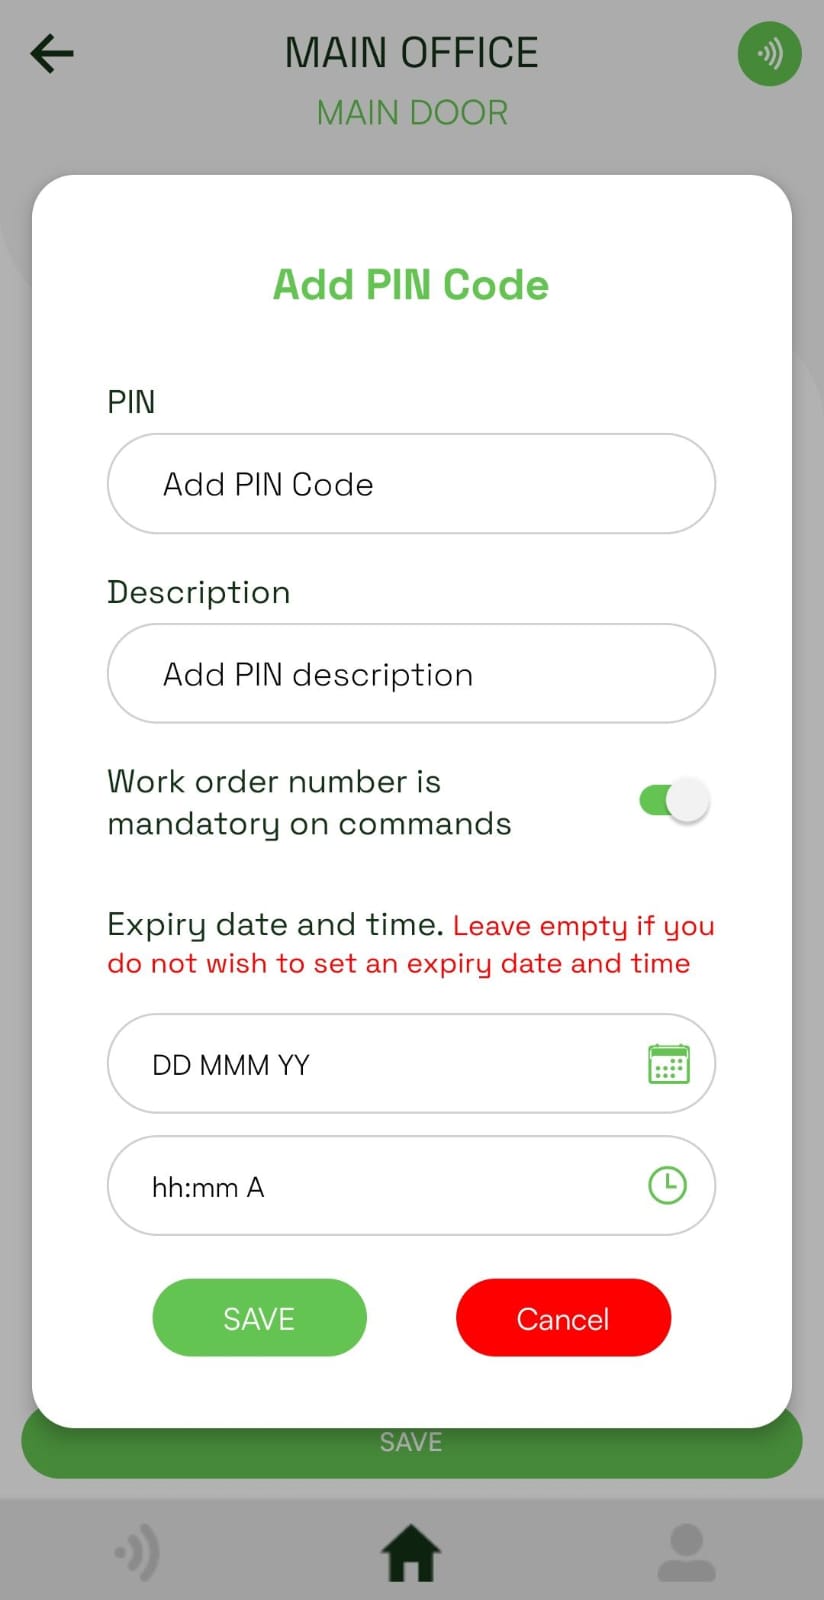
The ability to set the work order number as mandatory on selected PIN codes
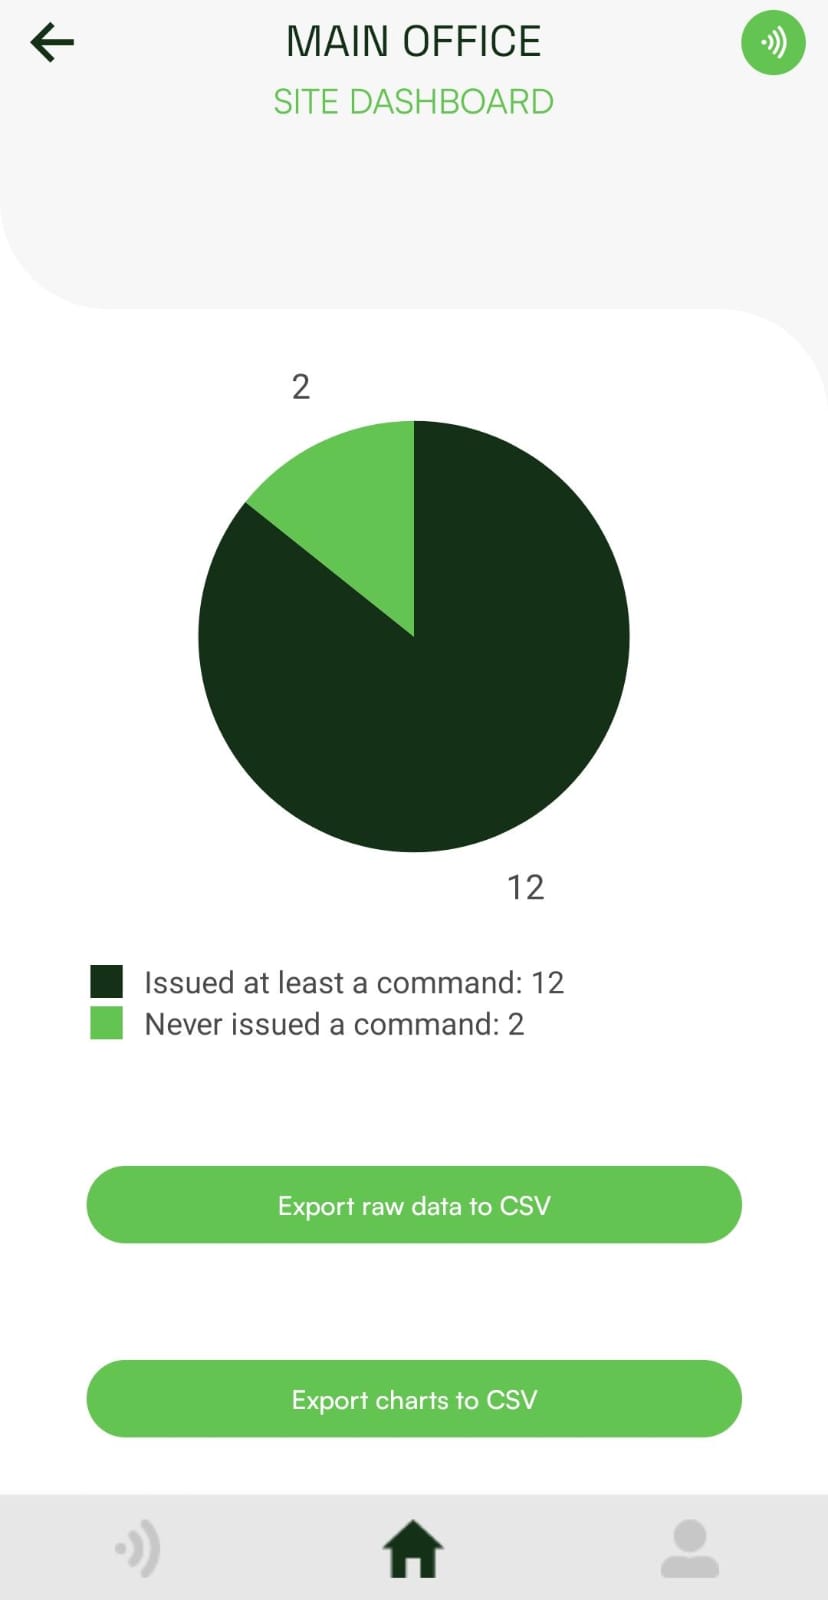
The ability to export raw data in the site dashboard
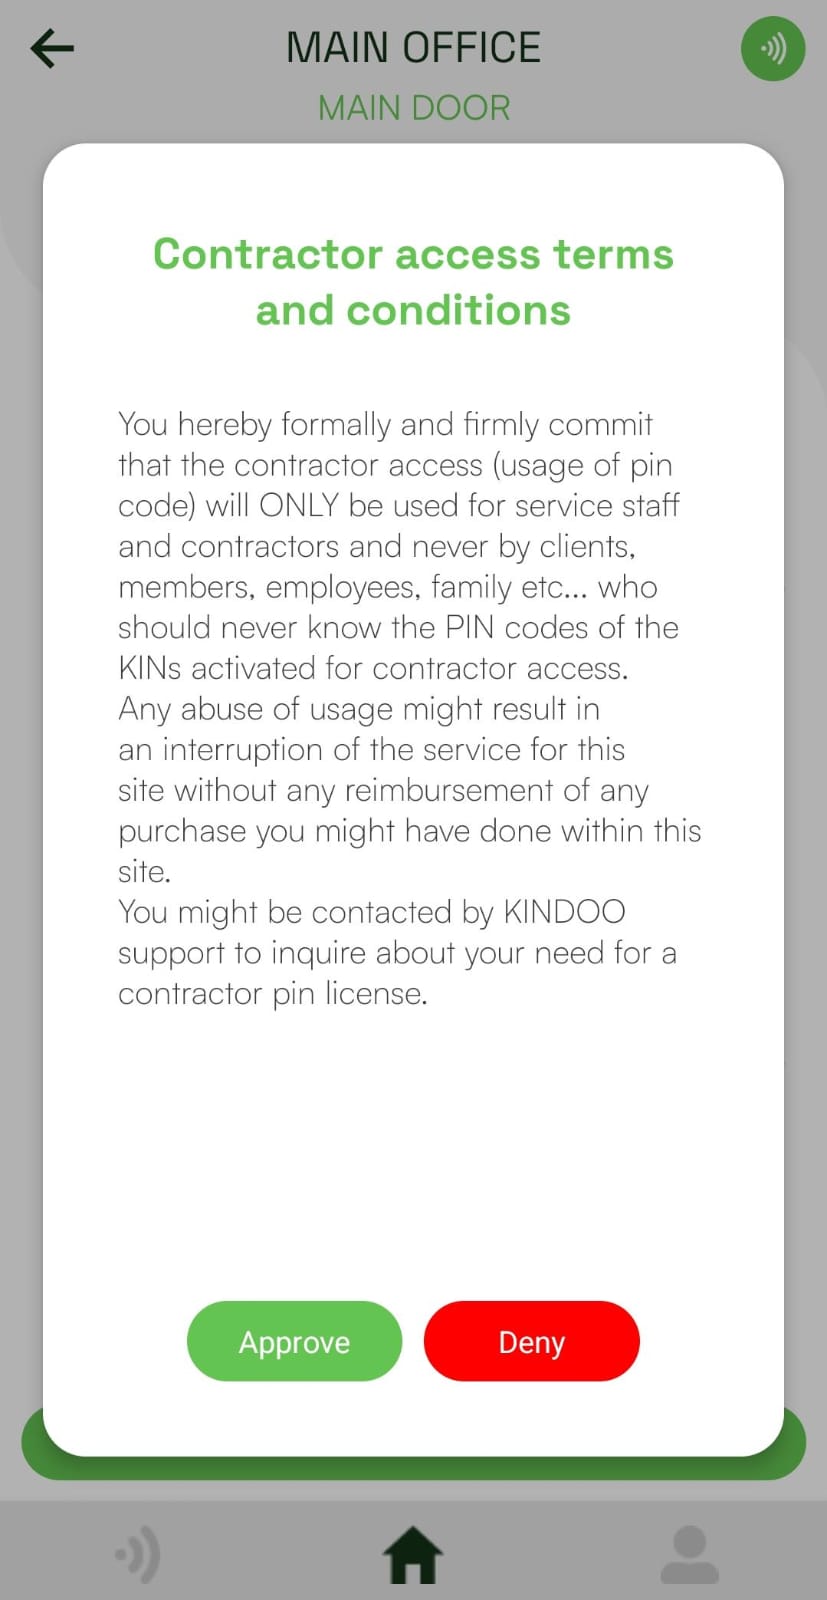
Contractor access terms and conditions must be accepted when purchasing PIN license
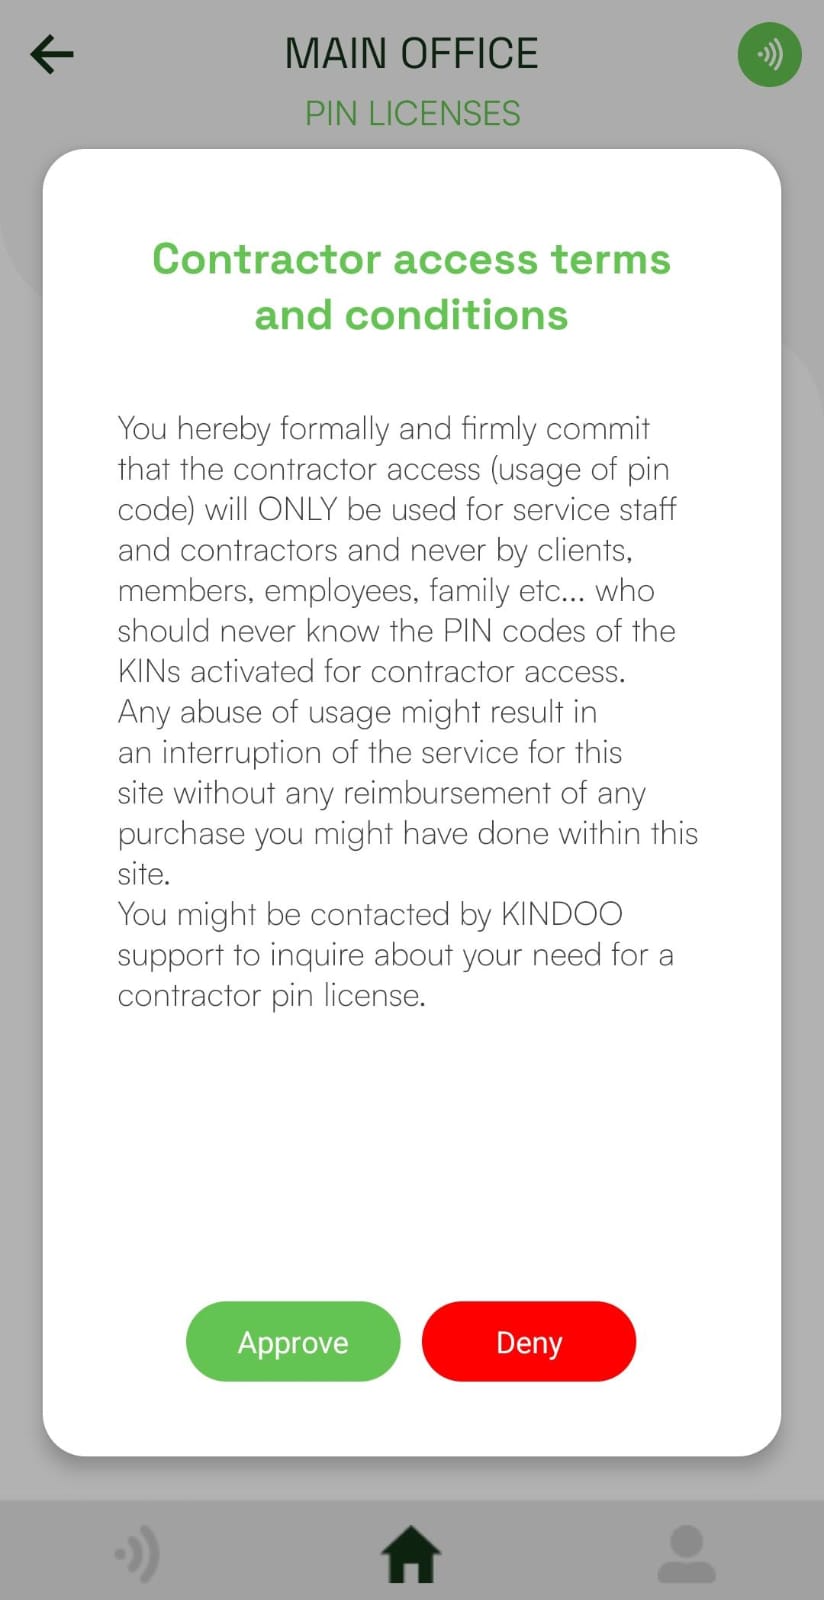
Contractor access terms and conditions must be accepted when turning on the contractor access on a KIN